Export Control
EAR Export Classification: Not subject to the EAR per 15 C.F.R. Chapter 1, Part 734.3(b)(3), except for the following Service Bulletins which are currently published as EAR Export Classification 9E991: SBE70-0992, SBE72-0483, SBE72-0580, SBE72-0588, SBE72-0640, SBE73-0209, SBE80-0024 and SBE80-0025.Copyright
© IAE International Aero Engines AG (2001, 2014 - 2021) The information contained in this document is the property of © IAE International Aero Engines AG and may not be copied or used for any purpose other than that for which it is supplied without the express written authority of © IAE International Aero Engines AG. (This does not preclude use by engine and aircraft operators for normal instructional, maintenance or overhaul purposes.).Applicability
All
Common Information
TASK 72-50-22-300-091 LPT Stage 3 Vane - Plasma Spray The Inner Buttress Front Flange, Repair-091 (VRS4430)
General
Price and availability - none
The practices and processes referred to in the procedure by the TASK number are in the SPM.
NOTE
NOTE
NOTE
Preliminary Requirements
Pre-Conditions
NONESupport Equipment
| Name | Manufacturer | Part Number / Identification | Quantity | Remark |
|---|---|---|---|---|
| Milling machine | LOCAL | Milling machine | ||
| Grit blast equipment | LOCAL | Grit blast equipment | ||
| Turntable | LOCAL | Turntable | ||
| Horizontal and vertical transverse unit | LOCAL | Horizontal and vertical transverse unit | ||
| Plasma spray equipment | LOCAL | Plasma spray equipment | ||
| Radius gage set | LOCAL | Radius gage set | ||
| Dial caliper | LOCAL | Dial caliper | ||
| Micrometer | 0AM53 | Micrometer | ||
| Roughness microtester | LOCAL | Roughness microtester | ||
| Vibrating marking pencil | LOCAL | Vibrating marking pencil | ||
| IAE 3M14513 Milling fixture | 0AM53 | IAE 3M14513 | 1 | |
| IAE 3M14516 Inspection fixture | 0AM53 | IAE 3M14516 | 1 |
Consumables, Materials and Expendables
| Name | Manufacturer | Part Number / Identification | Quantity | Remark |
|---|---|---|---|---|
| CoMat 02-047 TAPE, HEAT REFLECTIVE | 52152 | CoMat 02-047 | ||
| CoMat 02-050 HIGH TEMPERATURE GLASS CLOTH TAPE | 76381 | CoMat 02-050 | ||
| CoMat 03-066 METAL SPRAYING POWDER, 75 CHROMIUM CARBIDE/25 (80 NICKEL - 20 CHROMIUM ALLOY), FINE | DK026 | CoMat 03-066 | ||
| CoMat 05-046 ALUMINUM OXIDE GRIT | 62596 | CoMat 05-046 |
Spares
NONESafety Requirements
NONEProcedure
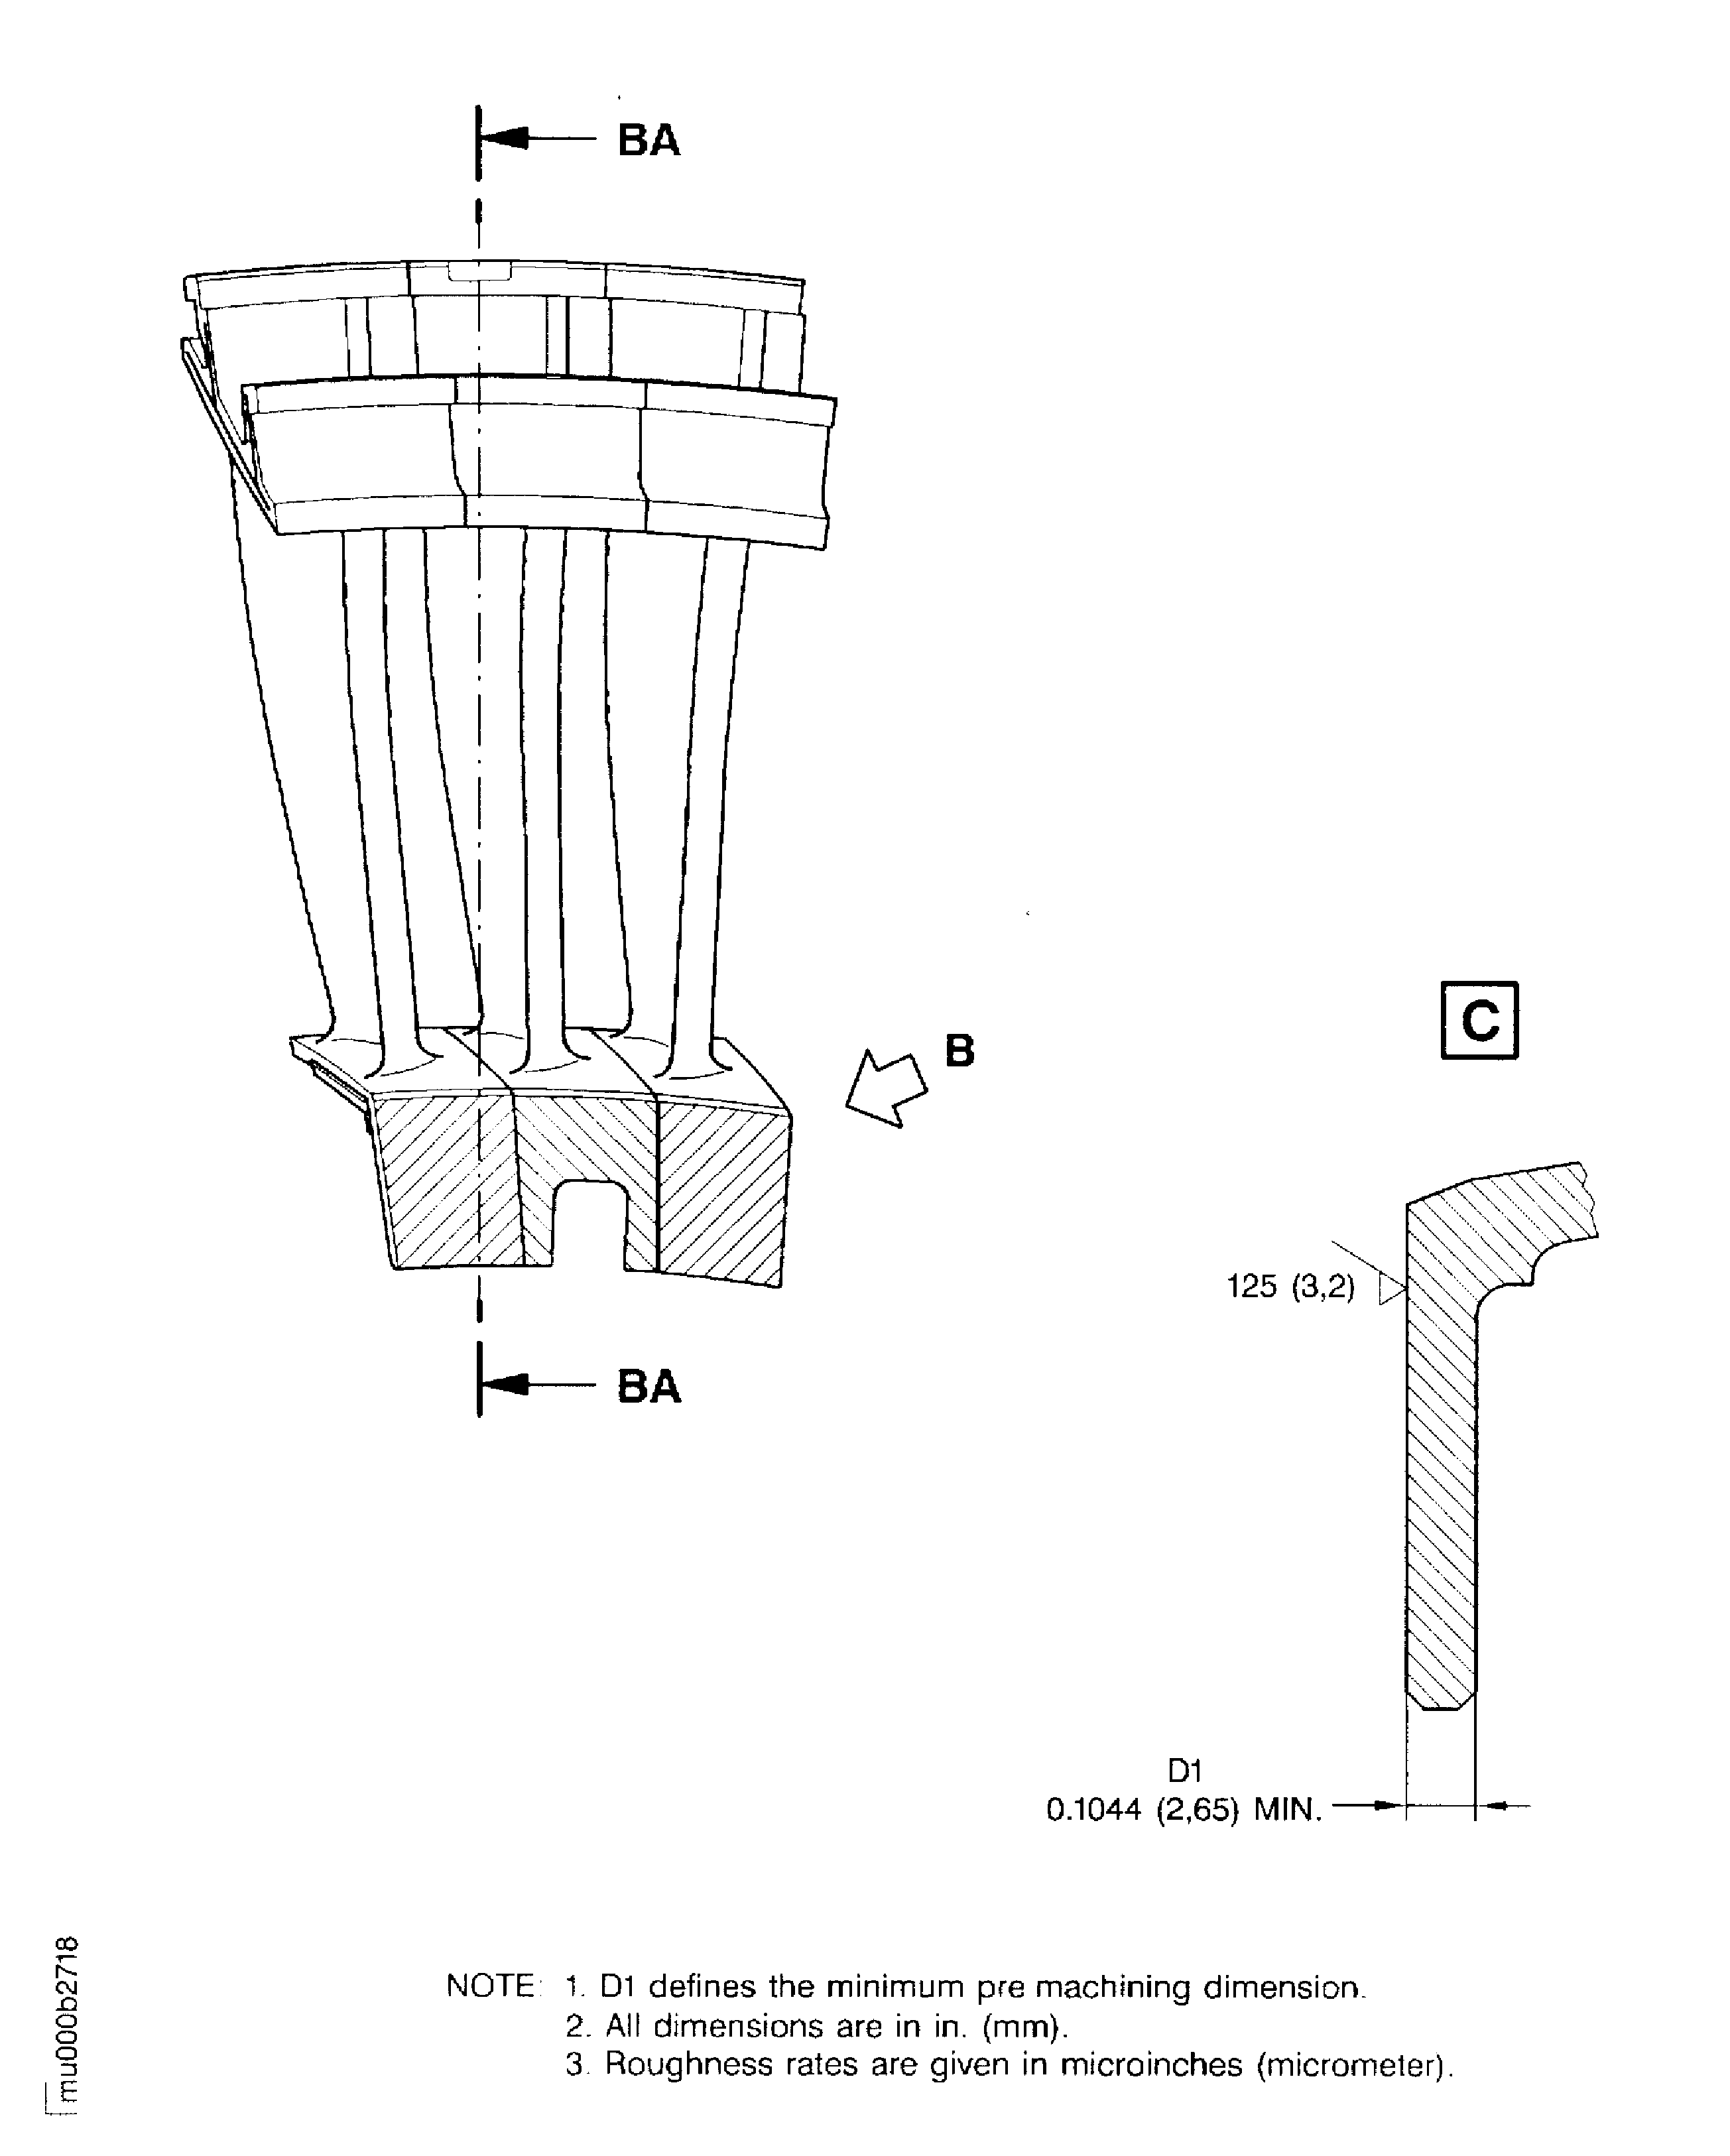
Use IAE 3M14513 Milling fixture 1 off and a milling machine. Remove the old coating and damage fully. Keep material removal to a minimum to allow for future repairs. Refer to Figure.
Machine dimension D1 to remove worn or damaged coating.
SUBTASK 72-50-22-322-056 Machine the Inner Front Flange
Refer to the SPM TASK 70-11-03-300-503.
Clean the vane.
SUBTASK 72-50-22-110-275 Clean the Vane
Make sure that the surfaces have full protection. Use CoMat 02-047 TAPE, HEAT REFLECTIVE or CoMat 02-050 HIGH TEMPERATURE GLASS CLOTH TAPE.
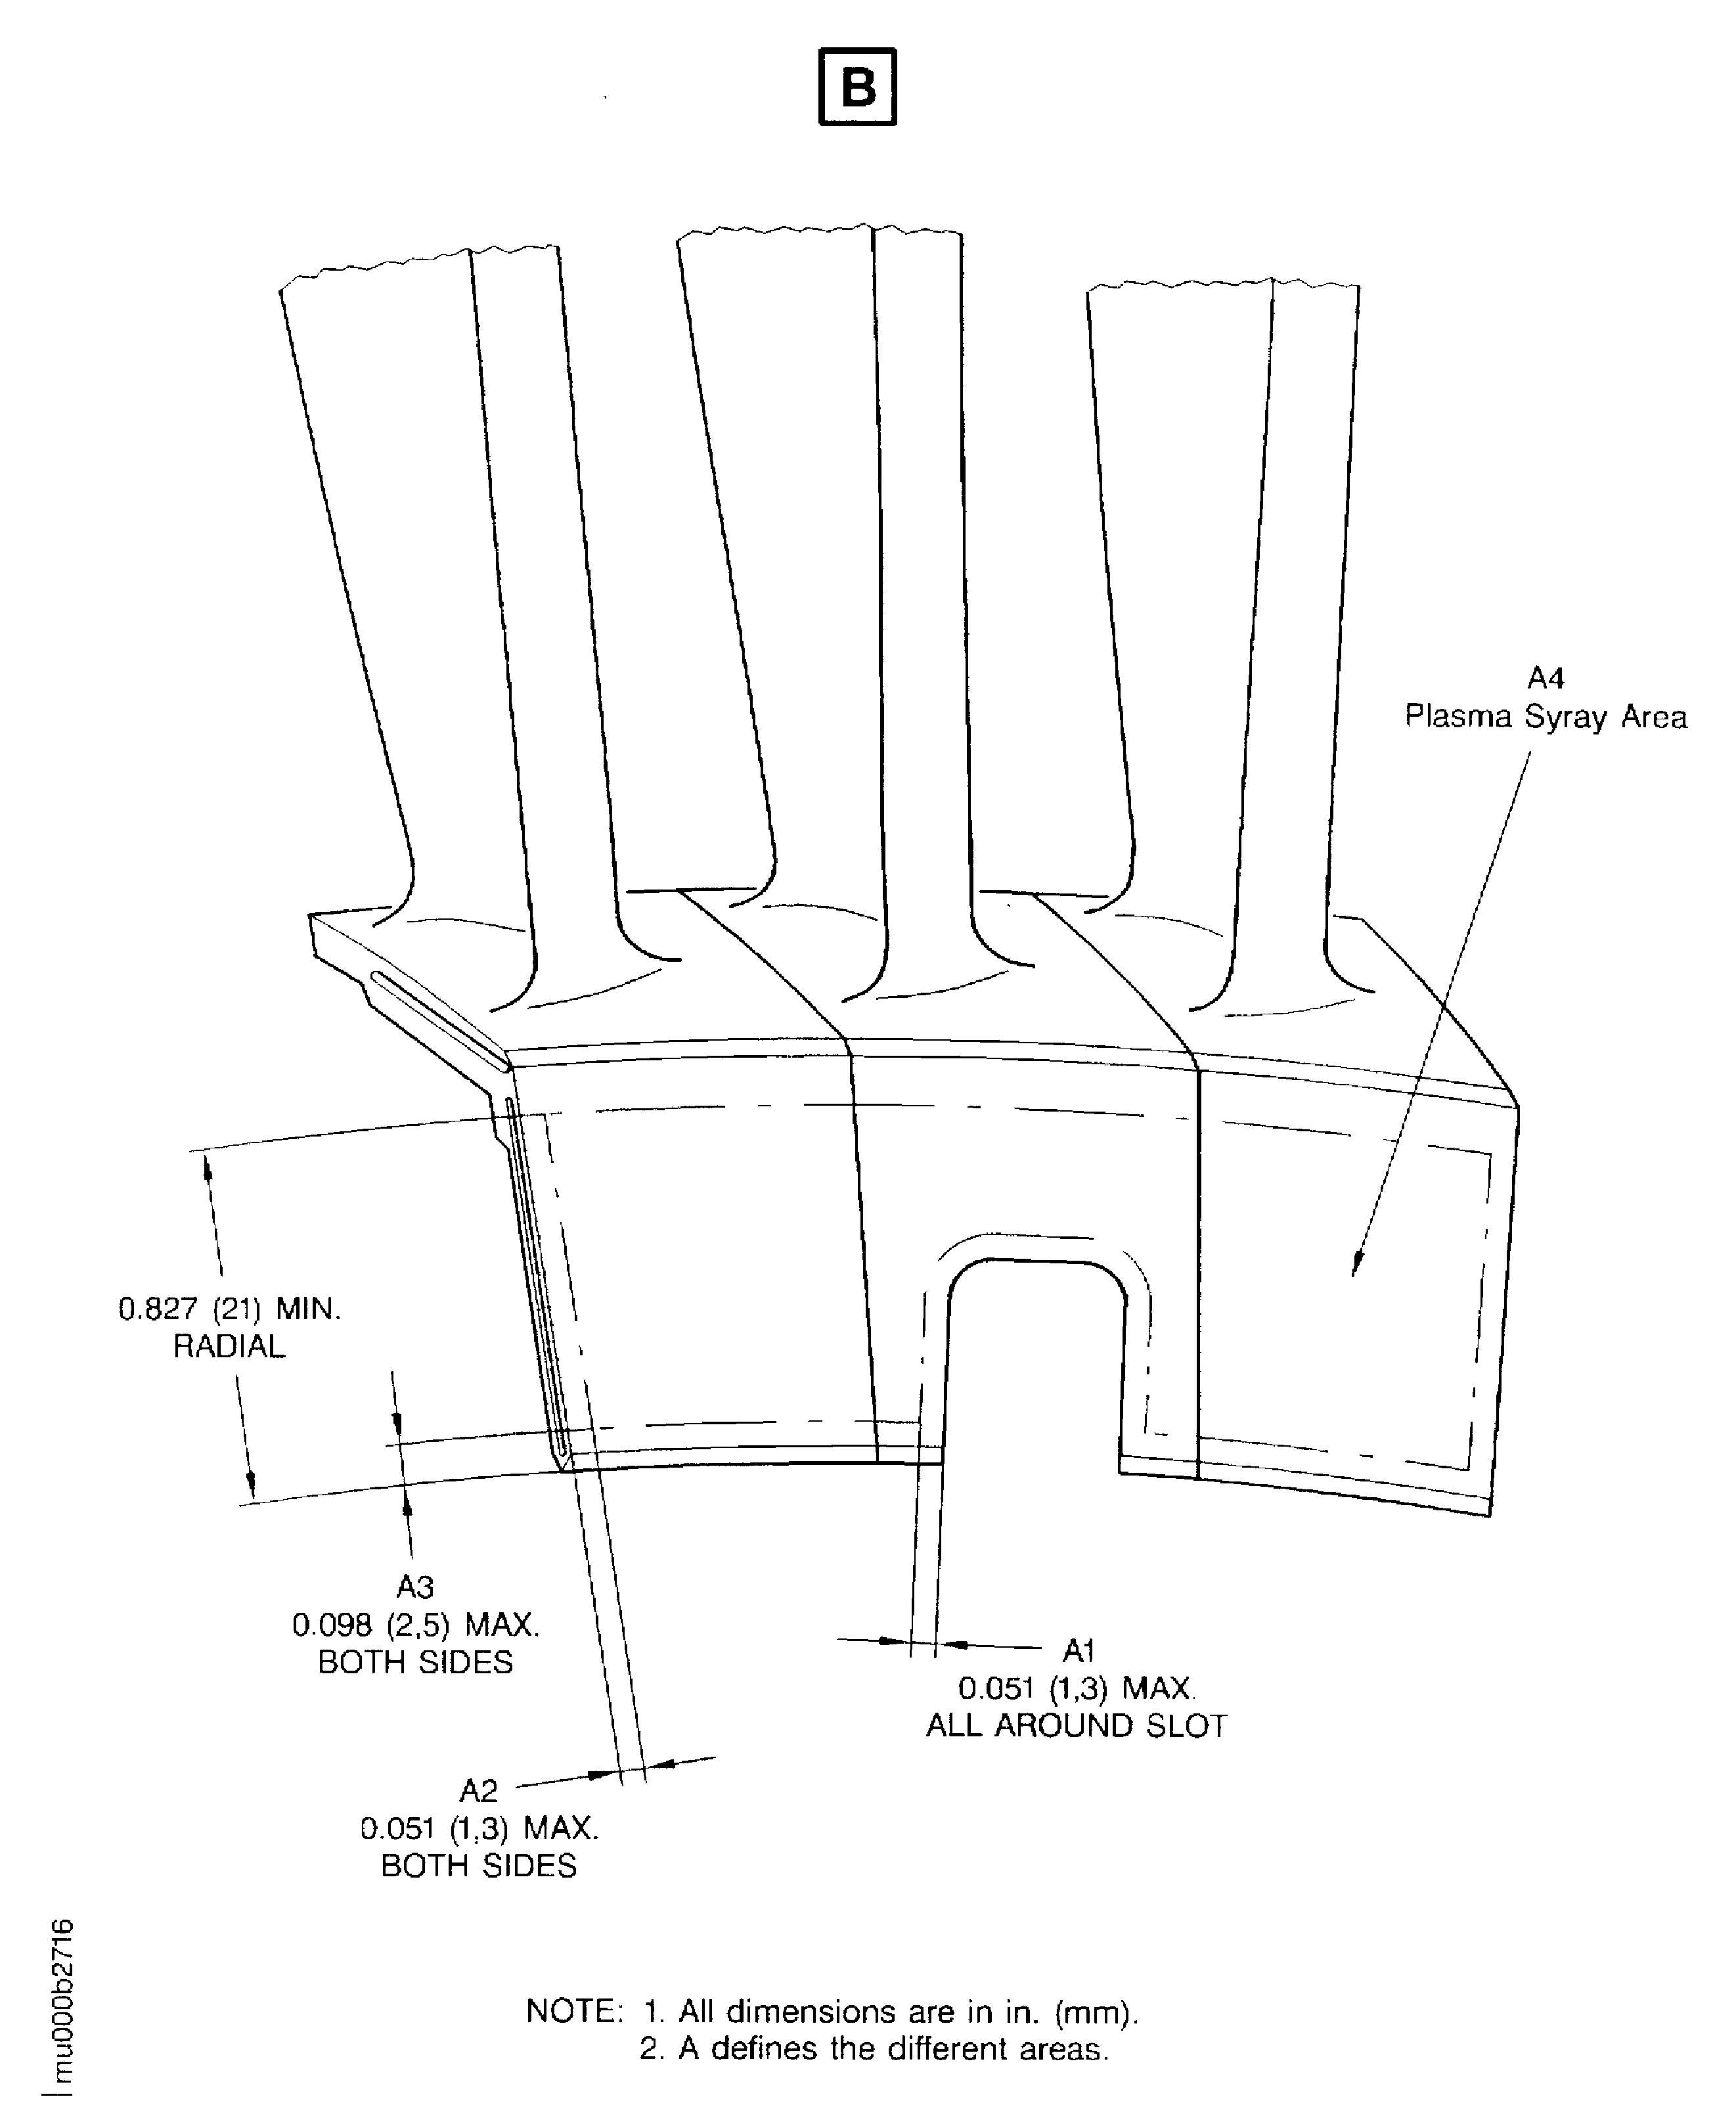
Refer to Figure.
Mask the areas A1, A2 and A3.
Use grit blast equipment. Use CoMat 05-046 ALUMINUM OXIDE GRIT. The surface texture must be 120 to 200 microinch (3.0 to 5.0 micrometer ra).
Refer to Figure and to the SPM TASK 70-34-03-340-501.
Grit blast the area A4.
SUBTASK 72-50-22-340-031 Prepare the Surfaces for the Plasma Spray Procedure
Use IAE 3M14513 Milling fixture 1 off.
Use control unit, horizontal and vertical transvers unit. Use turntable, turntable control assembly and transvers unit control assembly.
Use plasma spray equipment.
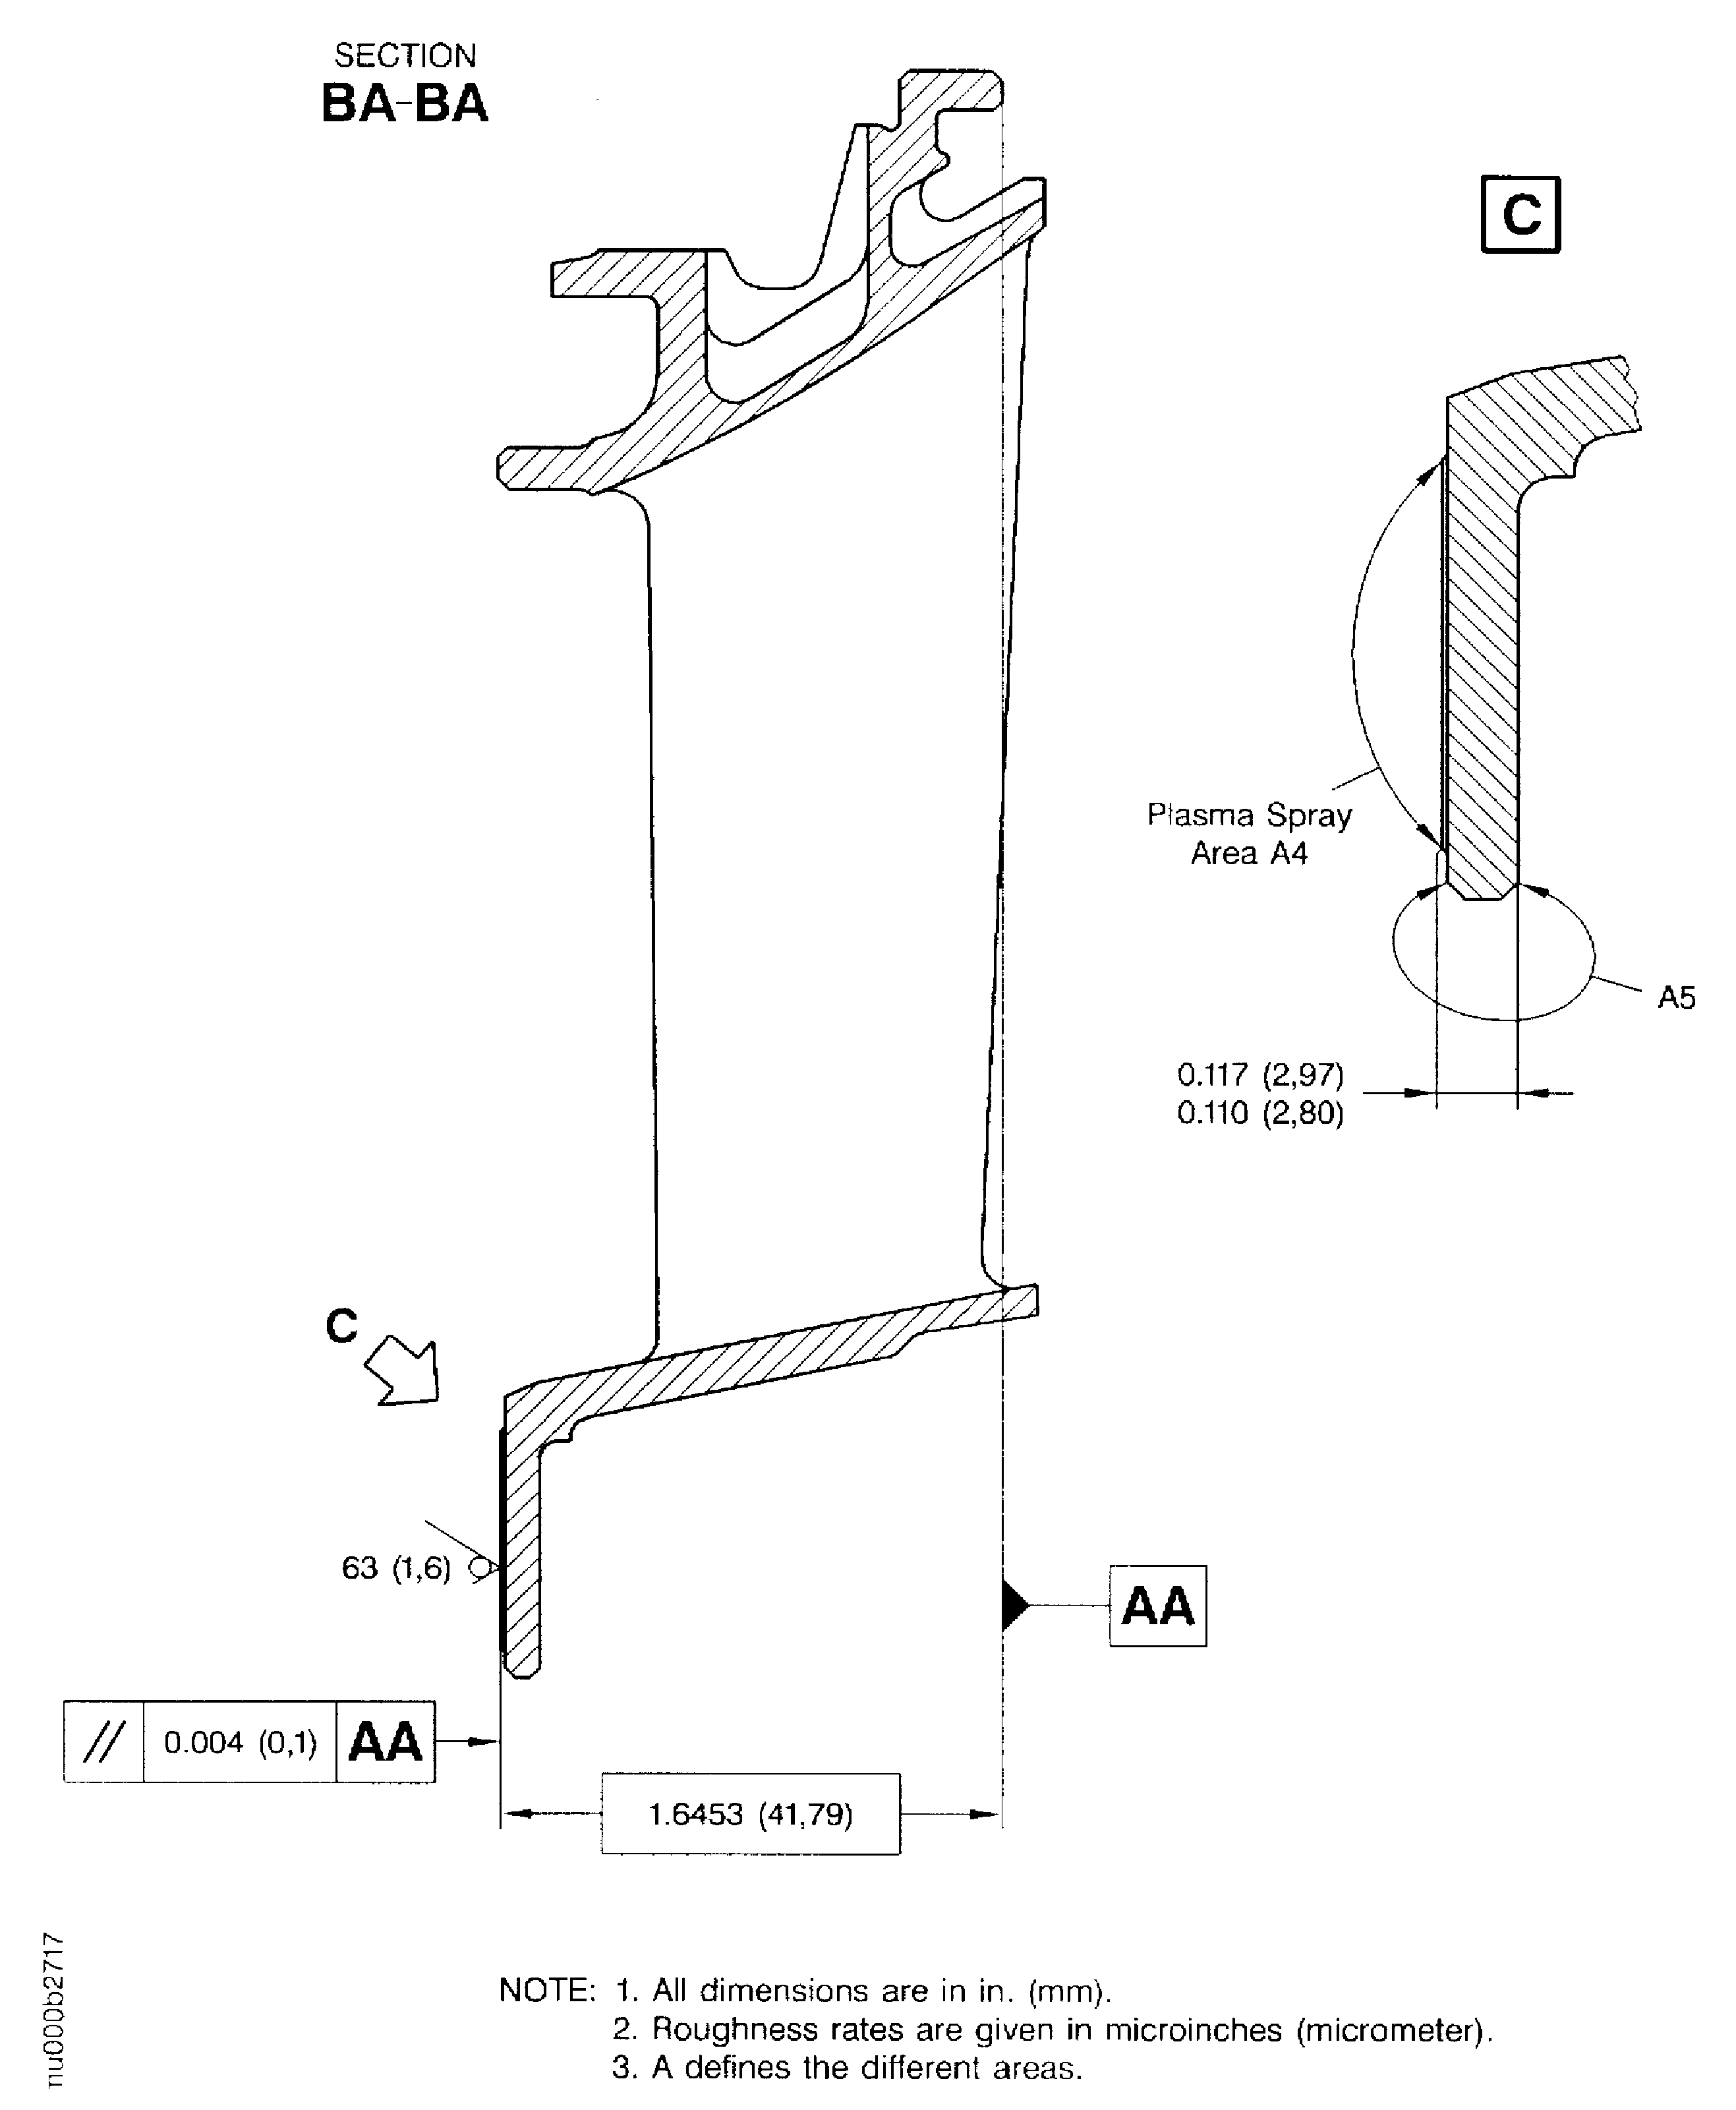
The coating thickness must be 0.004 to 0.013 in. (0.11 to 0.32 mm) and must agree with the required flange thickness. Refer to Figure.
Plasma spray the area A4.
SUBTASK 72-50-22-340-032 Plasma Spray the Prepared Surface
Refer to the SPM TASK 70-11-03-300-503.
Clean the vane.
SUBTASK 72-50-22-110-276 Clean the Vane
Use IAE 3M14516 Inspection fixture 1 off.
Refer to Figure.
Use dial caliper, micrometer and roughness micro-tester.
Dimensionally examine the coated area.
Refer to the SPM TASK 70-34-03-340-501-002 for acceptance standards.
Examine the coating.
SUBTASK 72-50-22-220-370 Do the Post Repair Inspection
Figure: Inner buttress front flange plasma spray repair area of the stage 3 turbine vane
Inner buttress front flange plasma spray repair area of the stage 3 turbine vane

Figure: Inner buttress front flange plasma spray repair area (masking) of the stage 3 turbine vane
Inner buttress front flange plasma spray repair area (masking) of the stage 3 turbine vane

Figure: Inner buttress front flange plasma spray repair (finish dimensions) of the stage 3 turbine vane
Inner buttress front flange plasma spray repair (finish dimensions) of the stage 3 turbine vane

