Export Control
EAR Export Classification: Not subject to the EAR per 15 C.F.R. Chapter 1, Part 734.3(b)(3), except for the following Service Bulletins which are currently published as EAR Export Classification 9E991: SBE70-0992, SBE72-0483, SBE72-0580, SBE72-0588, SBE72-0640, SBE73-0209, SBE80-0024 and SBE80-0025.Copyright
© IAE International Aero Engines AG (2001, 2014 - 2021) The information contained in this document is the property of © IAE International Aero Engines AG and may not be copied or used for any purpose other than that for which it is supplied without the express written authority of © IAE International Aero Engines AG. (This does not preclude use by engine and aircraft operators for normal instructional, maintenance or overhaul purposes.).Applicability
All
Common Information
TASK 72-50-33-300-053 LPT Stage 4 Rotating Airseal - Blend Repair, Repair-053 (VRS4461)
General
Price and availability - none
The practices and processes referred to in the procedure by the TASK numbers are in the SPM.
Repair Facilities
The Source Demonstration requirements of this repair means that any facility not authorized to accomplish this repair either, utilize the Authorized Repair Vendors listed below or contact the IAE Repair Services Group to determine if a qualification program can be initiated at their facility.
IAE INTERNATIONAL AERO ENGINES AG
400 Main Street, M/S 121-10
East Hartford, CT 06108
USA
Attn: Manager Repair Services
Authorized Repair Vendors for Shotpeen Repair VRS4461 TASK 72-50-33-300-053 (REPAIR-053) are listed below
MTU AERO ENGINES GMBH
Dachauer Strasse 665
80995 Muenchen
Germany
The designation by IAE of an authorized repair vendor indicates that the repair vendor has demonstrated the necessary capability to enable him to carry out the listed repair work. However, IAE make no warranties or representations concerning the qualifications or quality standards of the repair vendors to carry out the repair work and accepts no responsibility whatsoever for any work that may be carried out by a repair vendor, other than when IAE is listed as the repair vendor. Authorized repair vendors do not act as agents or representatives of IAE.
NOTE
Preliminary Requirements
Pre-Conditions
NONESupport Equipment
| Name | Manufacturer | Part Number / Identification | Quantity | Remark |
|---|---|---|---|---|
| Silicon impression material | LOCAL | Silicon impression material | ||
| Carbide tipped reamer | LOCAL | Carbide tipped reamer |
Consumables, Materials and Expendables
NONESpares
NONESafety Requirements
NONEProcedure
Use carbide tipped reamer.
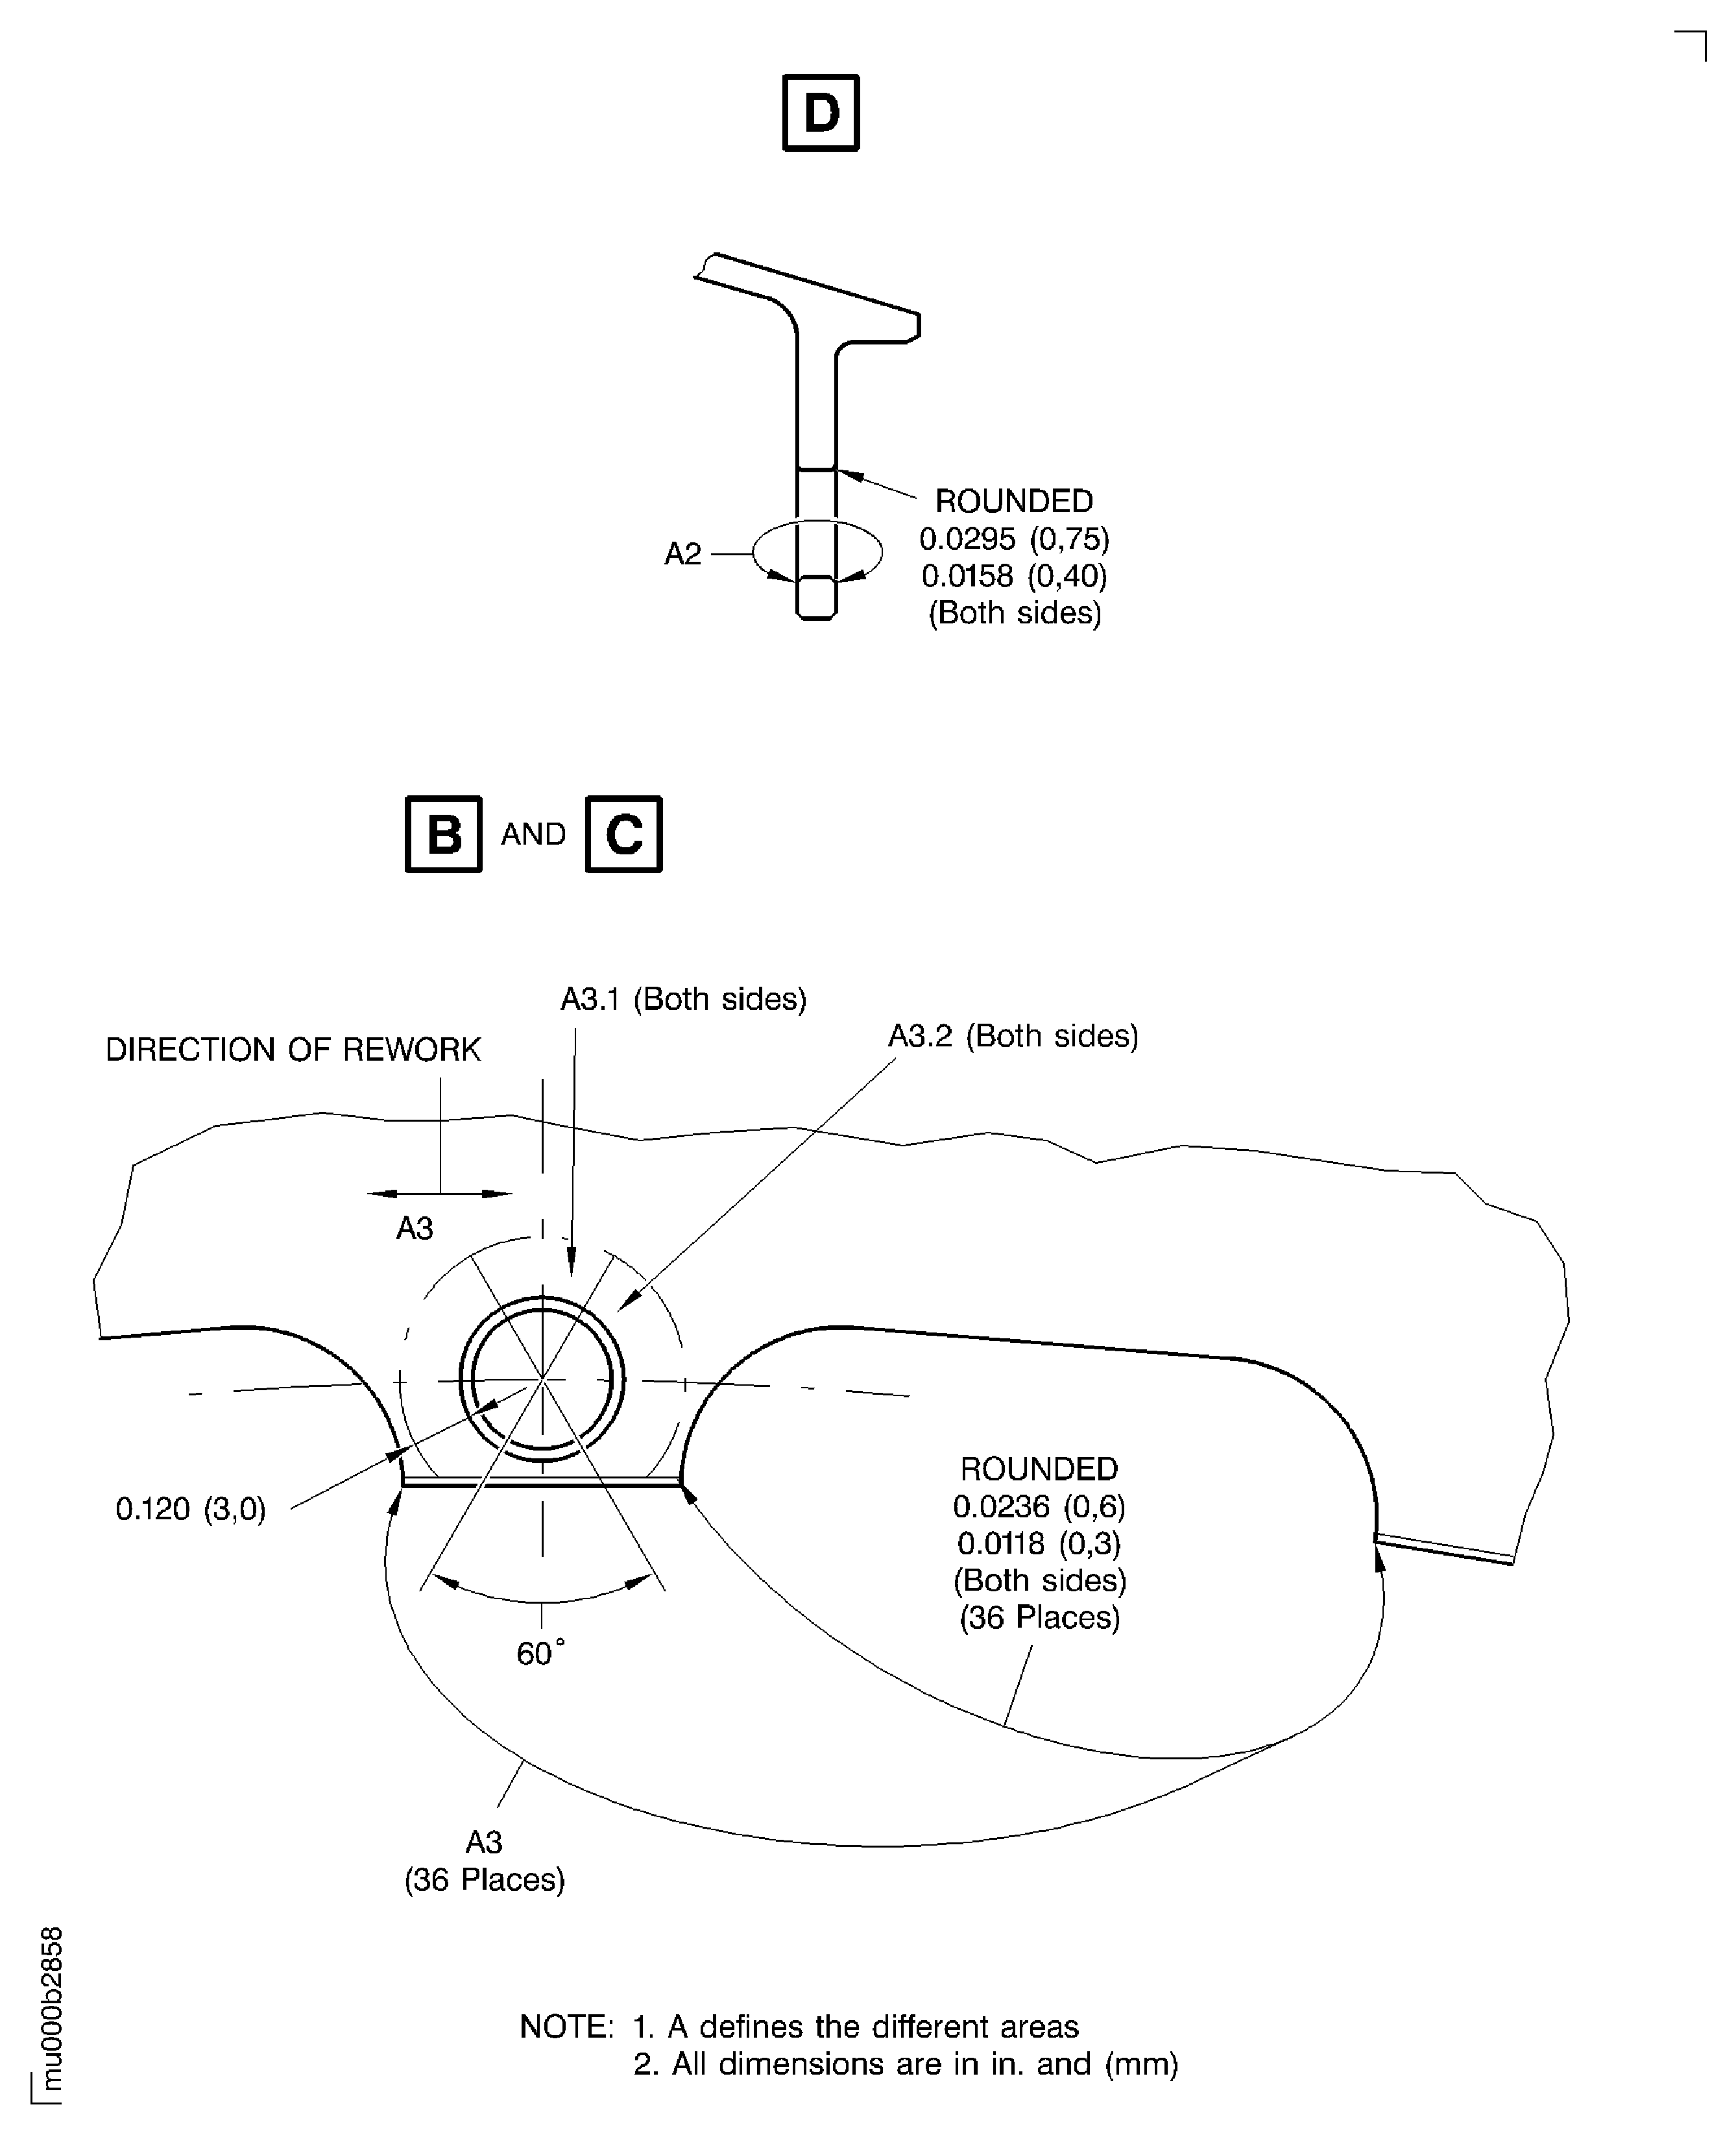
Maximum permitted diameter of the holes is 0.2717 in. (6.90 mm).
Remove only minimum material to achieve surface finish.
Round bottom dents to a maximum depth of 0.005 in. (0.127 mm) are permitted in the lead-in radii, without blendings, provided any raised material is removed.
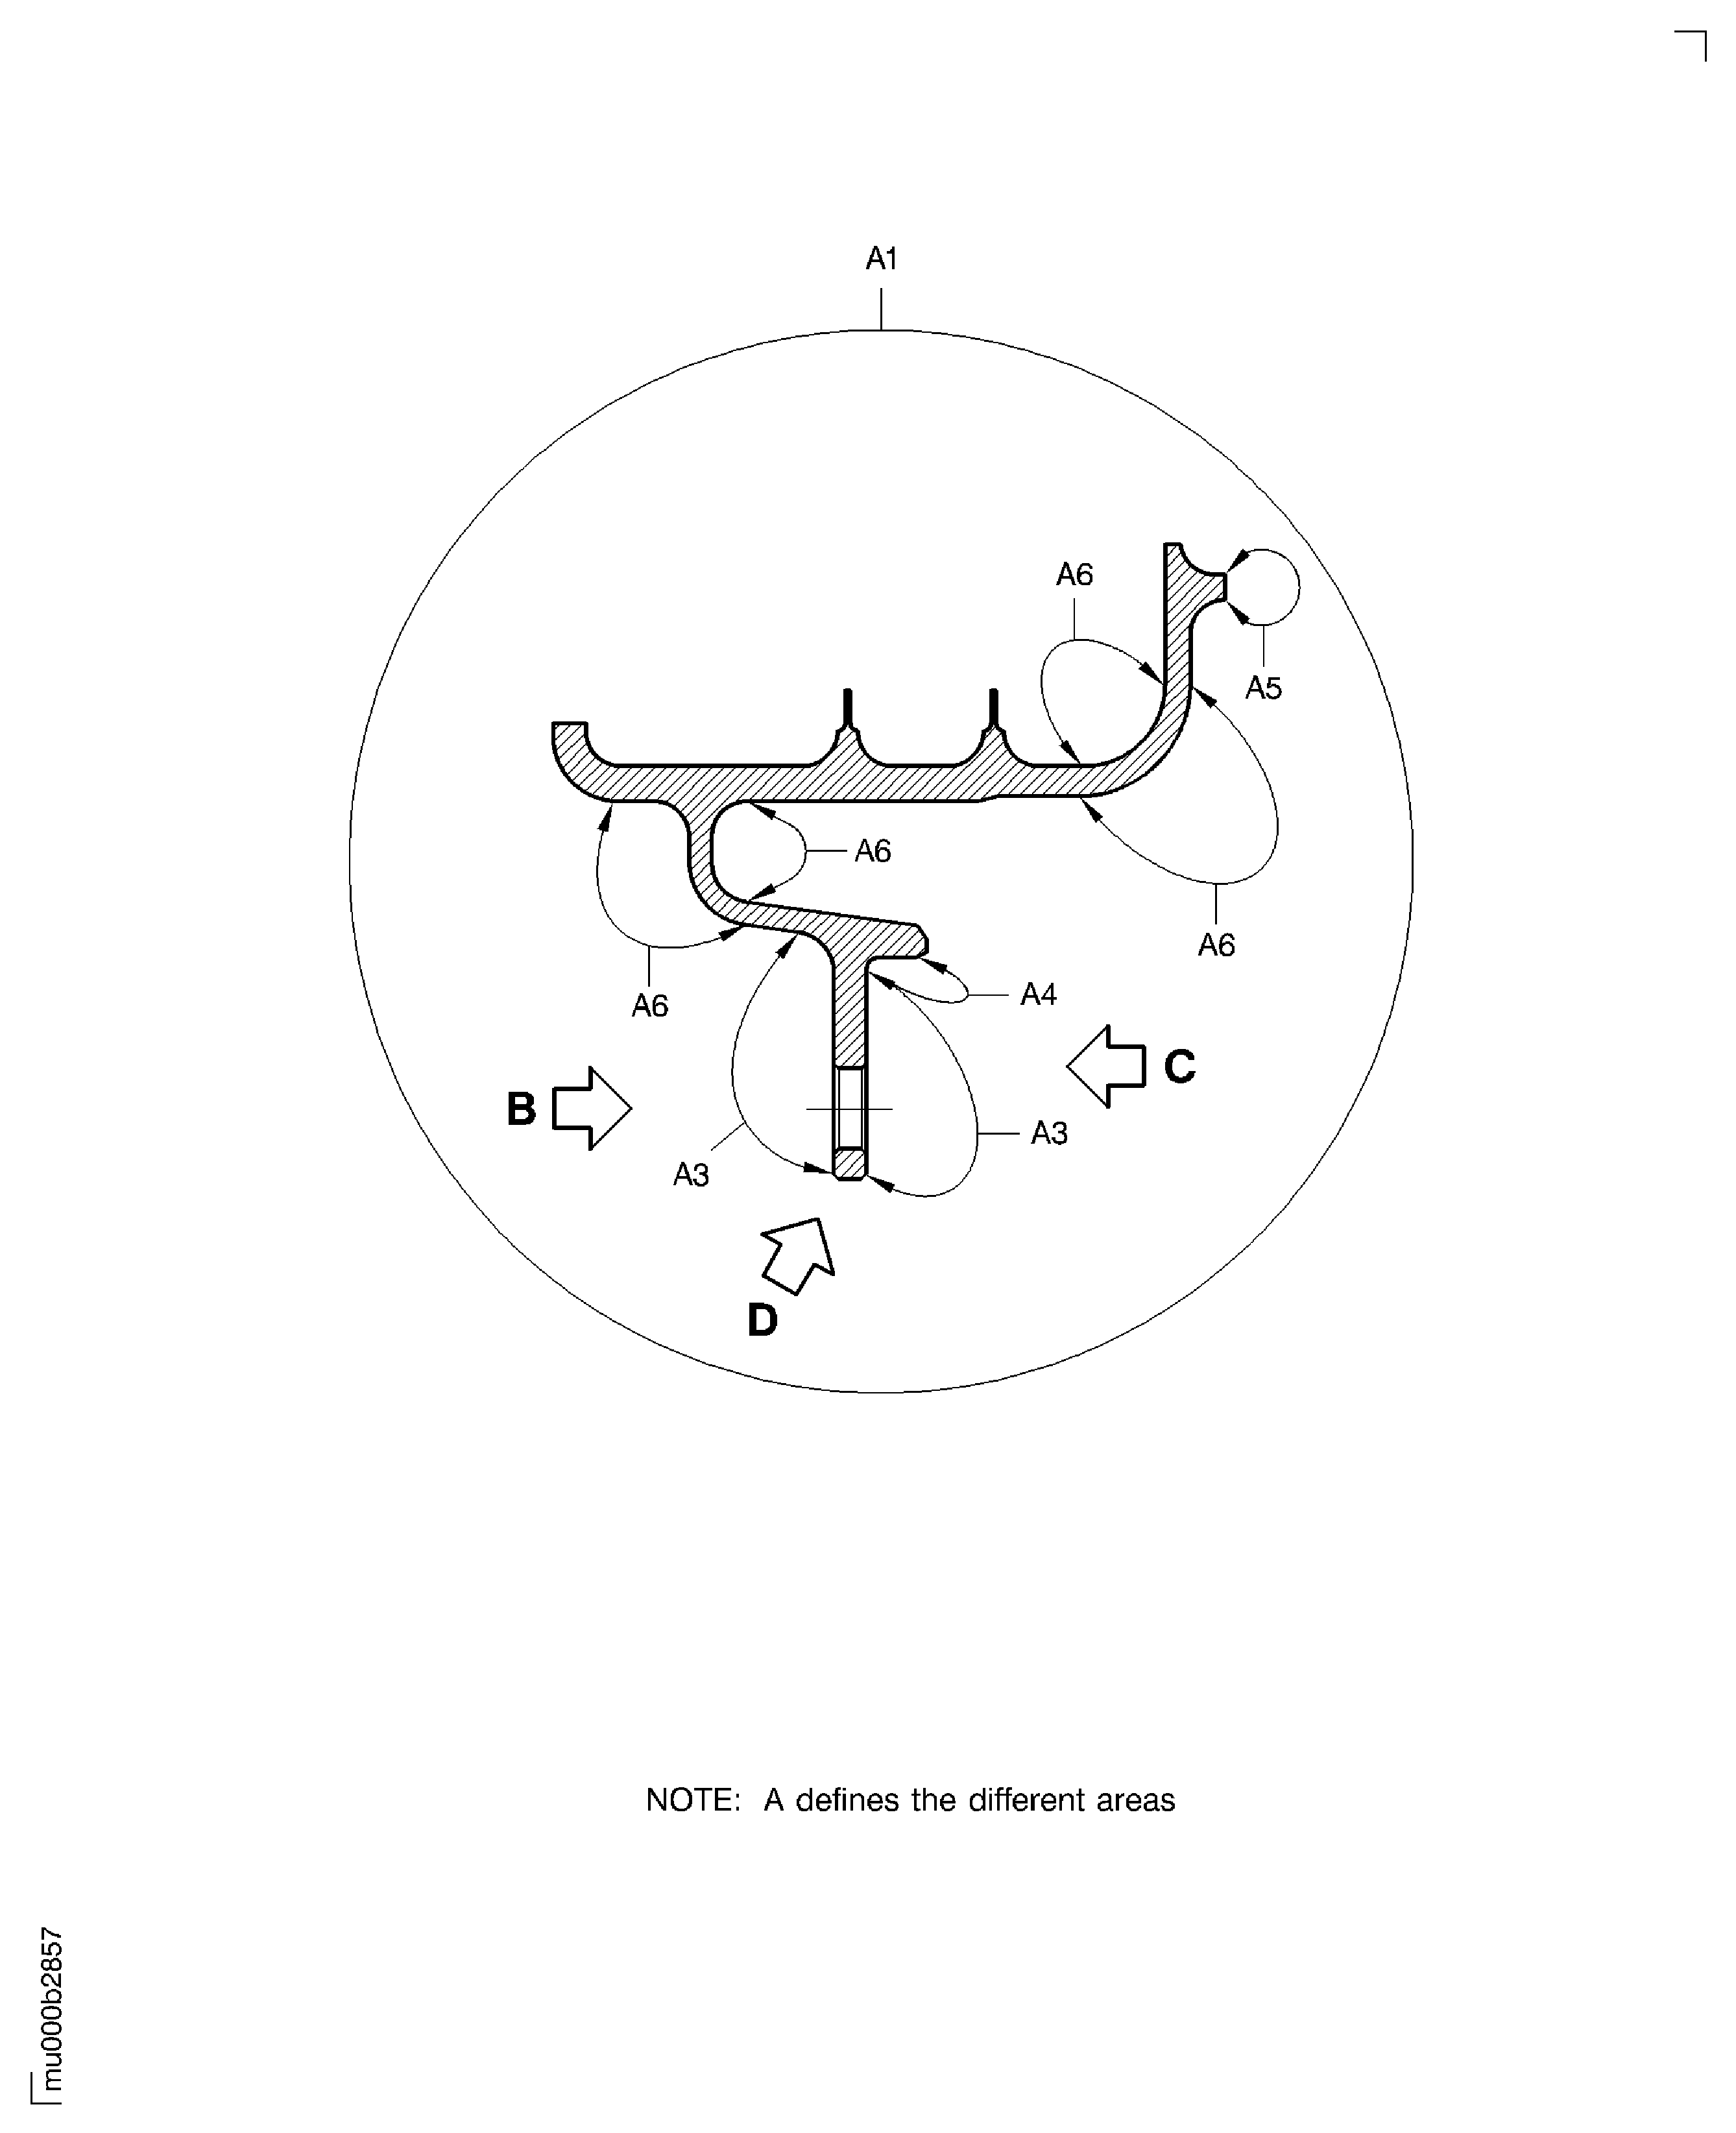
Blend repair in area A2.
Maximum permitted depth of blend repair is 0.005 in. (0.13 mm).
Maximum permitted length of blends for scratches and scores is 0.75 in. (19.10 mm).
Minimum distance between blend is 0.500 in. (12.70 mm).
For damage outside the spacing limit maximum depth of blend repair is 0.003 in. (0.08 mm).
Maximum blend area is 0.25 sqin. (160.00 sq mm).
Blend repair in area A6.
SUBTASK 72-50-33-350-153 Blend Repair of the Stage 4 Turbine Air Seal
NOTE
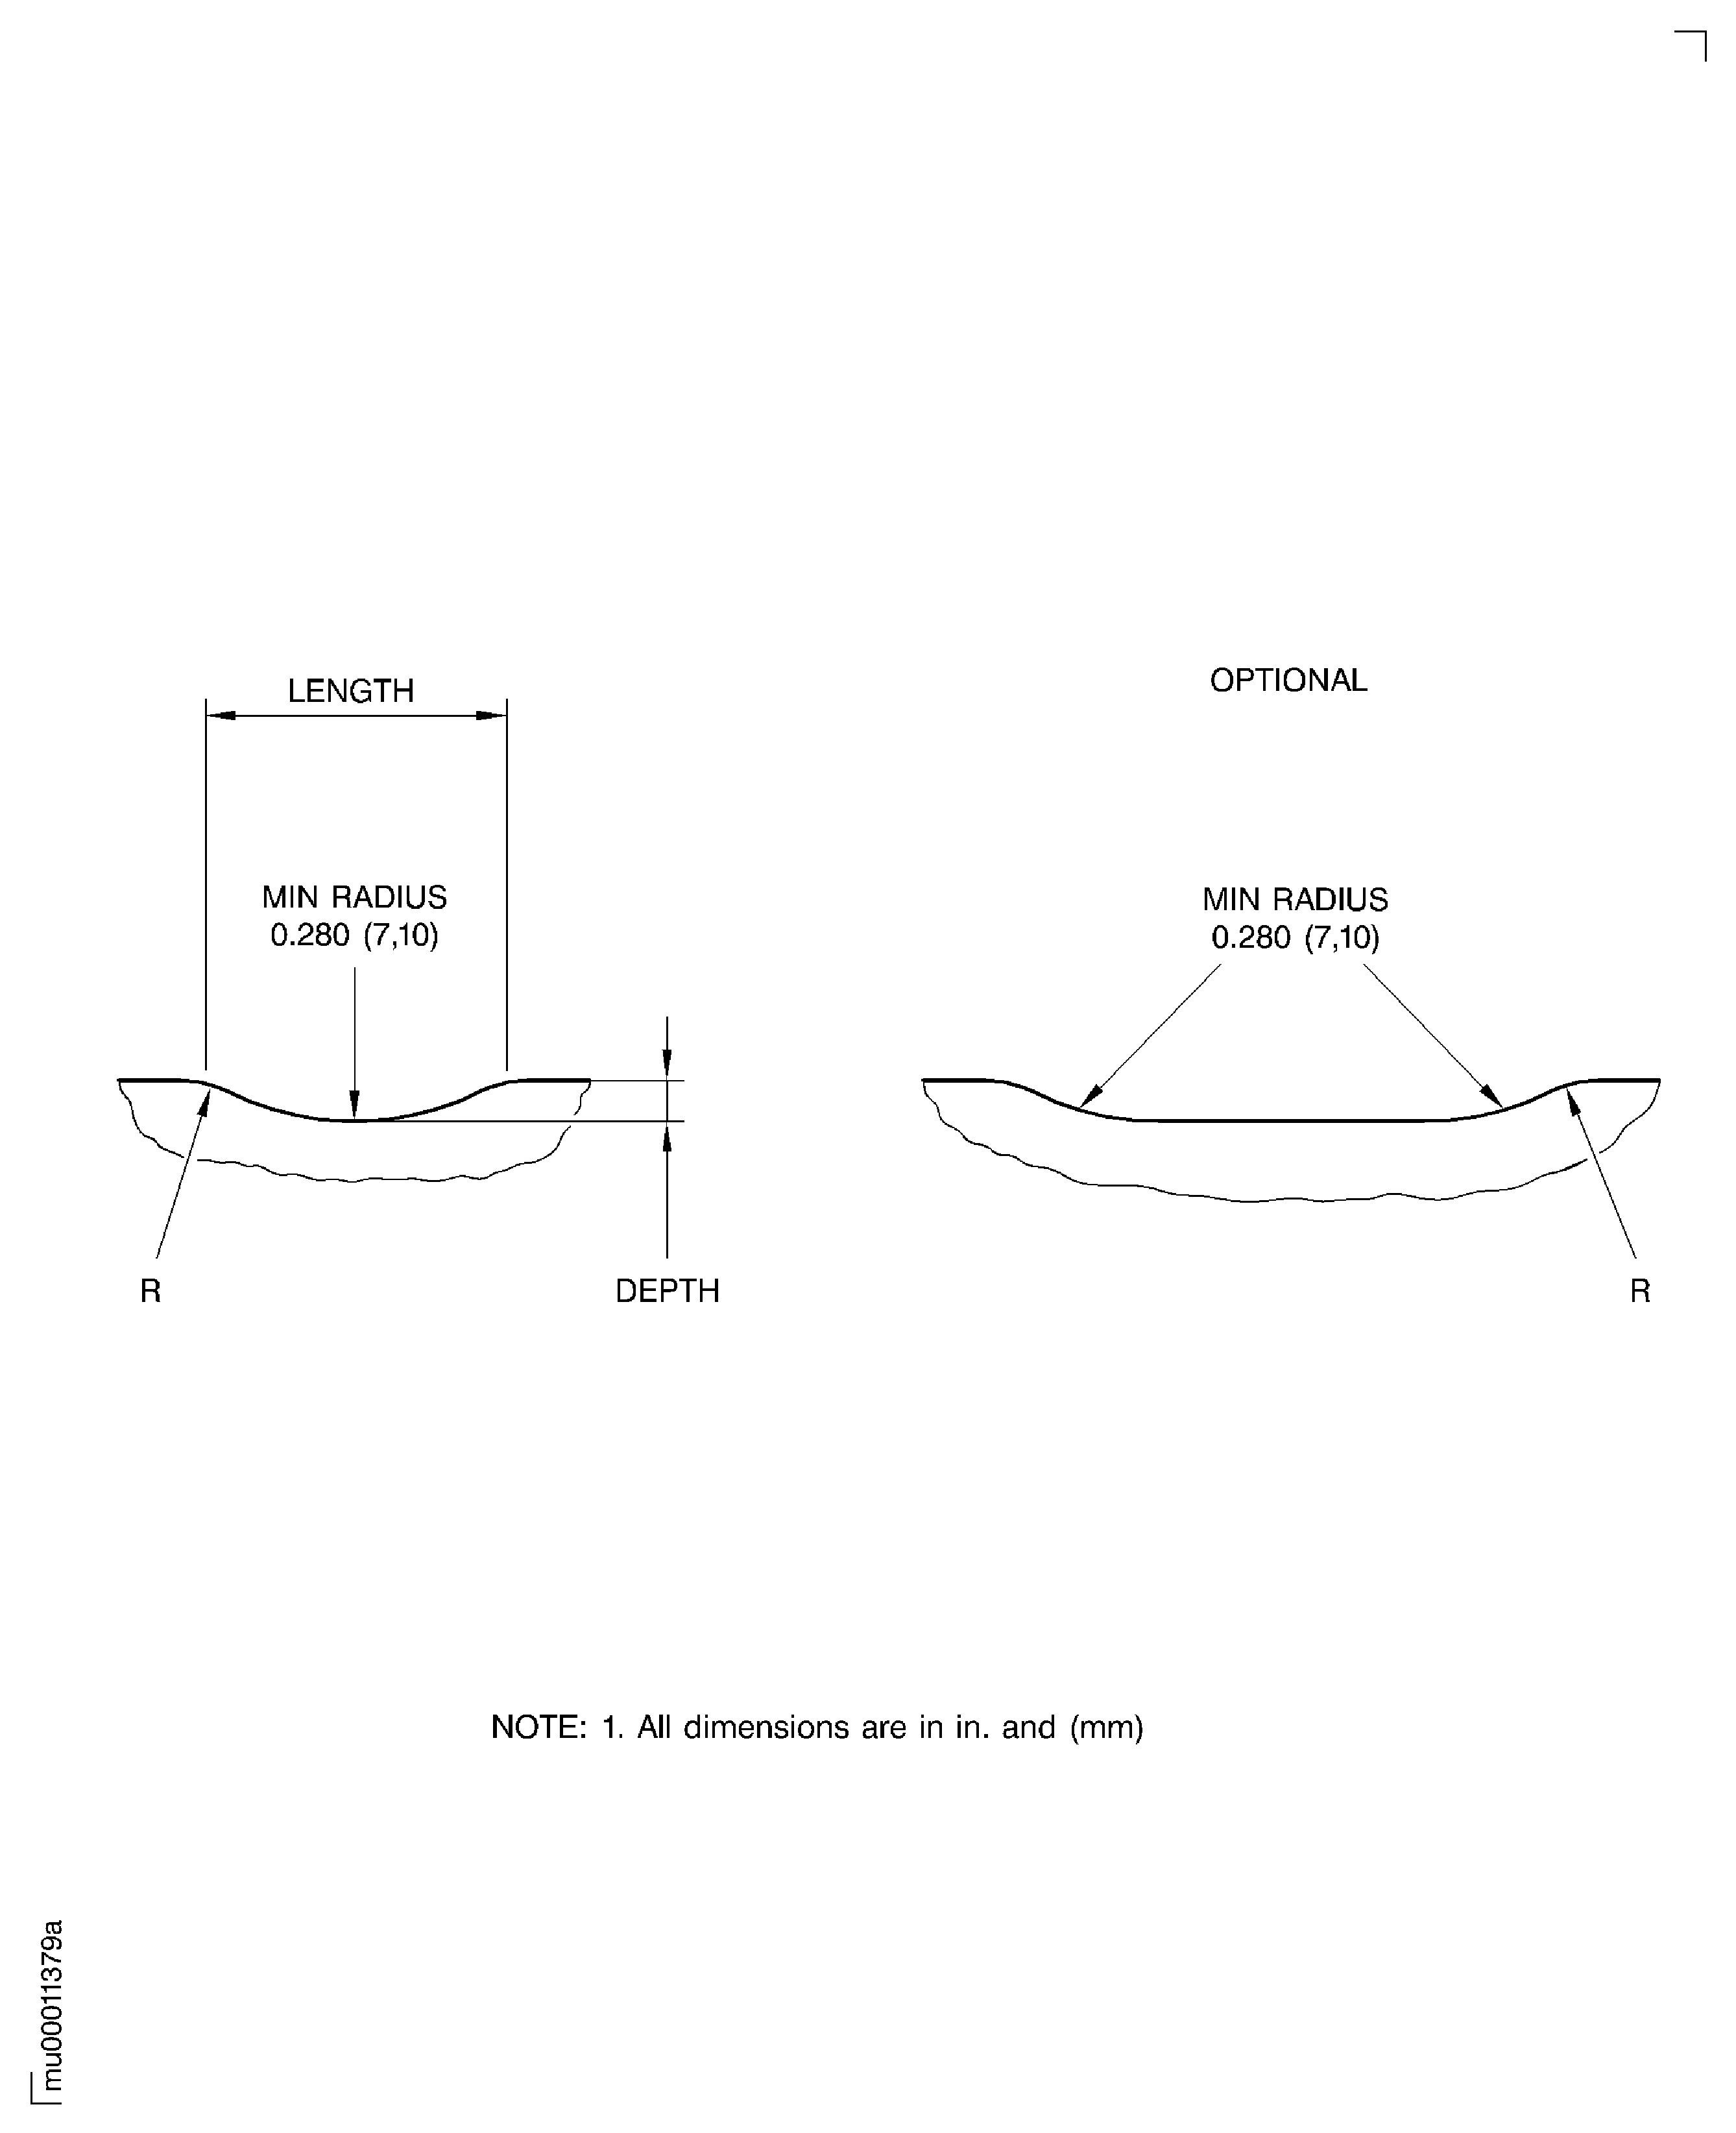
Refer to SPM TASK 70-35-21-350-501 for blending surface damage.For local blending use a length to depth ratio of 100:1 minimum, refer to Figure.If there is a number of damage marks together blend the whole area to the specified depth. No more than 25 blends are permitted. Tell IAE if more than 25 blends are necessary.Do not blend the coated knife edge seals using this repair.Refer to the SPM TASK 70-35-19-350-501.
Butterfly polish all the repaired holes.
SUBTASK 72-50-33-320-101 Polish the Repaired Holes of the Stage 4 Turbine Air Seal
Repair, VRS4438 TASK 72-50-33-300-052 (REPAIR-052).
Rebalance the air seal.
SUBTASK 72-50-33-350-154 Do the Post Repair
Figure: Blend repair of the stage 4 turbine air seal
Sheet 1

Figure: Blend repair of the stage 4 turbine air seal
Sheet 2

Figure: Local blending length to depth ratio
Local blending length to depth ratio

