Export Control
EAR Export Classification: Not subject to the EAR per 15 C.F.R. Chapter 1, Part 734.3(b)(3), except for the following Service Bulletins which are currently published as EAR Export Classification 9E991: SBE70-0992, SBE72-0483, SBE72-0580, SBE72-0588, SBE72-0640, SBE73-0209, SBE80-0024 and SBE80-0025.Copyright
© IAE International Aero Engines AG (2001, 2014 - 2021) The information contained in this document is the property of © IAE International Aero Engines AG and may not be copied or used for any purpose other than that for which it is supplied without the express written authority of © IAE International Aero Engines AG. (This does not preclude use by engine and aircraft operators for normal instructional, maintenance or overhaul purposes.).Applicability
All
Common Information
TASK 72-50-42-200-002-B00 No. 5 Bearing Seal Rear Spacer - Examine, Inspection-002
General
This TASK gives the procedure for the inspection of the No. 5 bearing rear seal spacer. For other parts of the No. 5 bearing assembly and seal, refer to TASK 72-50-42-200-000 (INSPECTION/CHECK-000).
Fig/item numbers in parentheses in the procedure agree with those used in the IPC.
The policy that is necessary for inspection is given in the SPM TASK 70-20-00-200-501.
All the parts must be cleaned before any part is examined. Refer to the SPM TASK 70-10-00-100-501.
A ** following repair referenced in this inspection indicates that the repair is not yet published in the current revision of the manual and the part must be rejected. Contact IAE for additional information concerning FAA approved repair date.
Do not discard any part until you are sure there are no repairs available. Refer to the instructions in Repair before a discarded part is used again or oversize parts are installed.
Parts which should be discarded can be held although no repair is available. The repair of a discarded part could be shown to be necessary at a later date.
All parts must be examined to make sure that all the repairs have been completed satisfactorily.
The practices and processes referred to in the procedure by the TASK numbers are in the SPM.
References
Refer to the SPM for data on these items.
Definitions of Damage, SPM TASK 70-02-02-350-501
Inspection of Parts, SPM TASK 70-20-01-200-501
Some data on these items is contained in this TASK. For more data on these items refer to the SPM.
Method of Testing for Crack Indications
Chemical Processes
Surface Protection
Preliminary Requirements
Pre-Conditions
NONESupport Equipment
NONEConsumables, Materials and Expendables
NONESpares
NONESafety Requirements
NONEProcedure
Clean the part. Refer to TASK 72-50-42-100-000 (CLEANING-000).
Do the test for cracks on the part that is given below. Use the applicable penetrant inspection procedure.
PART IDENT TASK/SUBTASK
No. 5 bearing seal spacer
SPM TASK 70-23-01-230-501 (Dip or spray)
SUBTASK 72-50-42-230-057-001 Examine the No. 5 Bearing Seal Spacer (01-142) for Cracks
Clean the part. Refer to TASK 72-50-42-100-000 (CLEANING-000).
Do the test for cracks on the part that is given below. Use the applicable penetrant inspection procedure.
PART IDENT TASK/SUBTASK
No. 5 bearing seal spacer
SPM TASK 70-23-02-230-501 (Dip or Spray)
SUBTASK 72-50-42-230-057-002 Examine the No. 5 Bearing Seal Spacer (01-142) for Cracks
Refer to Figure.
Repair, VRS5618 TASK 72-50-42-300-018 (REPAIR-018)
Other than (a)
Repair, VRS5618 TASK 72-50-42-300-018 (REPAIR-018)
Other than (a) or (b)
Chips on the inner and outer edges
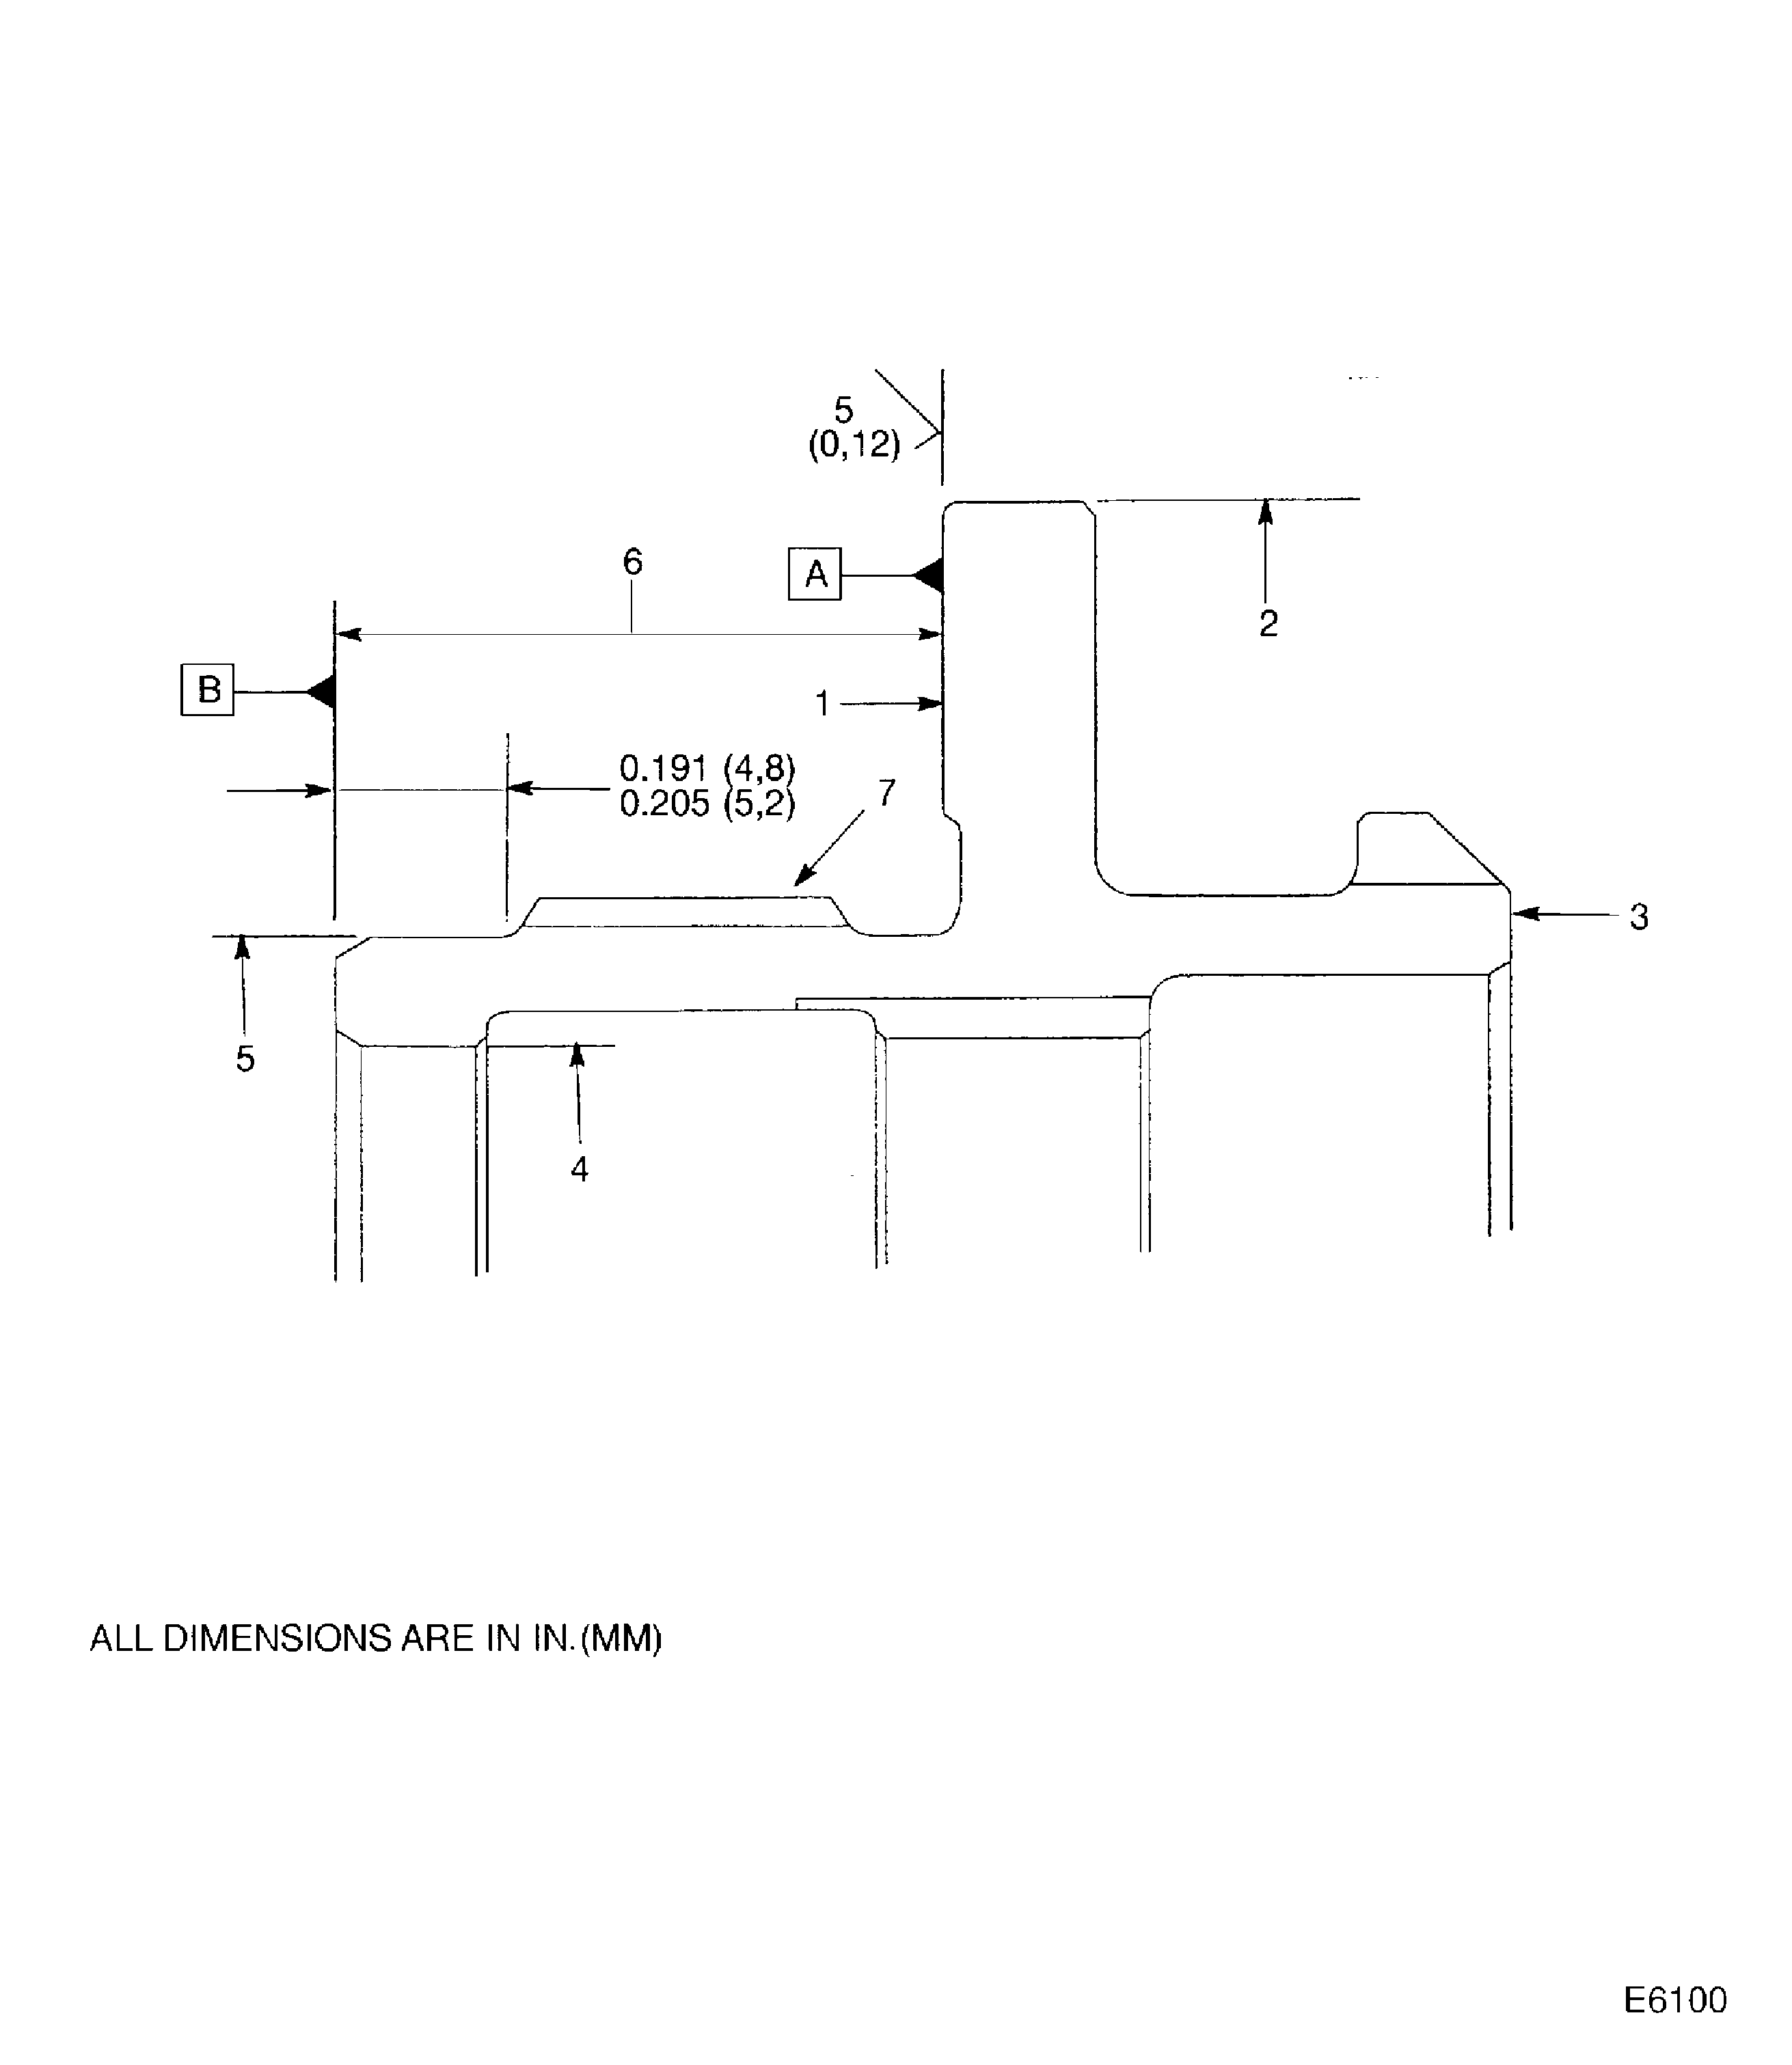
Examine the hardcoated surface of the seal spacer at location 1 for chips and pits.
SUBTASK 72-50-42-220-086 Examine the No. 5 Bearing Seal Spacer (01-142) for Scratches, Nicks, Chops and Pits
Refer to Figure.
Repair, VRS5618 TASK 72-50-42-300-018 (REPAIR-018)
Other than (a)
Parallelism.
Repair VRS5618 TASK 72-50-42-300-018 (REPAIR-018)
Other than (a)
Flatness.
Repair, VRS5618 TASK 72-50-42-300-018 (REPAIR-018)
Other than (a)
Surface finish.
Examine the hardcoated surface of the seal spacer at location 1 for parallelism, flatness and surface finish.
SUBTASK 72-50-42-220-087 Examine the No. 5 Bearing Seal Spacer (01-142) for Parallelism, Flatness and Surface Finish of the Hardcoat
Refer to: Figure
SUBTASK 72-50-42-220-088 Examine the No. 5 Bearing Seal Spacer (01-142) Outside Diameter for the Diameter and Concentricity
Refer to: Figure
SUBTASK 72-50-42-220-089 Examine the No. 5 Bearing Seal Spacer (01-142) for Parallelism
Refer to: Figure
SUBTASK 72-50-42-220-090 Examine the No. 5 Bearing Seal Spacer (01-142) Inside Diameter for the Diameter, Concentricity and Perpendicularity
Refer to: Figure
SUBTASK 72-50-42-220-091 Examine the No. 5 Bearing Seal Spacer (01-142) for the Axial Dimension
Refer to Figure.
Repair, VRS5638 TASK 72-50-42-300-023 (REPAIR-023)
Missing, peeling or damaged silver plating on threads
Examine the seal spacer at location 7.
SUBTASK 72-50-42-220-092 Examine the No. 5 Bearing Seal Spacer (01-142) for Damaged Silver Plating
Figure: No. 5 Bearing Rear Seal Spacer Inspection Locations
No. 5 Bearing Rear Seal Spacer Inspection Locations

