Export Control
EAR Export Classification: Not subject to the EAR per 15 C.F.R. Chapter 1, Part 734.3(b)(3), except for the following Service Bulletins which are currently published as EAR Export Classification 9E991: SBE70-0992, SBE72-0483, SBE72-0580, SBE72-0588, SBE72-0640, SBE73-0209, SBE80-0024 and SBE80-0025.Copyright
© IAE International Aero Engines AG (2001, 2014 - 2021) The information contained in this document is the property of © IAE International Aero Engines AG and may not be copied or used for any purpose other than that for which it is supplied without the express written authority of © IAE International Aero Engines AG. (This does not preclude use by engine and aircraft operators for normal instructional, maintenance or overhaul purposes.).Applicability
All
Common Information
TASK 72-60-25-200-003 Fuel Pump Drive Gear Rotating Seal Ring - Examine, Inspection-003
General
This TASK gives the procedure for the inspection of the rotating ring of the fuel pump. For the other parts of the fuel pump drive gear assembly, refer to TASK 72-60-25-200-000.
Fig/item numbers in parentheses in the procedure to agree with those used in the IPC.
The policy that is necessary for inspection is given in SPM TASK 70-20-01-200-501.
All the parts must be cleaned before any part is examined. Refer to SPM TASK 70-11-03-300-503.
All parts must be visually examined for damage, corrosion and wear. Any defects that are not identified in the procedure must be referred to IAE.
The procedure for those parts which must have a crack test is given in SPM TASK 70-23-00-230-501. Do the test before the part is visually examined. Limits for crack are given in SUBTASK for each part.
A ** following repair referenced in this inspection indicates that the repair is not yet published in the current revision of the manual and the part must be rejected. Contact IAE for additional information concerning FAA approved repair date.
Do not discard any parts until you are sure there are no repairs available. Refer to the instructions in repair before a discarded part is used again or oversize parts are installed.
Parts which should be discarded can be held although no repair is available. The repair of a discarded part could be shown to be necessary at a later date.
All parts must be examined to make sure that all the repairs have been completed satisfactorily.
The practices and processes referred to in the procedure by the TASK numbers are in SPM.
Preliminary Requirements
Pre-Conditions
NONESupport Equipment
NONEConsumables, Materials and Expendables
NONESpares
NONESafety Requirements
NONEProcedure
Reject.
Cracked.
Do the test for cracks on the parts that are given below.
PART IDENT
PROCEDURE
CURRENT/INSPECT
TASK/SUBTASK
Rotating ring
TB
500 Amp
SPM TASK 70-24-01-240-501, SUBTASK 70-24-01-240-011
CF
Two shots, 90 degrees apart
300 Amp
SPM TASK 70-24-01-240-501, SUBTASK 70-24-01-240-010
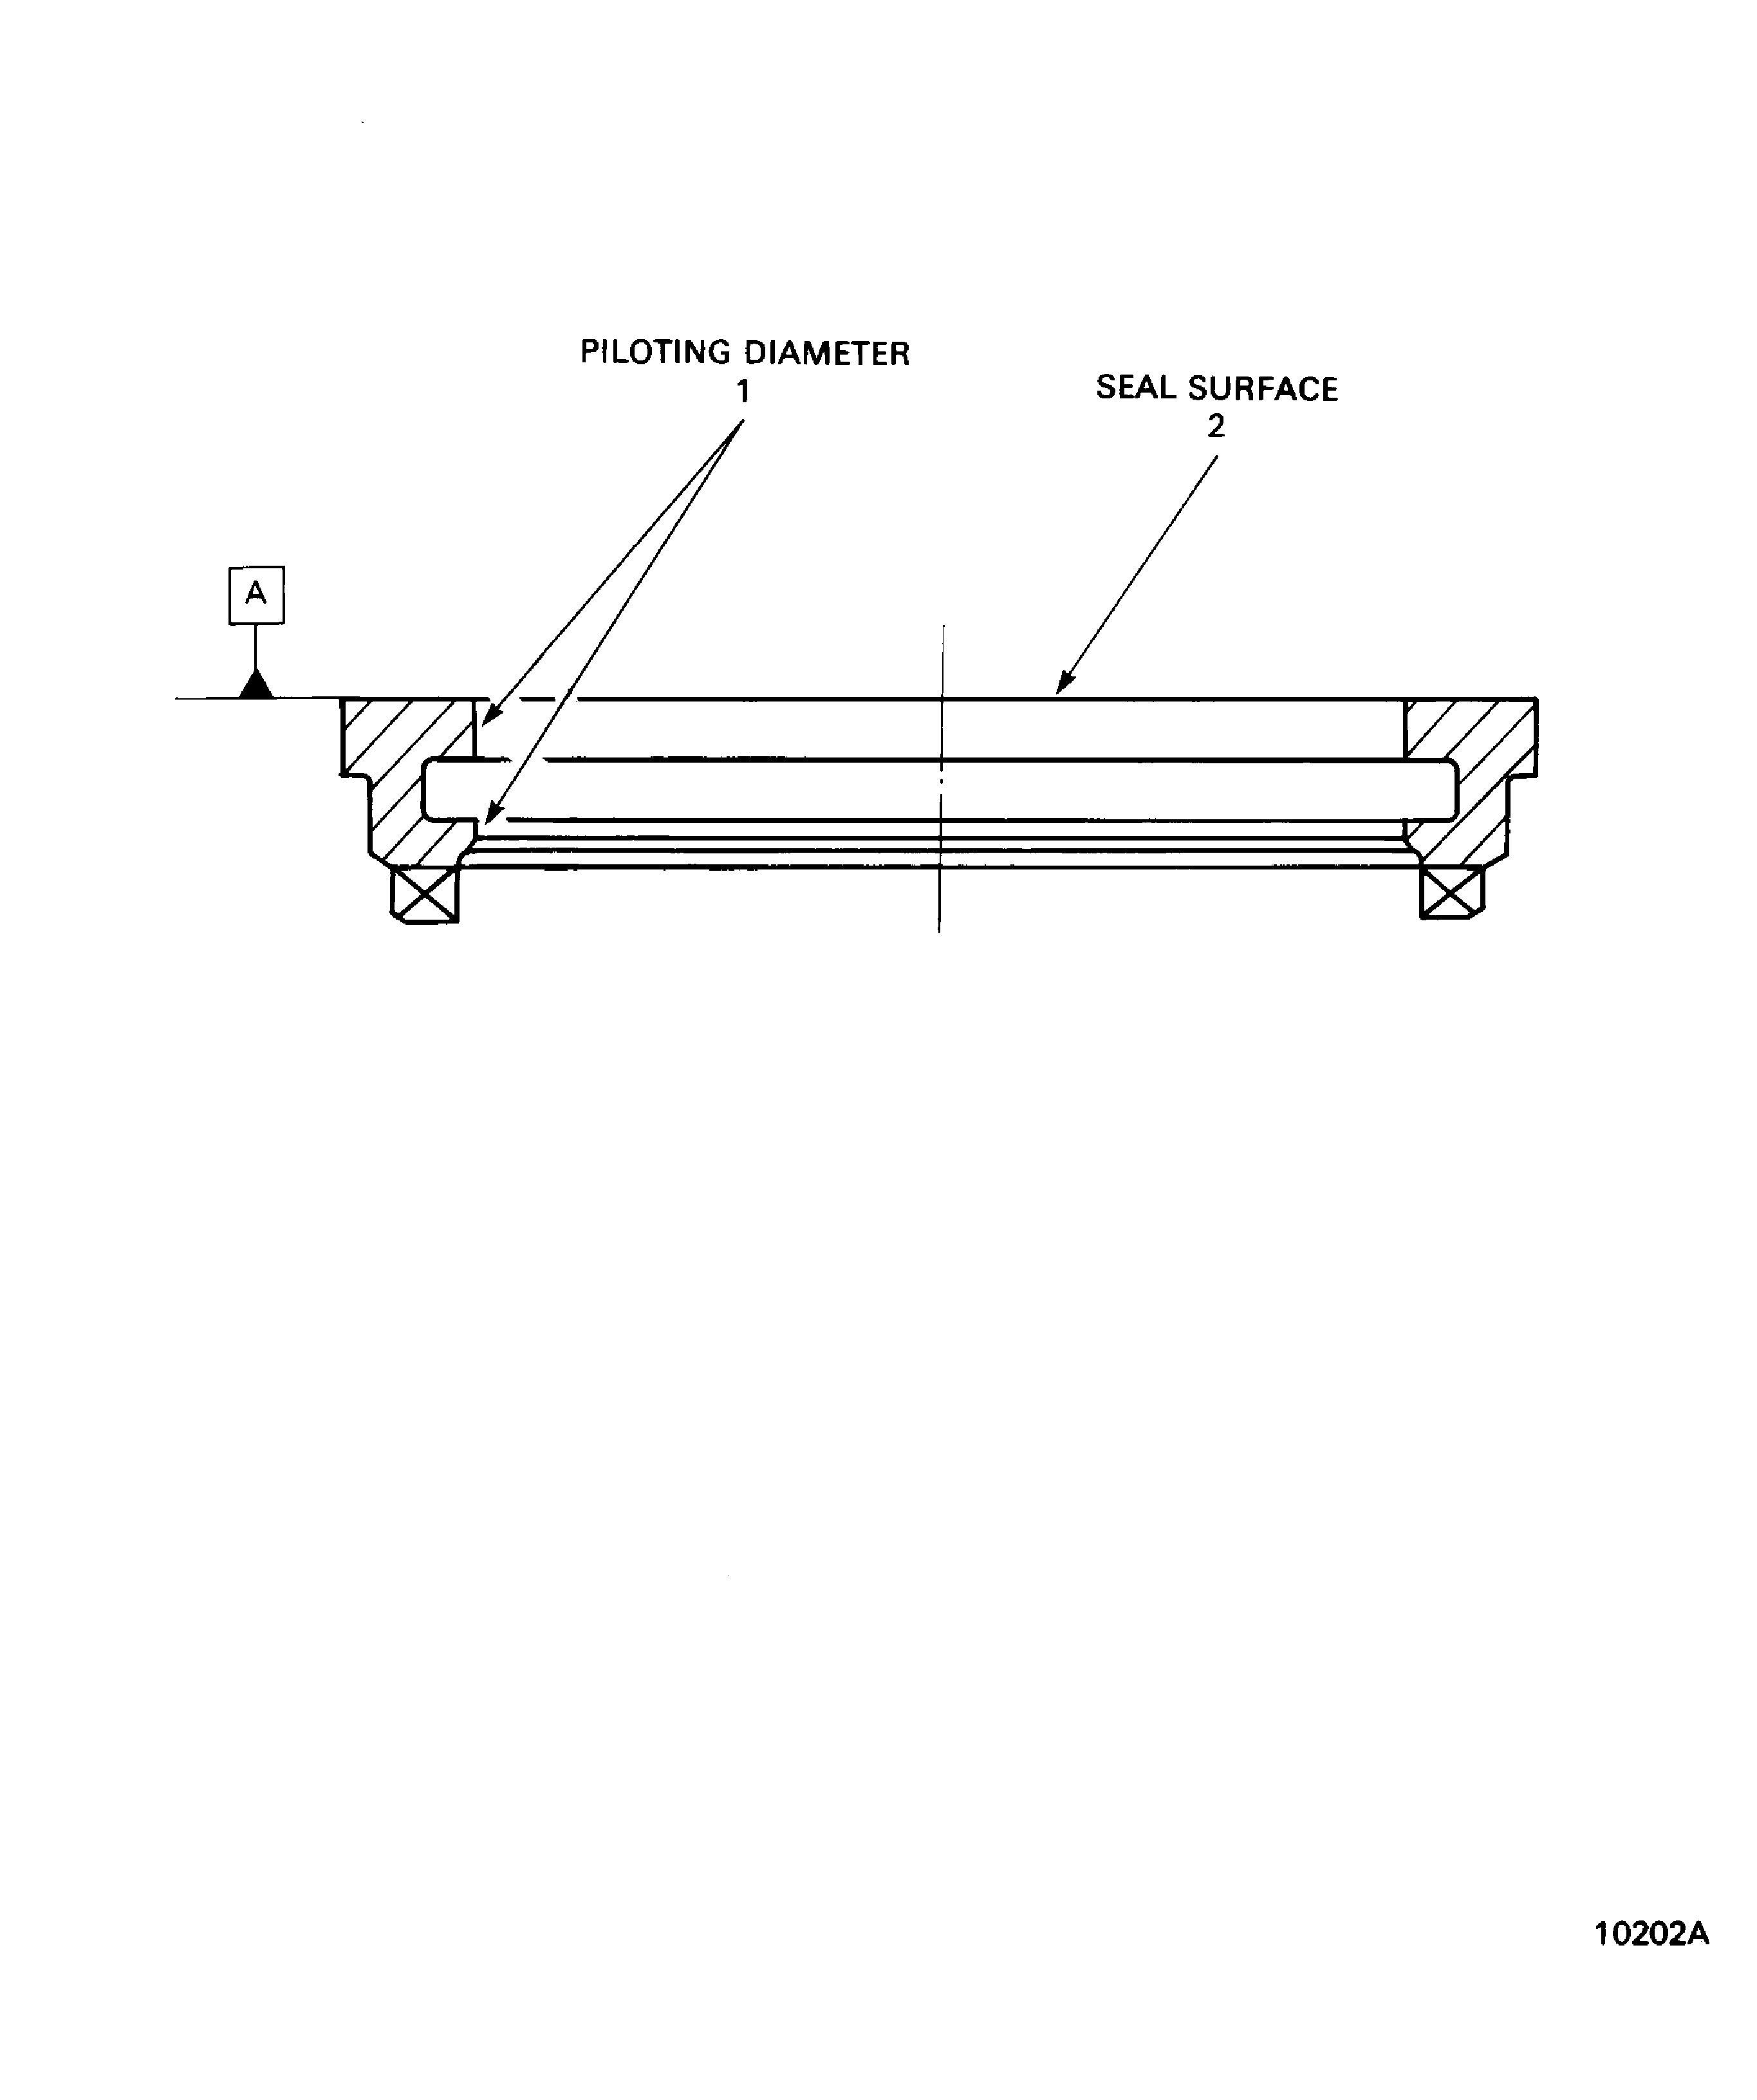
SUBTASK 72-60-25-240-058 Examine the Rotating Ring (01-170) for Cracks
Refer to Figure.
Repair, VRS5001 TASK 72-60-22-300-001 (Repair-001).
More than 1.6555 in. (42.049 mm).
Diameter.
Repair, VRS5001 TASK 72-60-22-300-001 (Repair-001).
More than Step.
Perpendicularity.
SUBTASK 72-60-25-220-099 Examine the Rotating Ring (01-170) Piloting Diameter at Location 1
Refer to Figure.
Repair, VRS5002 TASK 72-60-22-300-002 (Repair-002).
More than Step.
Flat surface.
Repair, VRS5002 TASK 72-60-22-300-002 (Repair-002).
More than Step.
Corrosion, pits and scratches.
SUBTASK 72-60-25-220-100 Examine the Rotating Ring (01-170) Seal Surface at Location 2
Figure: Locations - Rotating Ring of the Fuel Pump
Locations - Rotating Ring of the Fuel Pump

