Export Control
EAR Export Classification: Not subject to the EAR per 15 C.F.R. Chapter 1, Part 734.3(b)(3), except for the following Service Bulletins which are currently published as EAR Export Classification 9E991: SBE70-0992, SBE72-0483, SBE72-0580, SBE72-0588, SBE72-0640, SBE73-0209, SBE80-0024 and SBE80-0025.Copyright
© IAE International Aero Engines AG (2001, 2014 - 2021) The information contained in this document is the property of © IAE International Aero Engines AG and may not be copied or used for any purpose other than that for which it is supplied without the express written authority of © IAE International Aero Engines AG. (This does not preclude use by engine and aircraft operators for normal instructional, maintenance or overhaul purposes.).Applicability
All
Common Information
TASK 72-60-29-200-006 Deoiler Impeller - Examine, Inspection-006
General
This TASK gives the procedure for the inspection of the deoiler impellor. For other parts of the deoiler gear and impellor refer to TASK 72-60-29-200-000 (INSPECTION)
Fig/item numbers in parentheses in the procedure agree with those used in the IPC.
The policy that is necessary is given in the SPM TASK 70-20-00-200-501.
All parts that must be cleaned before any part is examined refer to the SPM TASK 70-10-00-100-501.
All parts must be visually examined for damage, corrosion and wear. Any defects that are not identified in the procedure must be referred to IAE.
A ** following repair referenced in this inspection indicates that the repair is not yet published in the current revision of the manual and the part must be rejected. Contact IAE for additional information concerning FAA approved repair date.
All parts must be visually examined for damage, corrosion and wear. Any defects that are not identified in the procedure must be referred to IAE.
The practices and processes referred to in the procedure by the TASK numbers are in the SPM.
References
Refer to the SPM for data on these items.
Definition of Damage, TASK 70-02-02-350-501.
Record and Control of Lives of the Parts, TASK 70-05-00-220-501.
Inspection of Parts, TASK 70-20-00-200-501.
Some data on these items is contained in this TASK. For more data on these items refer to the SPM.
Surface protection.
Preliminary Requirements
Pre-Conditions
NONESupport Equipment
| Name | Manufacturer | Part Number / Identification | Quantity | Remark |
|---|---|---|---|---|
| Workshop inspection equipment | LOCAL | |||
| FPI Inspection station | LOCAL |
Consumables, Materials and Expendables
NONESpares
NONESafety Requirements
NONEProcedure
Refer to TASK 72-60-29-100-000 (CLEANING-000)
Clean the Parts
SUBTASK 72-60-29-220-143 Examine the Deoiler Impellor (01-190) Fluorescent Penetrant
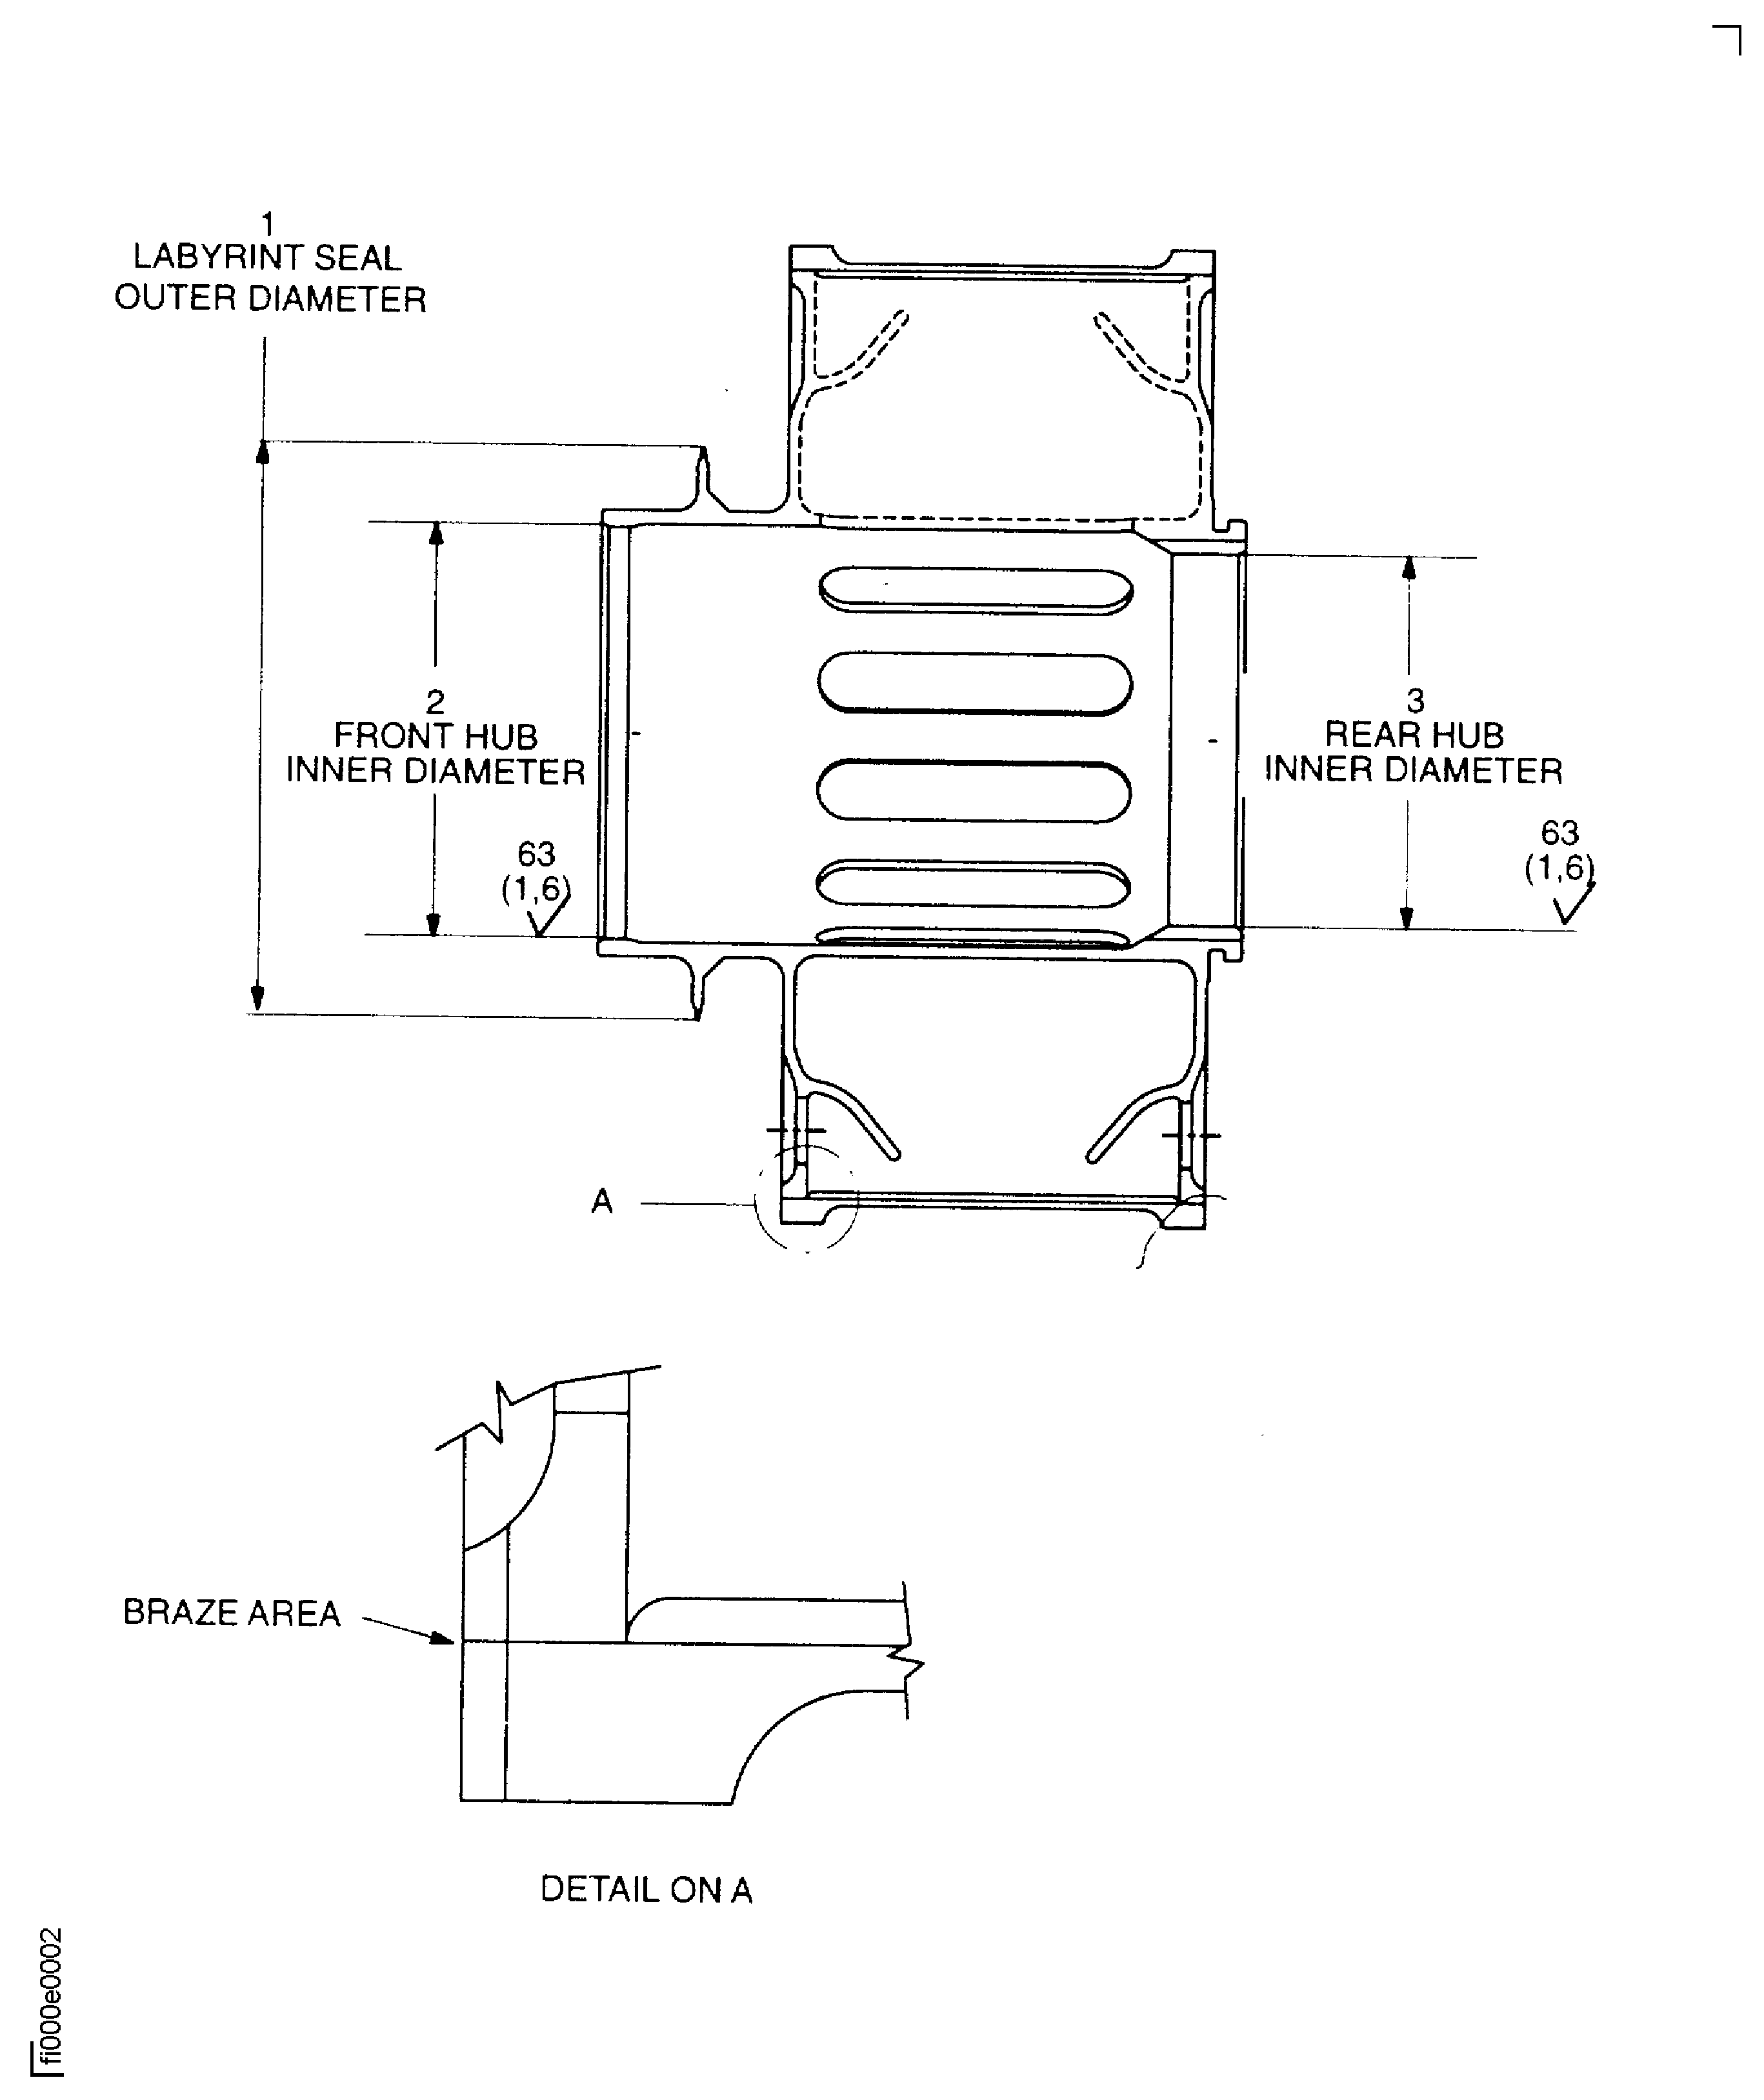
Refer to Figure.
More than Step
Cracks
Repair, VRS5658 TASK 72-60-29-300-041 (REPAIR-041)
All quantity
Surface damage, burrs
SUBTASK 72-60-29-220-144 Examine the Deoiler Impellor (01-190) Braze Area
Repair VRS5658 TASK 72-60-29-300-041 (REPAIR-041)
All quantity
Surface damage, burrs
SUBTASK 72-60-29-220-145 Examine the Deoiler Impellor (01-190) All Other Areas
Refer to Figure
SUBTASK 72-60-29-220-146 Examine the Deoiler Impellor (01-190) Labrynth Seal Outer Diameter at Location 1
Refer to Figure.
Repair, VRS5667 TASK 72-60-29-300-042 (REPAIR-042)
Between 2.3637 and 2.3745 in. (60.040 and 60.314 mm)
More than Step
Diameter
SUBTASK 72-60-29-220-147 Examine the Deoiler Impellor (01-190) Front Hub Inner Diameter at Location 2
Refer to Figure
Repair, VRS5657 TASK 72-60-29-300-040 (REPAIR-040)
Between 2.1338 and 2.1446 in. (54.200 and 54.474 mm)
More than Step
Diameter
SUBTASK 72-60-29-220-148 Examine the Deoiler Impellor (01-190) Rear Hub Inner Diameter at Location 3
Figure: Locations - deoiler impellor
Locations - deoiler impellor

