Export Control
EAR Export Classification: Not subject to the EAR per 15 C.F.R. Chapter 1, Part 734.3(b)(3), except for the following Service Bulletins which are currently published as EAR Export Classification 9E991: SBE70-0992, SBE72-0483, SBE72-0580, SBE72-0588, SBE72-0640, SBE73-0209, SBE80-0024 and SBE80-0025.Copyright
© IAE International Aero Engines AG (2001, 2014 - 2021) The information contained in this document is the property of © IAE International Aero Engines AG and may not be copied or used for any purpose other than that for which it is supplied without the express written authority of © IAE International Aero Engines AG. (This does not preclude use by engine and aircraft operators for normal instructional, maintenance or overhaul purposes.).Applicability
All
Common Information
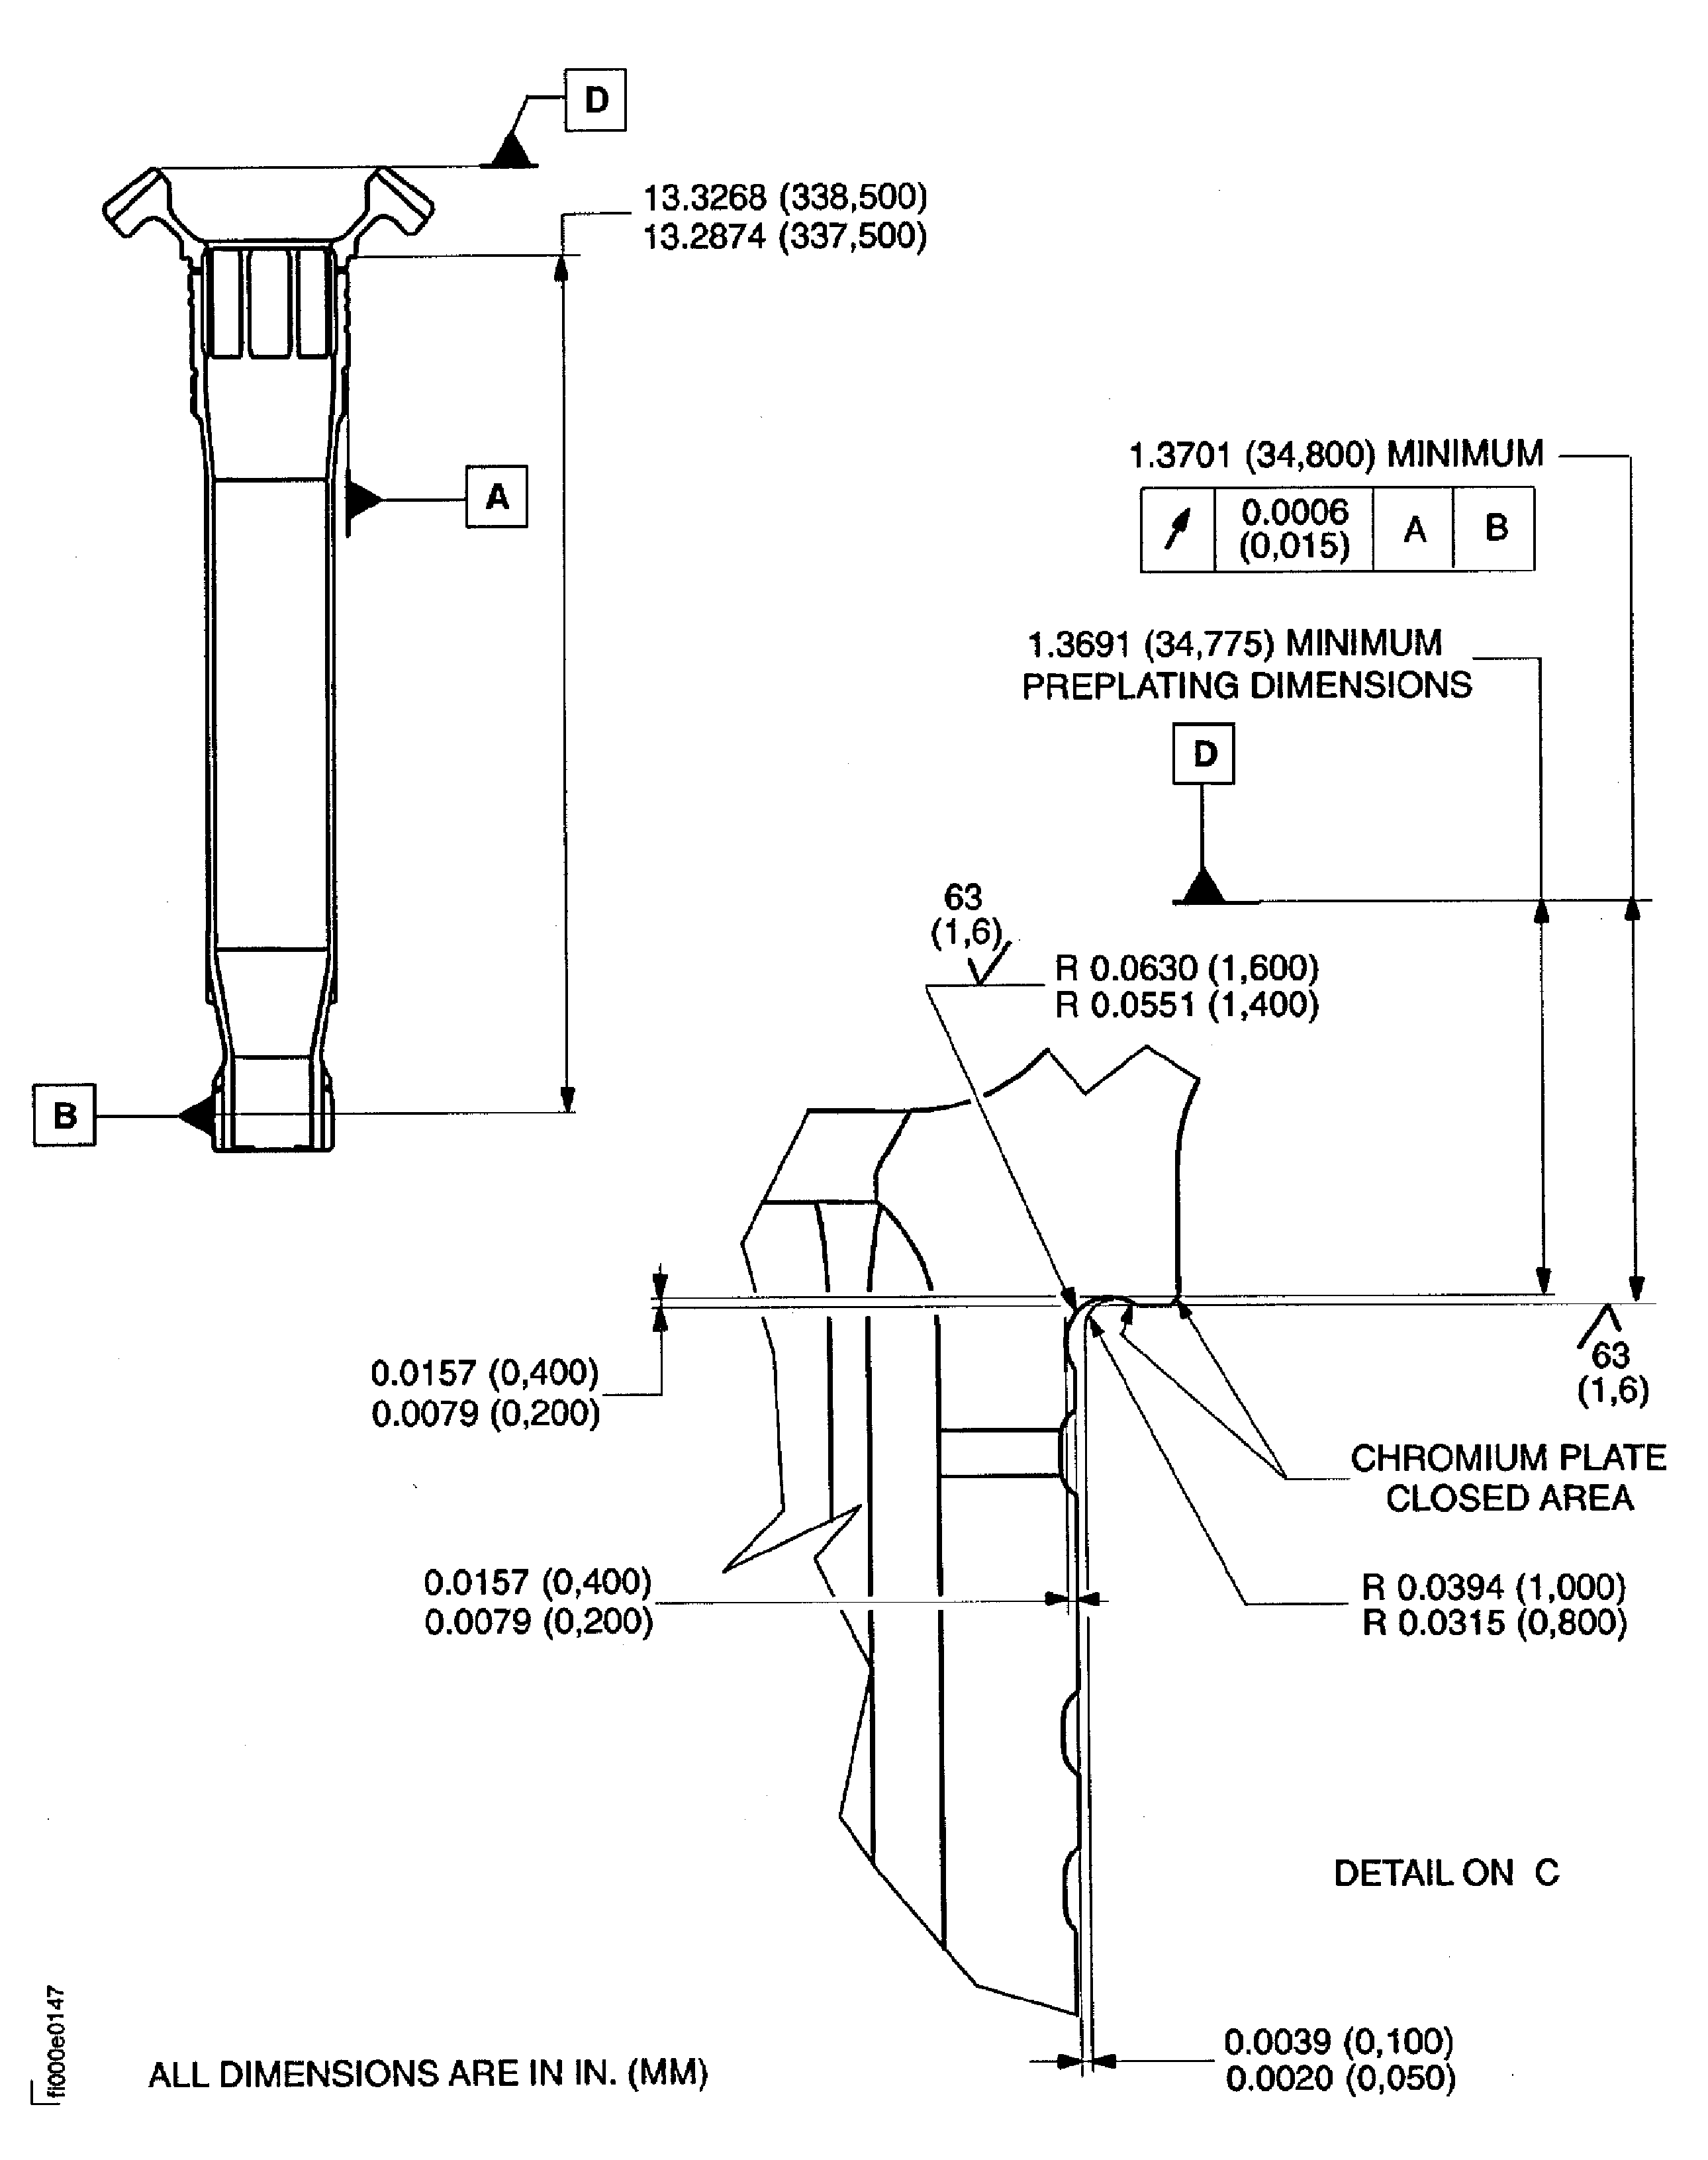
TASK 72-60-43-300-009 Angle Gearbox Driven Bevel Gearshaft - Chromium Plate The Roller Bearing Shoulder, Repair-009 (VRS5628)
General
Price and availability - none
The practices and processes referred to in the procedure by the TASK numbers are in the SPP
NOTE
To identify the consumable materials refer to the PCI
Other consumable materials are given in the SPM
Preliminary Requirements
Pre-Conditions
NONESupport Equipment
| Name | Manufacturer | Part Number / Identification | Quantity | Remark |
|---|---|---|---|---|
| Workshop inspection equipment | LOCAL | Workshop inspection equipment | ||
| Grinding Machine | LOCAL | Grinding Machine | ||
| Furnace | LOCAL | Furnace | ||
| Magnifying glass, 5x | LOCAL | Magnifying glass, 5x | ||
| Vibrating marking pencil | LOCAL | Vibrating marking pencil |
Consumables, Materials and Expendables
| Name | Manufacturer | Part Number / Identification | Quantity | Remark |
|---|---|---|---|---|
| CoMat 05-030 CAST STEEL SHOT DELETED | 0AM53 | CoMat 05-030 |
Spares
NONESafety Requirements
NONEProcedure
Refer to Figure.
SUBTASK 72-60-43-320-065 Machine the Roller Bearing Shoulder
Refer to the SPM TASK 70-24-01-240-501.
No cracks are permitted.
Do the magnetic particle inspection for cracks.
SUBTASK 72-60-43-240-061 Examine the Bevel Gearshaft
Refer to the SPM TASK 70-38-04-300-503.
Shot-peen the roller bearing mating face to an intensity of 0.006A to 0.008A in.
SUBTASK 72-60-43-380-057 Shot-Peen the Roller Bearing Shoulder
Refer to the SPM TASK 70-33-02-330-501.
Plate to a sufficient thickness to permit the machining to the last dimensions.
The plate out of the roller bearing mating face is permitted but must be removed.
Do the chromium plate.
SUBTASK 72-60-43-330-058 Chromium Plate the Roller Bearing Shoulder
Refer to Figure.
SUBTASK 72-60-43-320-066 Machine the Roller Bearing Shoulder
Use a Magnifying glass, 5x.
The natural network of crack, made more apparent by grinding, is permitted.
Do the visual inspection of the plated area for cracks and adhesion.
SUBTASK 72-60-43-220-088 Examine the Chromium Plated Area
Use the Vibrating marking pencil.
Remove the metal lifted by marking.
Refer to the SPM TASK 70-09-00-400-501.
Vibro engrave VRS5628 adjacent to the part number.
SUBTASK 72-60-43-350-060 Record the Repair
Figure: Repair details and dimensions
Repair details and dimensions

