Export Control
EAR Export Classification: Not subject to the EAR per 15 C.F.R. Chapter 1, Part 734.3(b)(3), except for the following Service Bulletins which are currently published as EAR Export Classification 9E991: SBE70-0992, SBE72-0483, SBE72-0580, SBE72-0588, SBE72-0640, SBE73-0209, SBE80-0024 and SBE80-0025.Copyright
© IAE International Aero Engines AG (2001, 2014 - 2021) The information contained in this document is the property of © IAE International Aero Engines AG and may not be copied or used for any purpose other than that for which it is supplied without the express written authority of © IAE International Aero Engines AG. (This does not preclude use by engine and aircraft operators for normal instructional, maintenance or overhaul purposes.).Applicability
All
Common Information
TASK 75-32-54-200-102-B00 HPC Stage 10 Bleed Silencer - Examine, Inspection-002
General
This TASK gives the procedure for the inspection of the HPC Stage 10 Bleed Outlet Valve Silencer Assembly. For the other HPC Stage 10 Bleed Outlet Valve Silencer Assembly parts,refer to the Component Maintenance Manual - Miscellaneous Mechanical (CMM-MECH-V2500-1IA) Inspection-000 TASK 75-32-54-200-400.
Fig./item numbers in parentheses in the procedure agree with those used in the IPC. Only the primary Fig./item numbers are used. For the service bulletin alpha variants refer to the IPC.
The policy that is necessary for inspection is given in the SPM, TASK 70-20-01-200-501.
All the parts must be cleaned before any part is examined. Refer to Cleaning-000 TASK 75-23-49-100-100.
All parts must be visually examined for damage, corrosion and wear. Any defects that are not identified in the procedure must be referred to IAE.
The procedure for those parts which must have a crack test is given in relevant SUBTASK. Do the crack test before the part is visually examined.
Do not discard any part until you are sure there are no repairs available. Refer to the instructions in Repair before a discarded part is used again or oversize parts are installed.
Parts which must be discarded can be held although no repair is available. The repair of a discarded part could be shown to be necessary at a later date.
All parts must be examined to make sure that all the repairs have been completed satisfactorily.
The practices and processes referred to in the procedure by the TASK/SUBTASK numbers are in the SPM.
NOTE
References
Refer to the SPM for data on these items:
Definitions of Damage - Specified Types of Damage, SPM TASK 70-02-02-350-501.
Inspection Policy and Inspection of Parts, SPM TASK 70-20-01-200-501.
Some data on these items are contained in this TASK. For more data on these items refer to the SPM:
Method of Testing for Crack Indications.
Chemical Processes
Surface Protection
Preliminary Requirements
Pre-Conditions
NONESupport Equipment
NONEConsumables, Materials and Expendables
NONESpares
NONESafety Requirements
NONEProcedure
Clean the part. Refer to Cleaning- 000 TASK 75-32-54-100-100.
Reject
Cracked
Silencer assembly (01-350), refer to SPM TASK 70-23-01-230-501.
Do the test for cracks on the parts that follow.
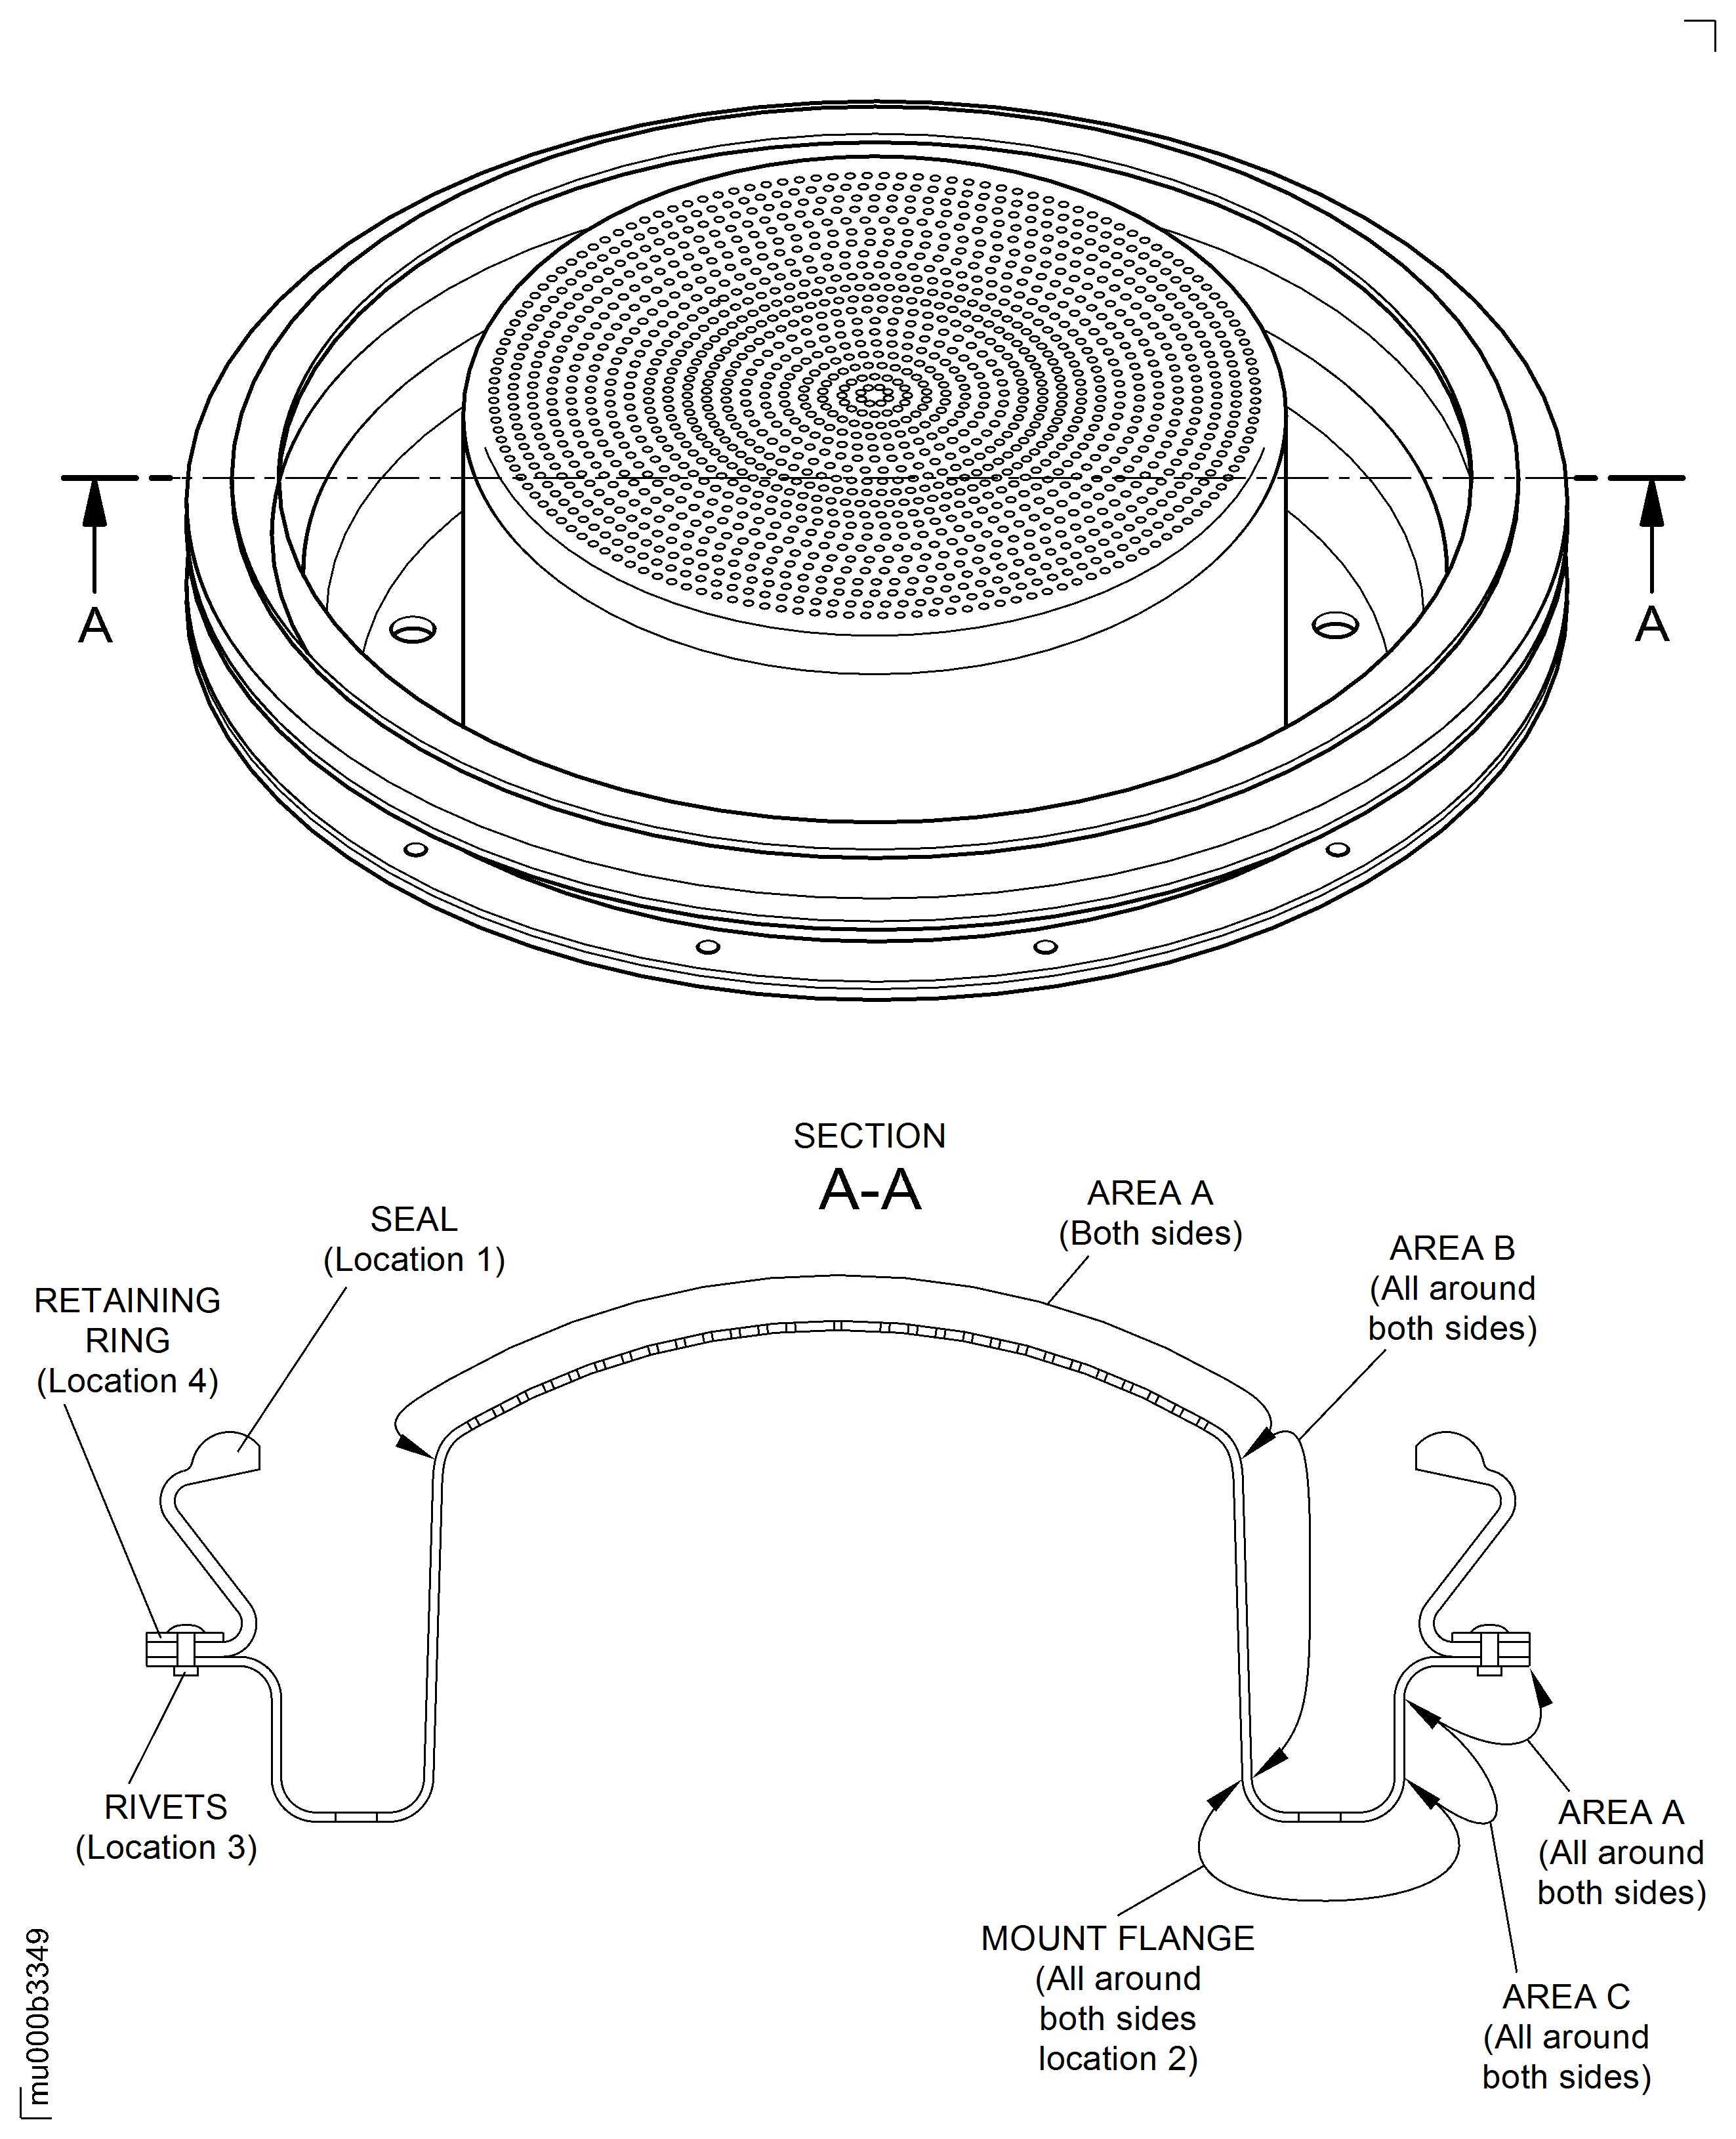
SUBTASK 75-32-54-230-061 Examine the Silencer Assembly for Cracks
Refer to Figure.
Repair, VRS6045 TASK 75-32-54-300-001 (Repair-001).
Split or torn
Seal material
SUBTASK 75-32-54-220-072 Examine the Silencer Assembly Seal at Location 1
Refer to Figure.
Reject
Galled
Reject
Scored
Reject
Burred
Bolt holes
SUBTASK 75-32-54-220-073 Examine the Silencer Assembly Mount Flange at Location 2
Refer to Figure.
Repair, VRS6045 TASK 75-32-54-300-001 (Repair-001).
Loose / missing / damaged.
SUBTASK 75-32-54-220-074 Examine the Silencer Assembly Seal Rivets at Location 3
Refer to Figure.
Repair, VRS6045 TASK 75-32-54-300-001 (Repair-001).
Loose
Repair, VRS6045 TASK 75-32-54-300-001 (Repair-001).
More than Step.
Scored
SUBTASK 75-32-54-220-076 Examine the Silencer Assembly Retaining Rings at Location 4
Figure: Locations on the HP Compressor Stage 10 Bleed Valves
Locations on the HP Compressor Stage 10 Bleed Valves

