Export Control
EAR Export Classification: Not subject to the EAR per 15 C.F.R. Chapter 1, Part 734.3(b)(3), except for the following Service Bulletins which are currently published as EAR Export Classification 9E991: SBE70-0992, SBE72-0483, SBE72-0580, SBE72-0588, SBE72-0640, SBE73-0209, SBE80-0024 and SBE80-0025.Copyright
© IAE International Aero Engines AG (2001, 2014 - 2021) The information contained in this document is the property of © IAE International Aero Engines AG and may not be copied or used for any purpose other than that for which it is supplied without the express written authority of © IAE International Aero Engines AG. (This does not preclude use by engine and aircraft operators for normal instructional, maintenance or overhaul purposes.).Applicability
All
Common Information
TASK 72-32-23-300-004 HPC Front Shaft Assembly - Repair The Location Diameter/s By Metal Spray, Repair-004 (VRS6127)
Effectivity
FIG/ITEM | PART NO. |
|---|---|
01-745 | 6A2914 |
01-745 | 6A2940 |
01-745 | 6A3888 |
01-745 | 6A3899 |
01-745 | 6A4147 |
01-745 | 6A8083 |
01-745 | 6A8094 |
Material of component
PART IDENT | SYMBOL | MATERIAL |
|---|---|---|
HP Compressor Front Stubshaft | TEG | Titanium aluminum vanadium alloy |
General
This Repair must only be done when the instruction to do so is given in TASK 72-32-23-200-000 (INSPECTION-000).
This Repair restores the worn location diameter(s) of the HP Compressor Stubshaft by Metal Spraying.
The practices and processes referred to in the procedure by the TASK/SUBTASK numbers are in the SPM.
Price and availability - none
NOTE
NOTE
Preliminary Requirements
Pre-Conditions
NONESupport Equipment
| Name | Manufacturer | Part Number / Identification | Quantity | Remark |
|---|---|---|---|---|
| Penetrant Crack Test Equipment | LOCAL | Penetrant crack test equipment | ||
| Dial test indicators | LOCAL | Dial test indicators | ||
| Standard workshop equipment | LOCAL | Standard workshop equipment | ||
| Dimensional inspection equipment | LOCAL | Dimensional inspection equipment | ||
| Chemical cleaning equipment | LOCAL | Chemical cleaning equipment | ||
| Abrasive blast equipment | LOCAL | Abrasive blast equipment | ||
| Metal spray equipment | LOCAL | Metal spray equipment | ||
| Vibrating marking pencil | LOCAL | Vibrating marking pencil | ||
| IAE 3R18657 Grinding fixture | 0AM53 | IAE 3R18657 | 1 | |
| IAE 3R18671 Mask | 0AM53 | IAE 3R18671 | 1 | |
| IAE 3R18672 Mask | 0AM53 | IAE 3R18672 | 1 |
Consumables, Materials and Expendables
| Name | Manufacturer | Part Number / Identification | Quantity | Remark |
|---|---|---|---|---|
| CoMat 02-001 ADHESIVE TAPE (MASKING) | LOCAL | CoMat 02-001 | ||
| CoMat 02-047 TAPE, HEAT REFLECTIVE | 52152 | CoMat 02-047 | ||
| CoMat 03-248 METAL SPRAY POWDER | LOCAL | CoMat 03-248 | ||
| CoMat 05-001 ABRASIVE MEDIUM, ALUMINIUM OXIDE, 20/30 GRADE | LOCAL | CoMat 05-001 |
Spares
NONESafety Requirements
NONEProcedure
Use IAE 3R18657 Grinding fixture 1 off.

CAUTION
TITANIUM COMPONENT - YOU MUST USE SILICON CARBIDE TYPE ABRASIVE WHEELS, STONES AND PAPERS TO DRESS, BLEND AND POLISH THIS COMPONENT.TITANIUM COMPONENT - DO NOT USE FORCE WITH MECHANICAL CUTTERS OR THE MATERIAL WILL BECOME TOO HOT.TITANIUM COMPONENT - IF THE MATERIAL SHOWS A CHANGE IN COLOR, TO DARKER THAN A LIGHT STRAW COLOR, THE COMPONENT IS TO BE REJECTED.Install the fixture into the grinding machine.
Use a Dial test indicators.
Install the front stubshaft into the fixture.
Refer to TASK 70-32-06-320-501.
Machine to remove all scores.
Grind the front stubshaft diameter(s) and chamfer(s).
SUBTASK 72-32-23-324-051 Grind the Location Diameter(s)
Refer to Figure.
Refer to the SPM TASK 70-22-03-220-501-001 and SPM TASK 70-22-03-220-501-002.
Measure the machined surfaces.
SUBTASK 72-32-23-220-076 Measure the Machined Surface(s)
Refer to TASK 70-23-04-230-501.
Cracks are not permitted.
Do a penetrant crack test.
SUBTASK 72-32-23-230-063 Do a Crack Test
Refer to the SPM TASK 70-11-01-300-503.
Chemically clean the front stubshaft.
SUBTASK 72-32-23-110-058 Chemically Clean
Refer to Figure.
Use CoMat 02-001 ADHESIVE TAPE (MASKING) or IAE 3R18671 Mask 1 off and IAE 3R18672 Mask 1 off.
Apply masking tape or mechanical masks.
SUBTASK 72-32-23-350-059 Mask the Area(s) not to be Repaired
Refer to Figure.
Refer to the SPM TASK 70-12-02-120-501.

CAUTION
TO PREVENT CONTAMINATION, DO NOT TOUCH THE SURFACE WHICH IS CLEANED FOR REPAIR.Abrasive blast the surface(s) for repair.
SUBTASK 72-32-23-120-053 Abrasive Blast the Surface(s) for Repair
Refer to Figure
Use CoMat 02-047 TAPE, HEAT REFLECTIVE or IAE 3R18671 Mask 1 off and IAE 3R18672 Mask 1 off.
Apply masking tape or mechanical masks.
SUBTASK 72-32-23-350-060 Mask the Area(s) not to be Repaired
Refer to the SPM TASK 70-34-01-340-501, SUBTASK 70-34-01-340-002 (B).
Apply metal spray to give a sufficient thickness for final machining to a maximum thickness of 0.008 in. (0.21 mm).
Apply metal spray.
SUBTASK 72-32-23-340-052 Metal Spray the Surface(s) for Repair
Refer to Figure
Use IAE 3R18657 Grinding fixture 1 off.
Install the fixture into the grinding machine.
Refer to the SPM TASK 70-32-00-320-501.
Machine to final dimension(s).
Grind the front stubshaft diameter(s) and chamfer(s).
SUBTASK 72-32-23-324-052 Grind the Metal Sprayed Surface(s)
Refer to Figure.
Refer to the SPM TASK 70-22-03-220-501-001 and SPM TASK 70-22-03-220-501-002.
Measure the machined surfaces.
SUBTASK 72-32-23-220-077 Measure the Machined Surface(s)
Refer to Figure.
Refer to the SPM TASK 70-09-00-400-501, SUBTASK 70-09-00-400-001.
Make a mark VRS6127 adjacent to the part number.
SUBTASK 72-32-23-350-061 Identify the Repair
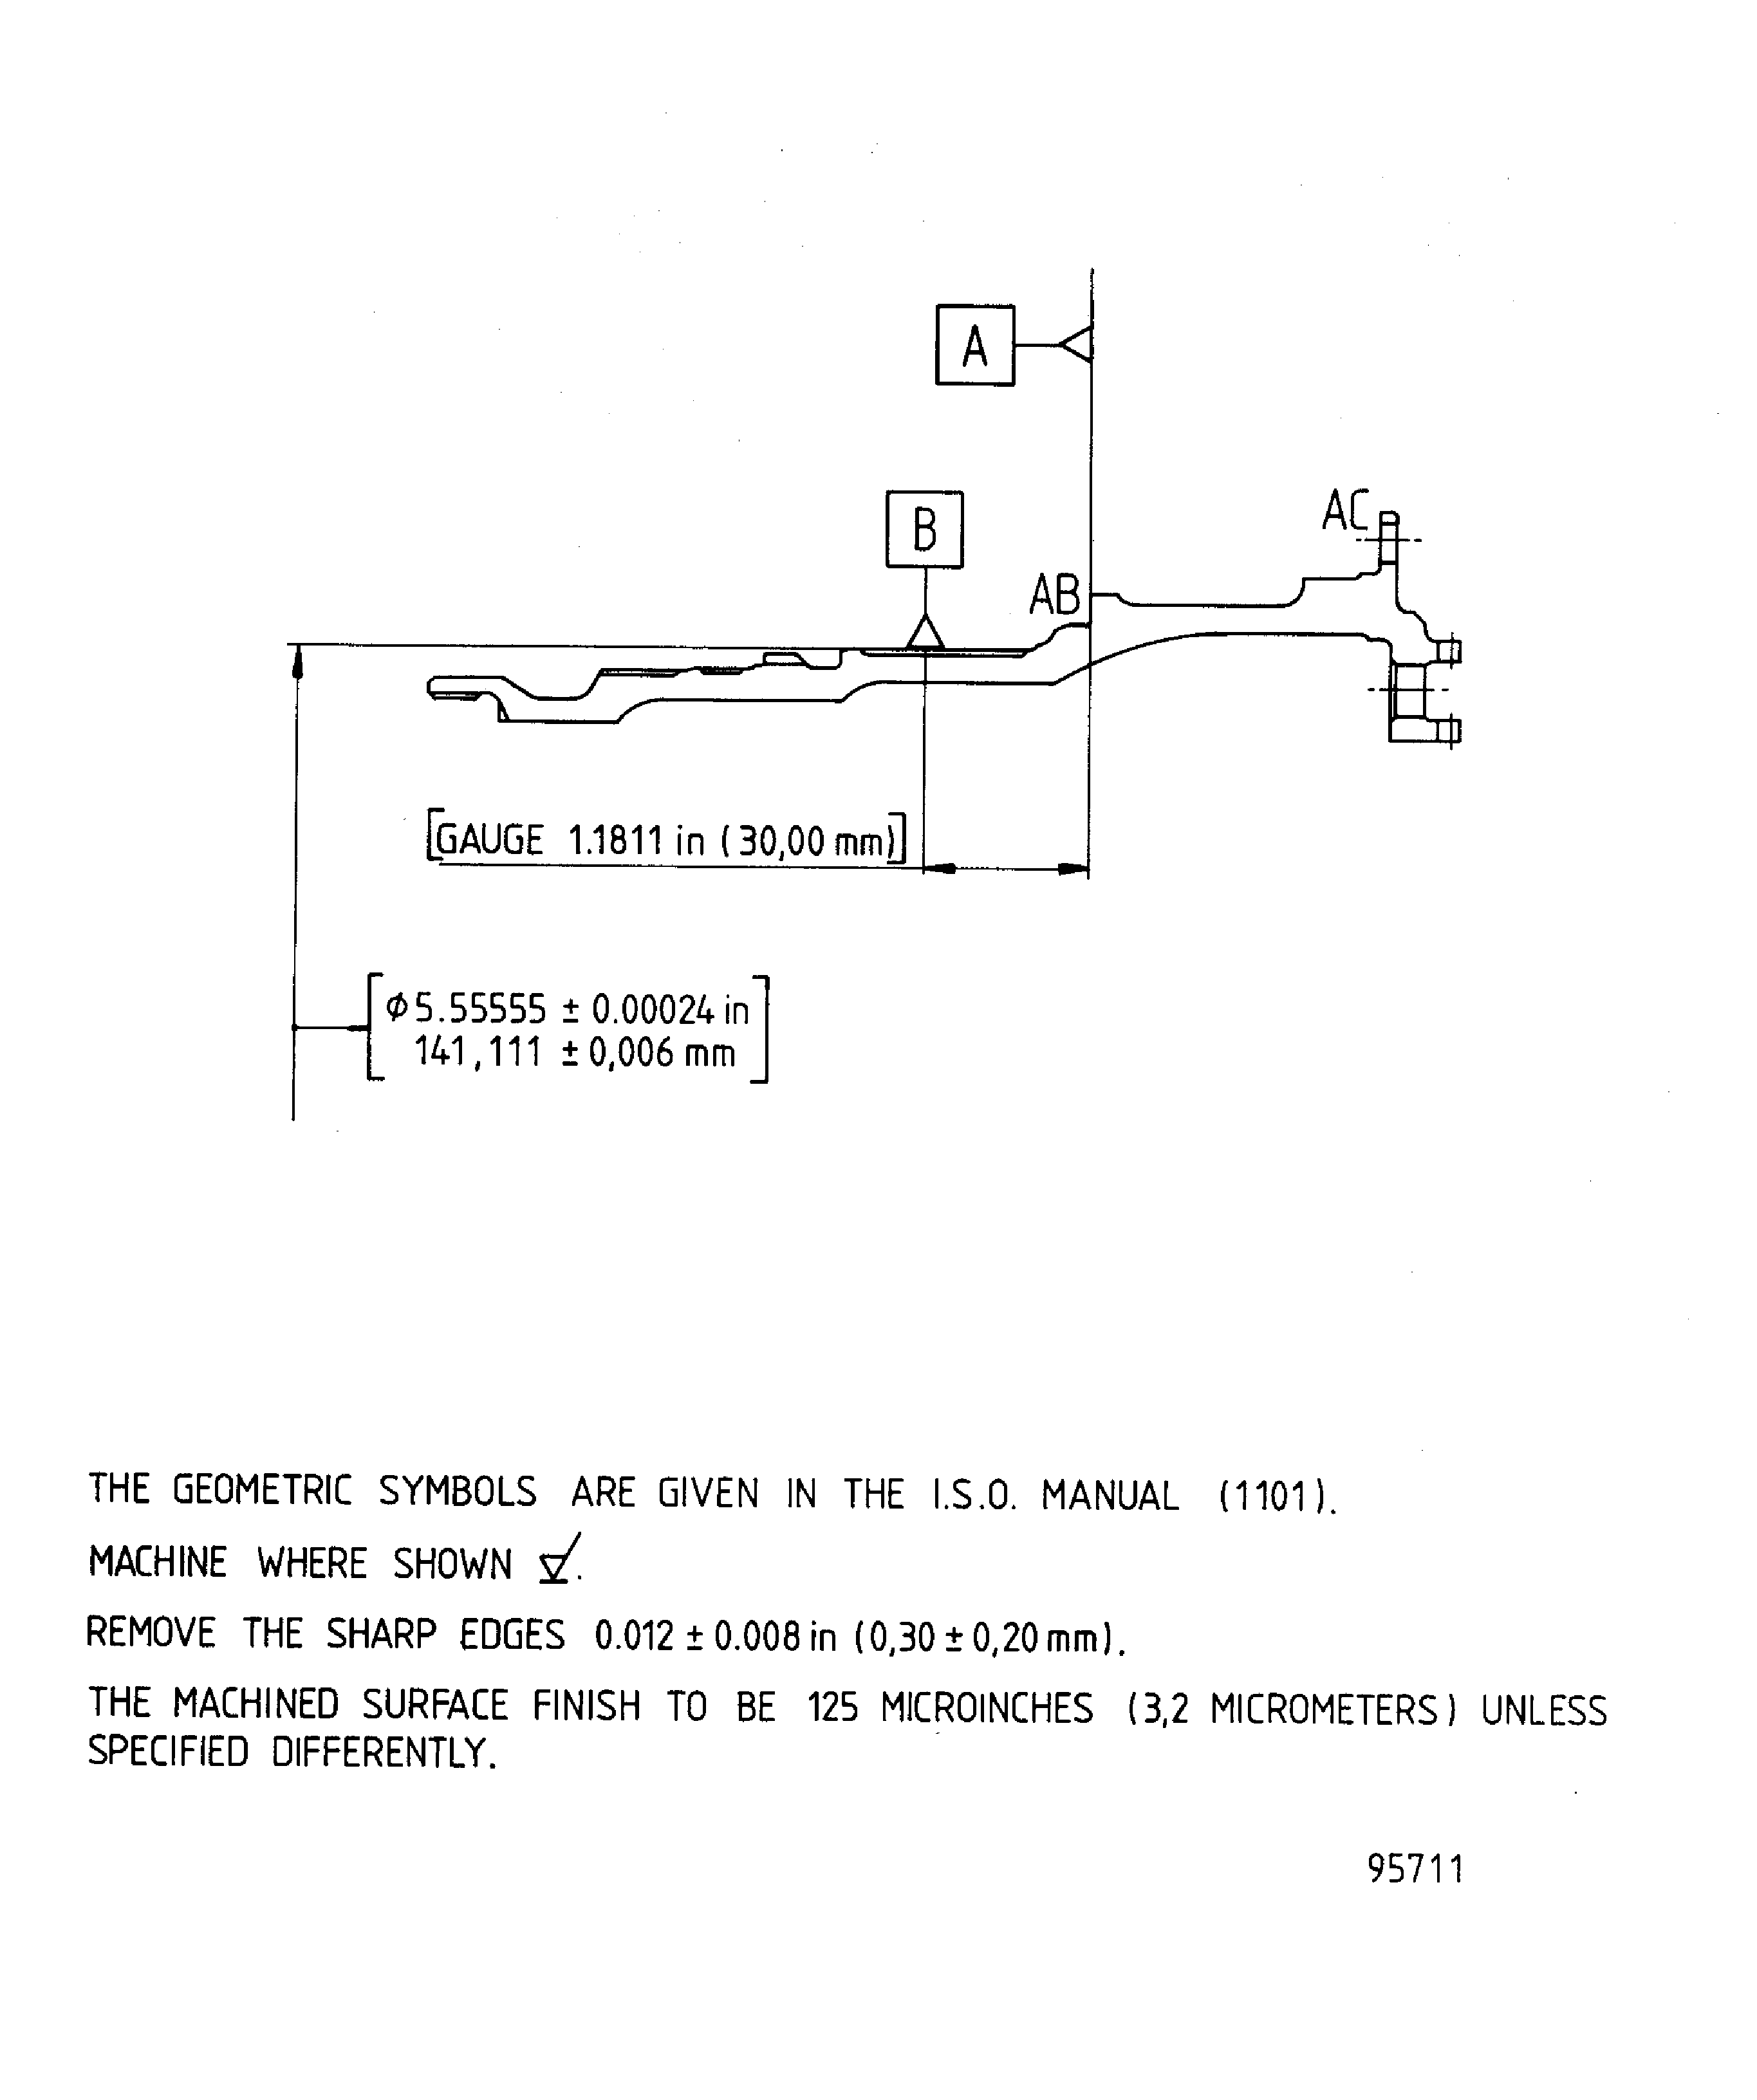
Figure: Repair Details and Dimensions
Repair Details and Dimensions

Figure: Repair Details and Dimensions
Repair Details and Dimensions

Figure: Repair Details and Dimensions
Repair Details and Dimensions

Figure: Repair Details and Dimensions
Repair Details and Dimensions

Figure: Repair Details and Dimensions
Repair Details and Dimensions

