Export Control
EAR Export Classification: Not subject to the EAR per 15 C.F.R. Chapter 1, Part 734.3(b)(3), except for the following Service Bulletins which are currently published as EAR Export Classification 9E991: SBE70-0992, SBE72-0483, SBE72-0580, SBE72-0588, SBE72-0640, SBE73-0209, SBE80-0024 and SBE80-0025.Copyright
© IAE International Aero Engines AG (2001, 2014 - 2021) The information contained in this document is the property of © IAE International Aero Engines AG and may not be copied or used for any purpose other than that for which it is supplied without the express written authority of © IAE International Aero Engines AG. (This does not preclude use by engine and aircraft operators for normal instructional, maintenance or overhaul purposes.).Applicability
All
Common Information
TASK 72-41-34-200-013-D00 HPC Stage 5 Unison Ring Connector Bridges - Examine, Inspection-013
General
This TASK gives the procedure for the inspection of the stage 5 bridge piece assemblies and/or bridging pieces.
Fig/item numbers in parentheses in the procedure agree with those used in the IPC. Only the primary Fig/item numbers are used. For the service bulletin alpha variants refer to the IPC.
The policy that is necessary for check is given in SPM TASK 70-20-01-200-501.
All the parts must be cleaned before any part is examined.
All the parts must be visually examined for damage, corrosion and wear. Any defects that are not identified in the procedure must be referred to IAE.
The procedure for those parts which must have a crack test is given in Step. Do the test before the part is visually examined.
Do not discard any part until you are sure there are no repairs available. Refer to the instructions in Repair before a discarded part is used again or oversize parts are installed.
Parts which should be discarded can be held although no repair is available. The repair of a discarded part could be shown to be necessary at a subsequent date.
All the parts must be examined to make sure that all the repairs have been completed satisfactorily.
The practices and processes referred to in the procedure by the TASK/SUBTASK numbers are in SPM.
References
Refer to SPM for data on these items:
Definition of Damage, SPM TASK 70-02-02-350-501,
Inspection of Parts, SPM TASK 70-20-01-200-501.
Some data on these items is contained in this TASK. For more data on these item refer to SPM:
Method of Testing for Crack Indications,
Chemical Processes,
Surface Protection.
Preliminary Requirements
Pre-Conditions
NONESupport Equipment
NONEConsumables, Materials and Expendables
NONESpares
NONESafety Requirements
NONEProcedure
Clean the parts. Refer to TASK 72-41-34-100-000 (CLEANING-000).
SUBTASK 72-41-34-230-130 Examine the Stage 5 Bridge Piece Assemblies and/or Bridging Pieces ((72-41-34,05-200) and (72-41-34,05-201)) for Cracks
Repair, VRS6198 TASK 72-41-34-300-008 (REPAIR-008) or Repair, VRS6689 TASK 72-41-34-300-060 (REPAIR-060).
More than in step B.(1).
Nicked.
Repair, VRS6198 TASK 72-41-34-300-008 (REPAIR-008) or Repair, VRS6689 TASK 72-41-34-300-060 (REPAIR-060).
More than in step C.(1).
Scored.
Repair, VRS6198 TASK 72-41-34-300-008 (REPAIR-008) or Repair, VRS6689 TASK 72-41-34-300-060 (REPAIR-060).
More than in step D.(1).
Scratched.
SUBTASK 72-41-34-220-410 Examine the Stage 5 Bridge Piece Assemblies and/or Bridging Pieces ((72-41-34,05-200) and (72-41-34,05-201)) Bodies at Location 1
Refer to Figure.
Repair, VRS6198 TASK 72-41-34-300-008 (REPAIR-008) or Repair, VRS6689 TASK 72-41-34-300-060 (REPAIR-060).
More than in Step.
Galled.
Repair, VRS6198 TASK 72-41-34-300-008 (REPAIR-008) or Repair, VRS6689 TASK 72-41-34-300-060 (REPAIR-060).
More than in Step.
Scratched.
More than in Step.
Wear on the bore.
SUBTASK 72-41-34-220-411 Examine the Stage 5 Bridge Piece Assemblies (72-41-34, 05-200) and (72-41-34, 05-201) Spacers at Location 2 (Pre SBE 72-0564, SBE 72-0564)
Refer to Figure.
Repair, VRS6202 TASK 72-41-34-300-027 (REPAIR-027).
More than in Step.
Wear on the bore.
Repair, VRS6202 TASK 72-41-34-300-027 (REPAIR-027).
If the bushes are missing.
Repair, VRS6202 TASK 72-41-34-300-027 (REPAIR-027).
More than in Step.
Scored.
SUBTASK 72-41-34-220-412 Examine the Stage 5 Bridge Piece Assemblies (72-41-34,05-200) Bushes at Location 3 (Pre SBE 72-0564)
More than in Step.
Scored.
SUBTASK 72-41-34-220-413 Examine the Stage 5 Bridge Piece Assemblies and/or Bridging Pieces ((72-41-34,05-200) and (72-41-34,05-201)) Bolt Holes at Location 4
Refer to Figure.
SUBTASK 72-41-34-220-414 Examine the Stage 5 Bridge Piece Assemblies (72-41-34,05-200) Dowels at Location 5 (Pre SBE 72-0564)
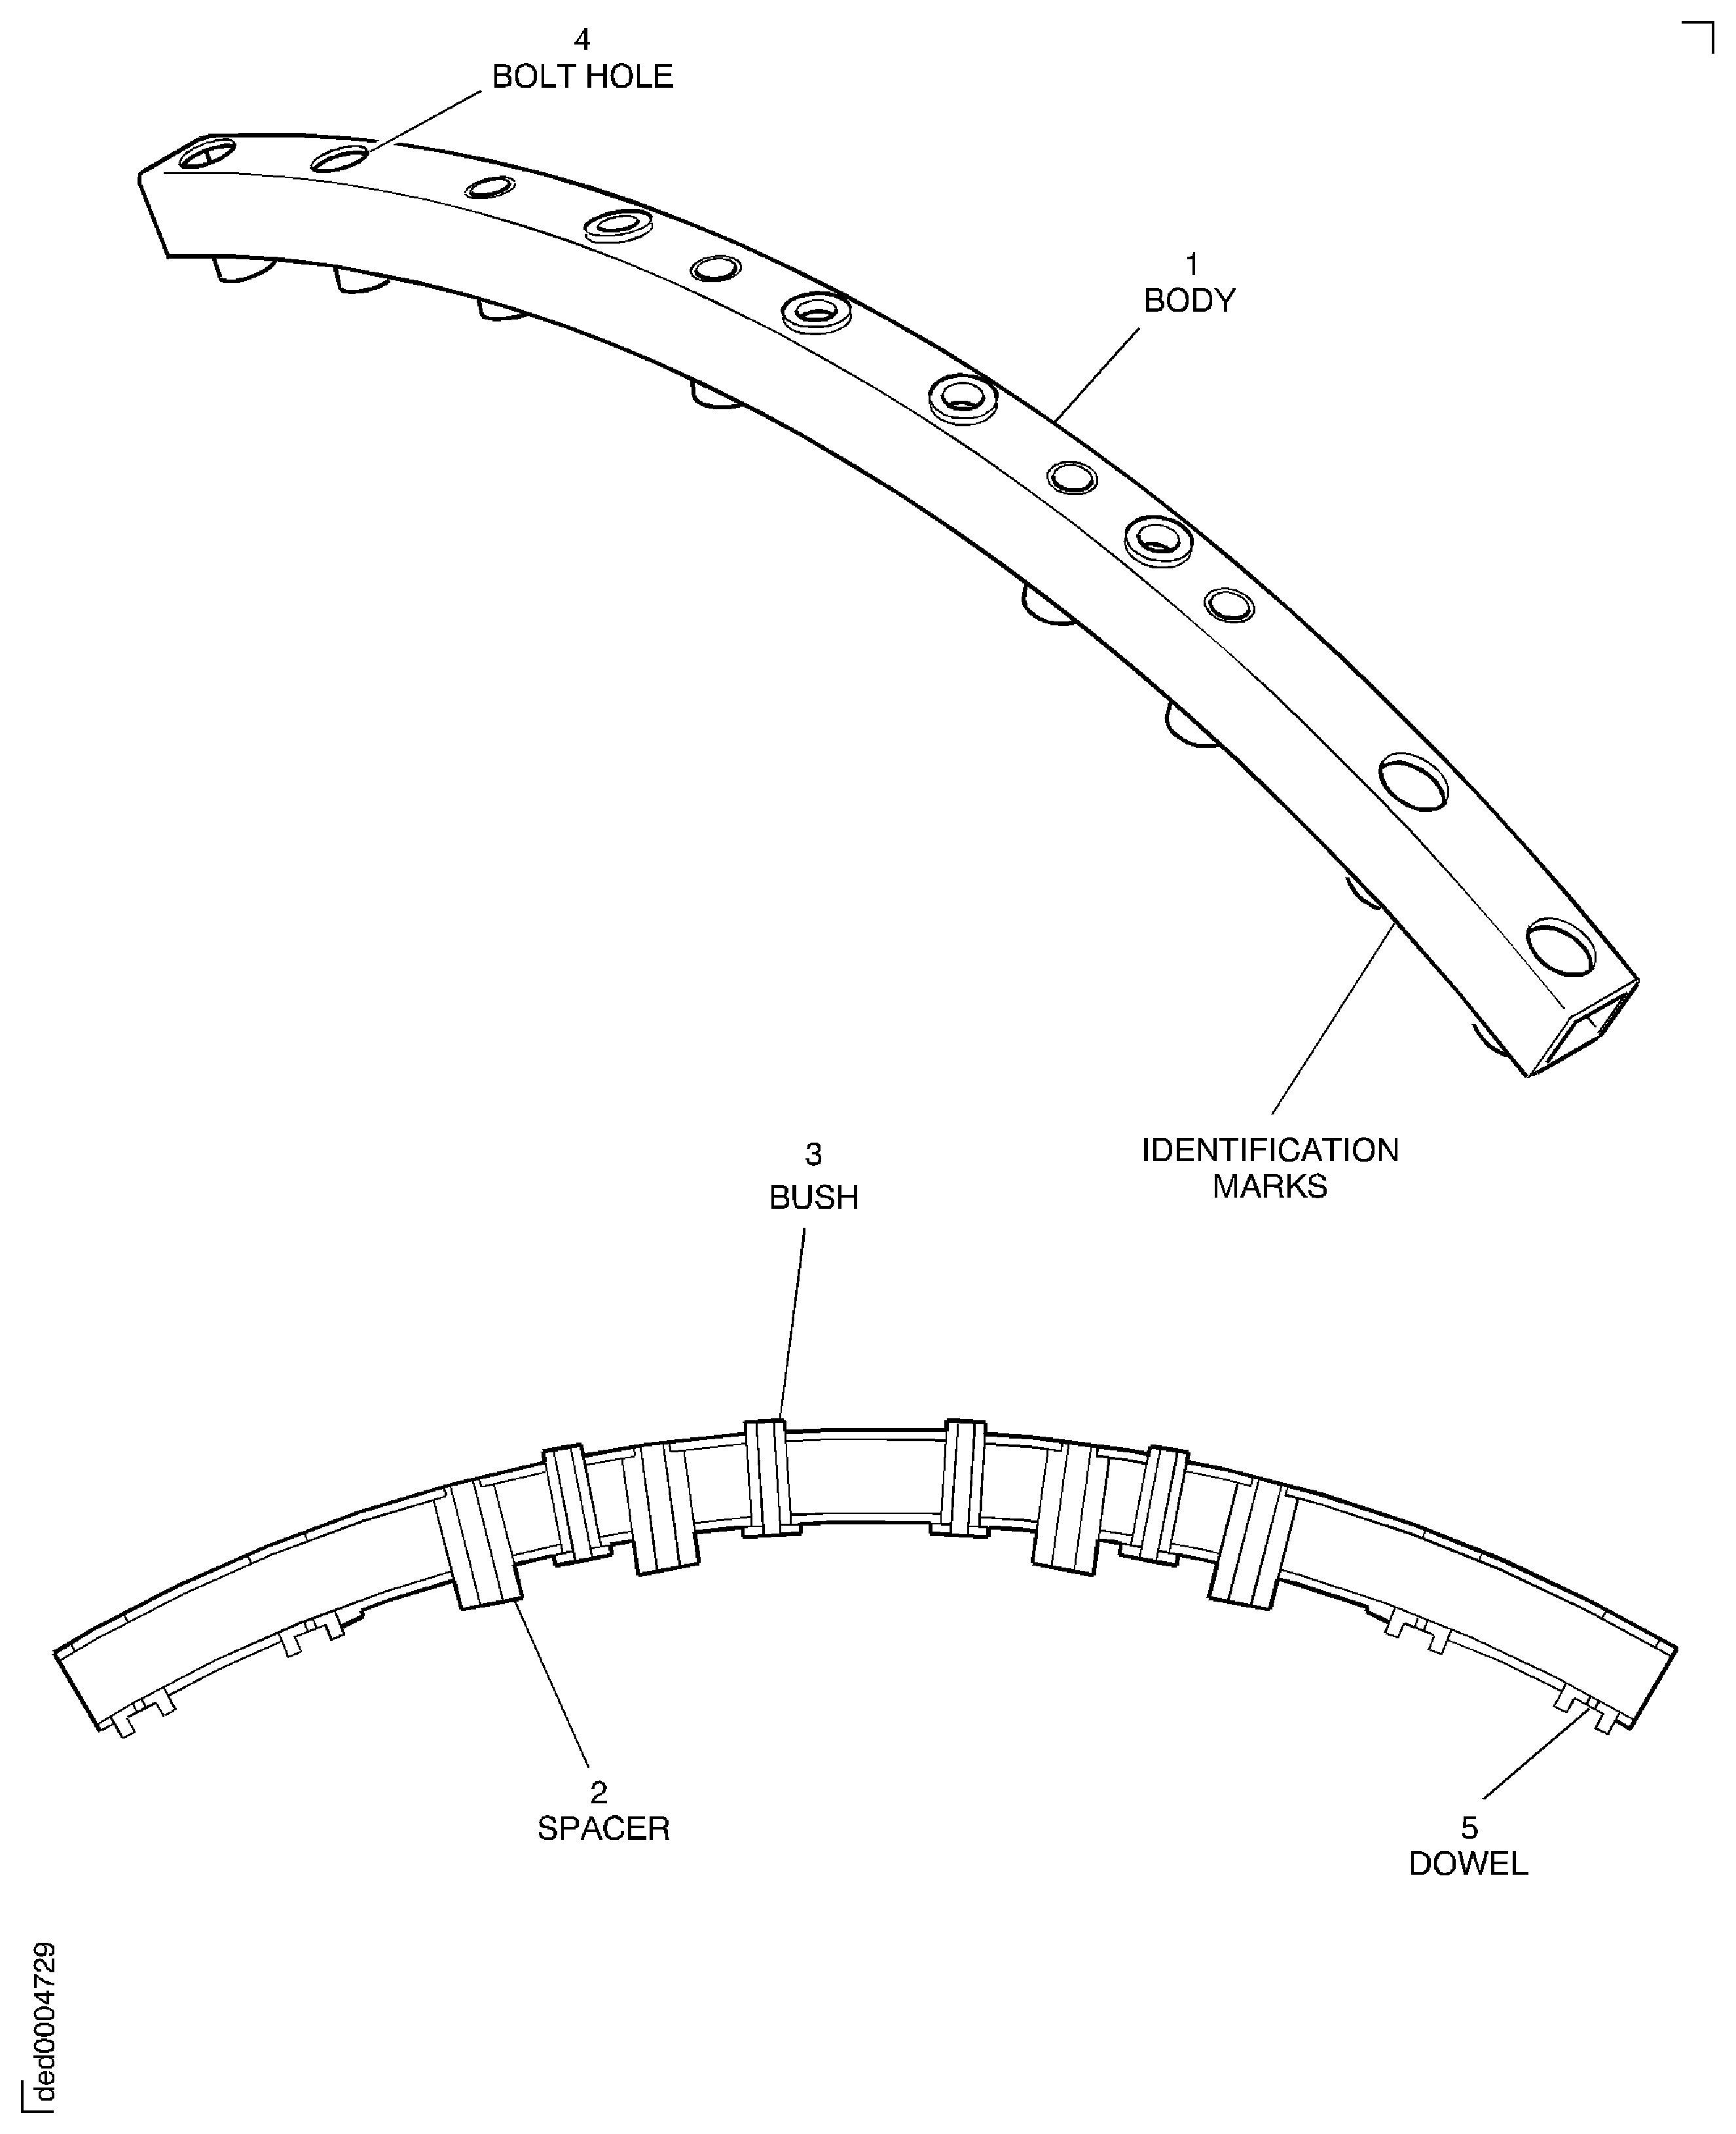
Figure: Stage 5 Bridge Piece Assembly - Inspection Locations
Stage 5 Bridge Piece Assembly - Inspection Locations

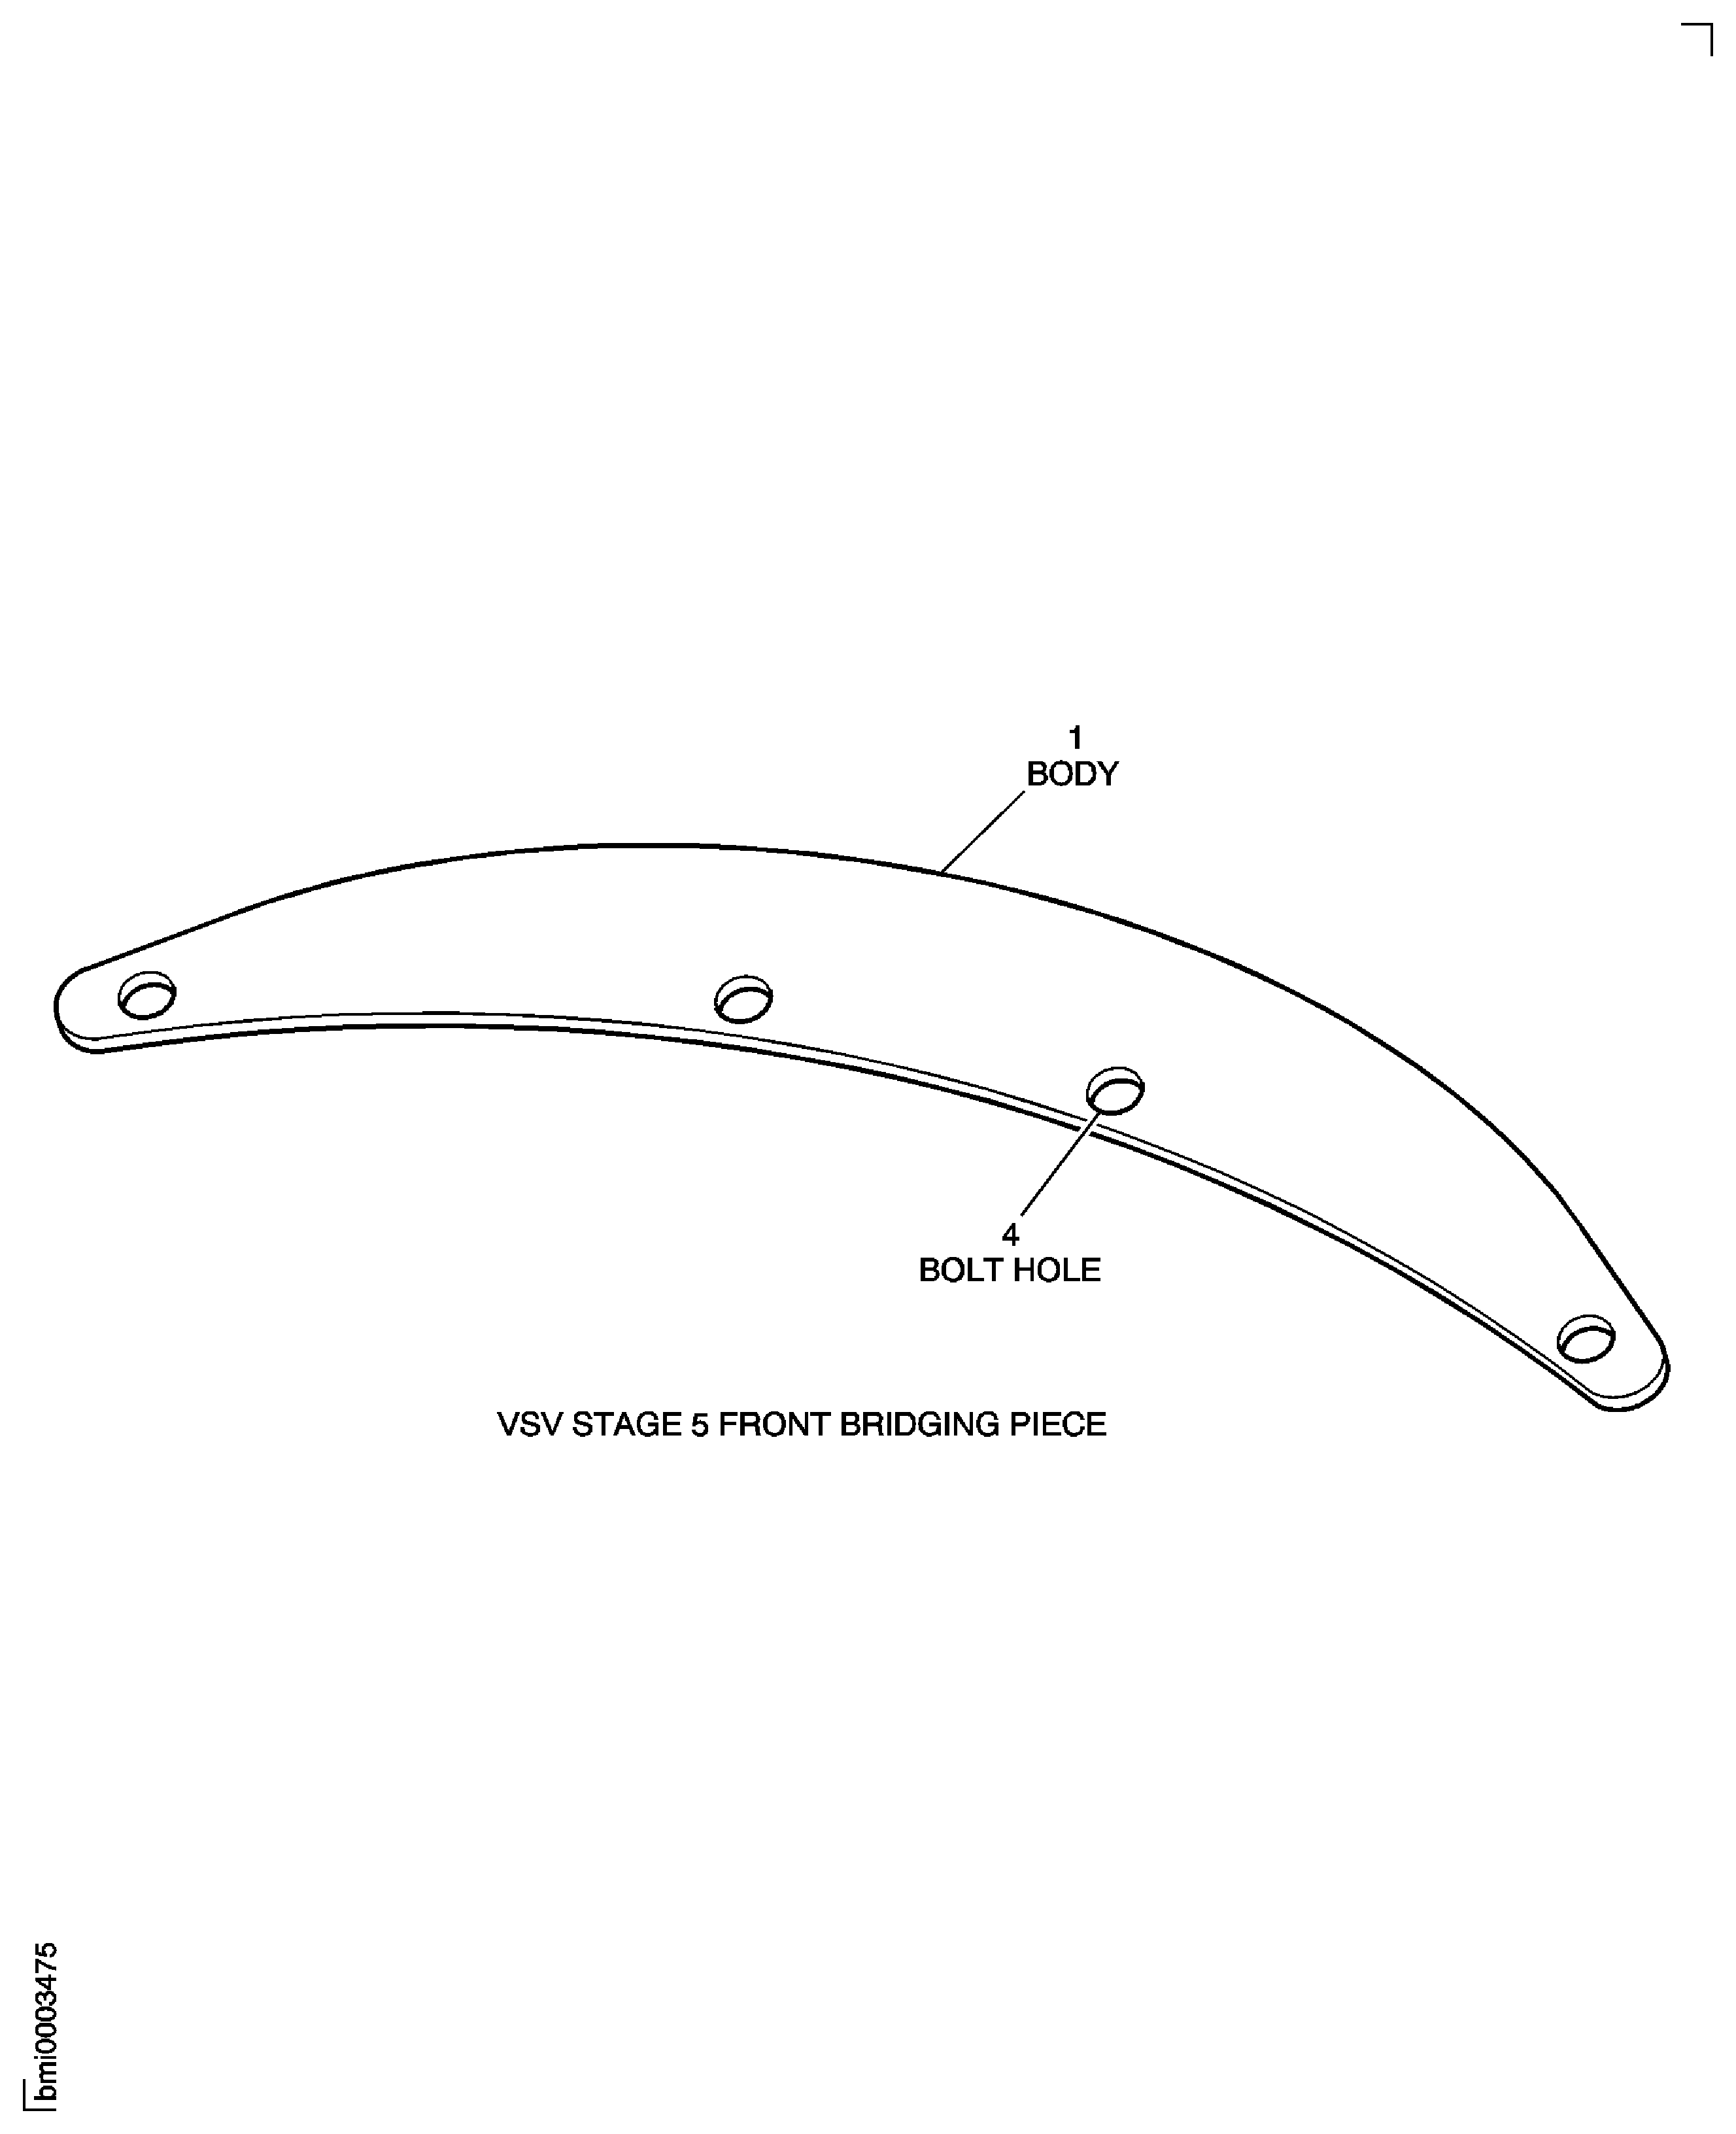
Figure: Stage 5 Front Bridging Piece - Inspection Locations
Stage 5 Front Bridging Piece - Inspection Locations

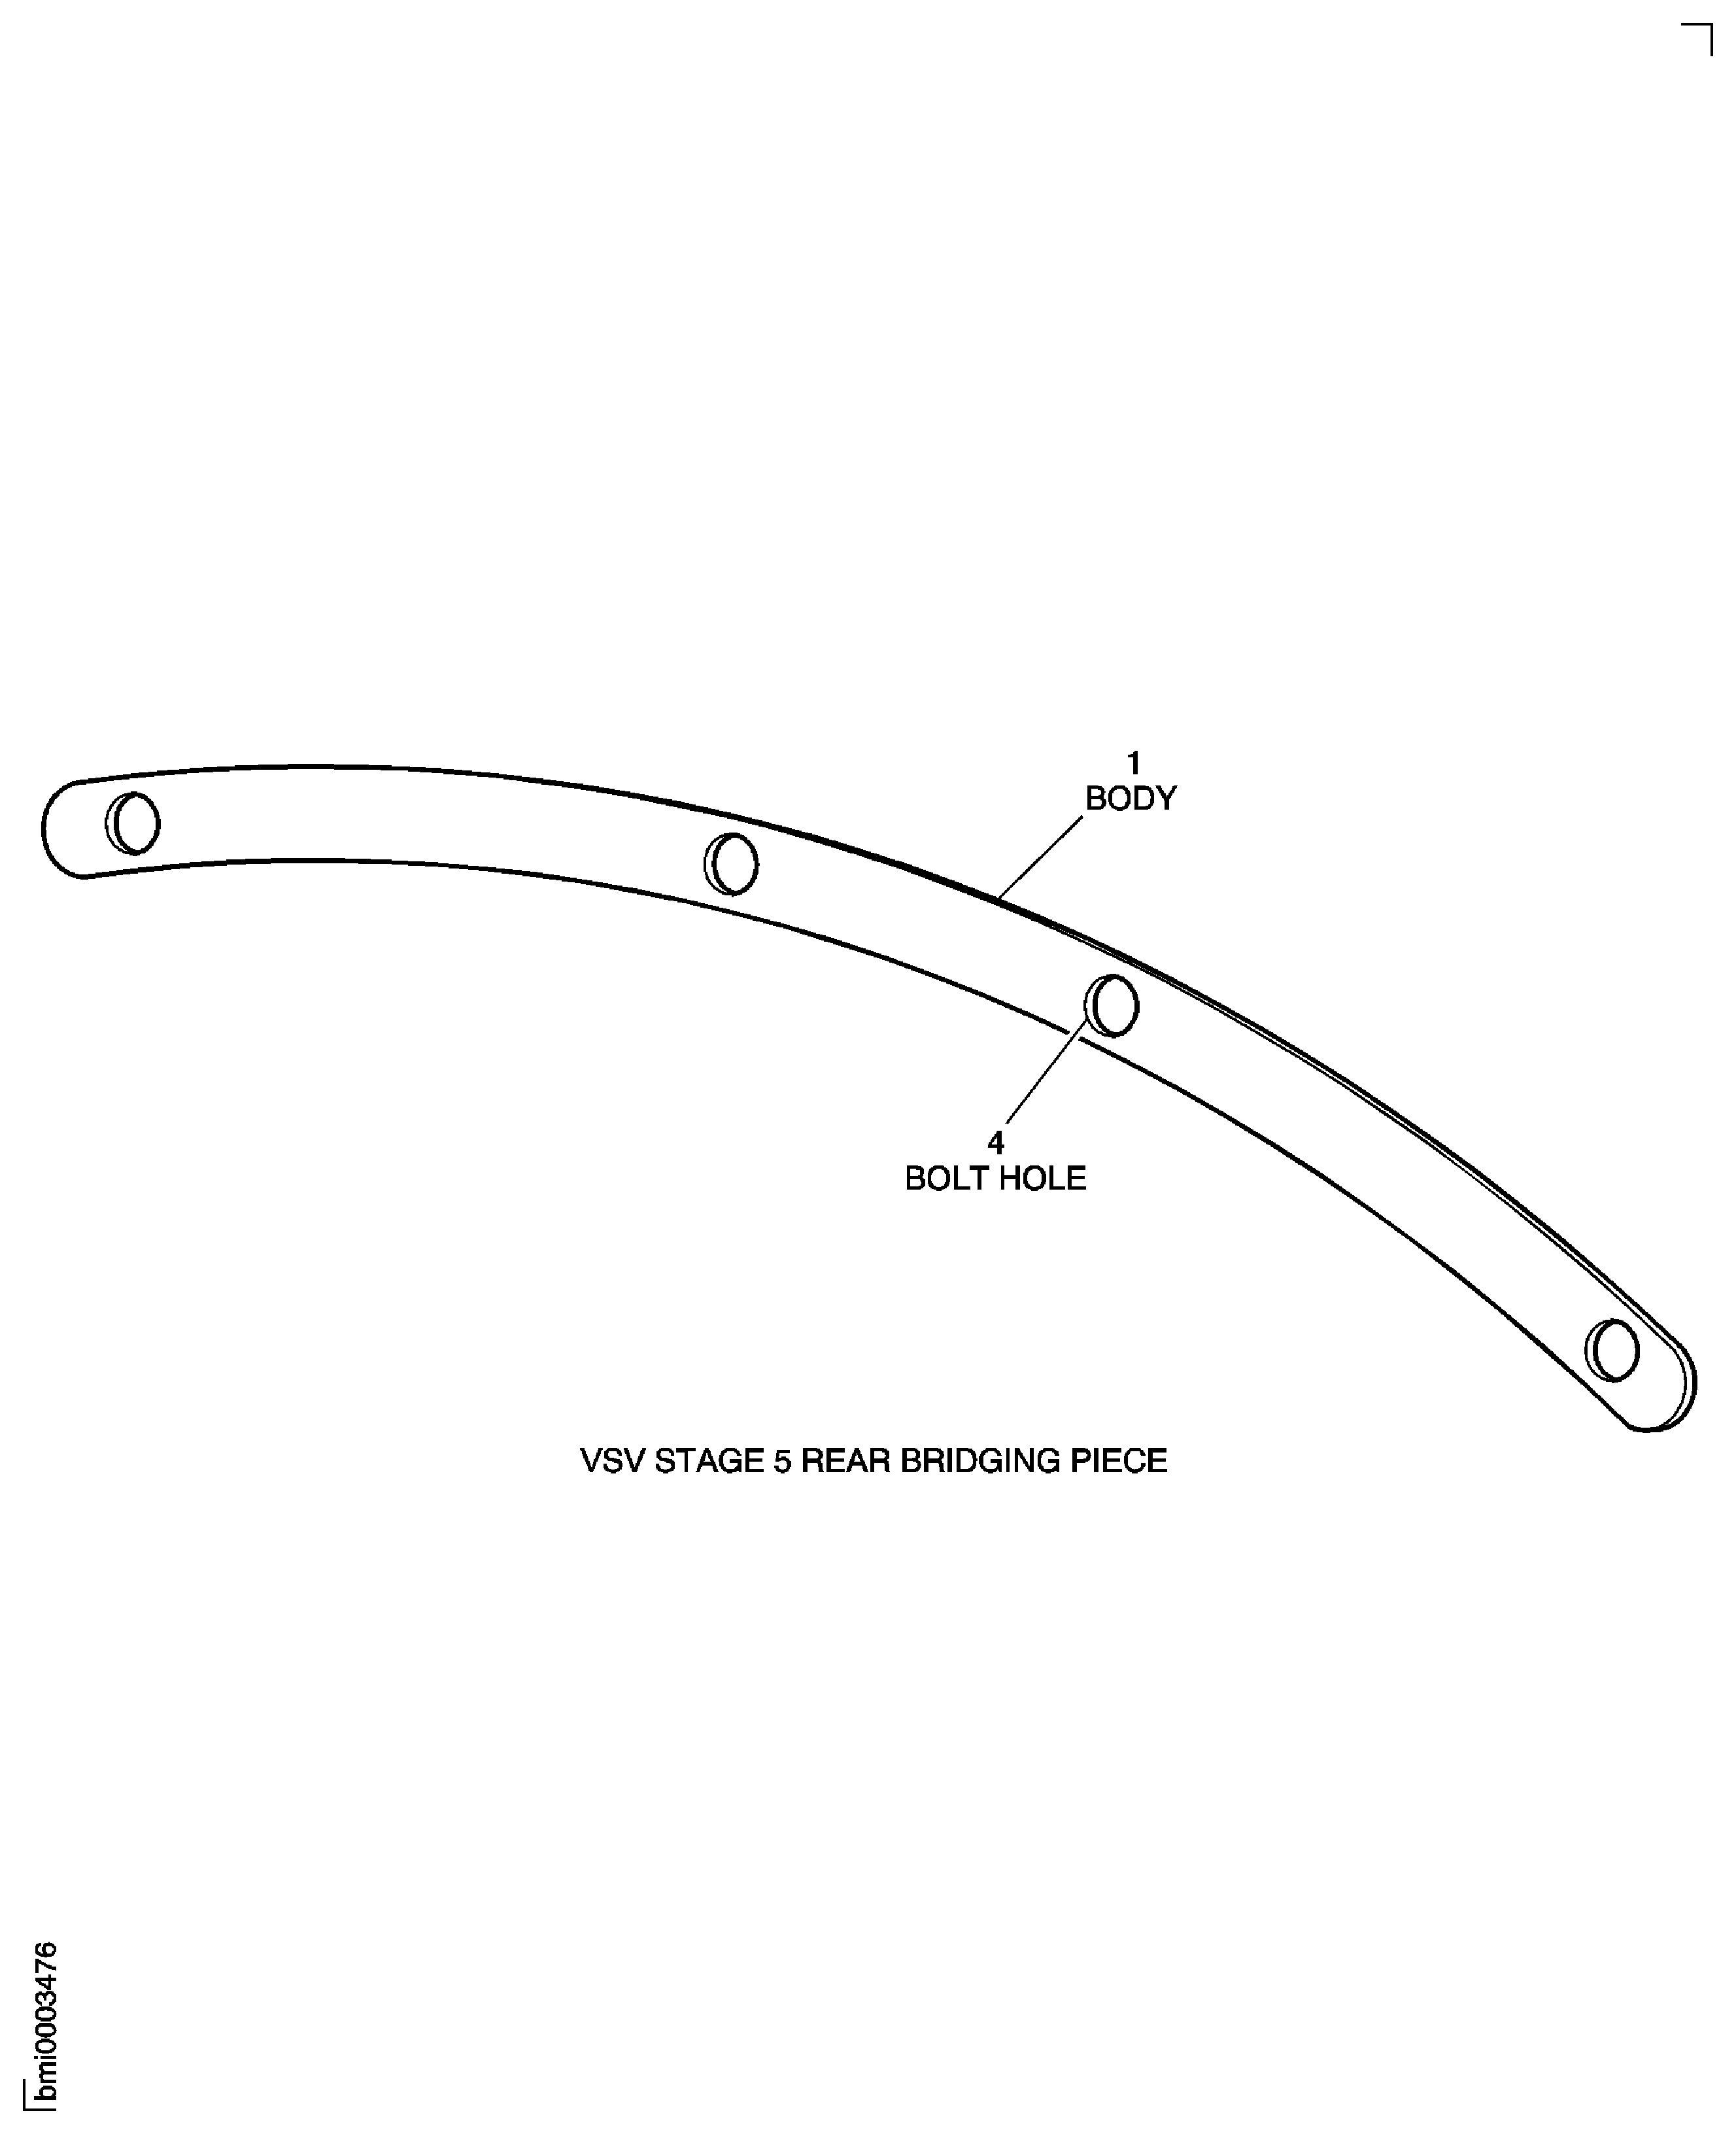
Figure: Stage 5 Rear Bridging Piece - Inspection Locations
Stage 5 Rear Bridging Piece - Inspection Locations

