Export Control
EAR Export Classification: Not subject to the EAR per 15 C.F.R. Chapter 1, Part 734.3(b)(3), except for the following Service Bulletins which are currently published as EAR Export Classification 9E991: SBE70-0992, SBE72-0483, SBE72-0580, SBE72-0588, SBE72-0640, SBE73-0209, SBE80-0024 and SBE80-0025.Copyright
© IAE International Aero Engines AG (2001, 2014 - 2021) The information contained in this document is the property of © IAE International Aero Engines AG and may not be copied or used for any purpose other than that for which it is supplied without the express written authority of © IAE International Aero Engines AG. (This does not preclude use by engine and aircraft operators for normal instructional, maintenance or overhaul purposes.).Applicability
All
Common Information
TASK 72-42-33-300-024 No. 4 Bearing Front Seal Support - Restore The Front Flange Inner Diameter, Repair-024 (VRS3796)
Material of component
PART IDENT | SYMBOL | MATERIAL |
|---|---|---|
No. 4 bearing seal support assembly | - | PWA 1264 Titanium alloy |
General
None
Preliminary Requirements
Pre-Conditions
| Action/Condition | Data Module/Technical Publication |
|---|---|
| Make sure that all the cleaning and inspection procedures are done before this repair. |
Support Equipment
| Name | Manufacturer | Part Number / Identification | Quantity | Remark |
|---|---|---|---|---|
| Workshop inspection equipment | LOCAL | Workshop inspection equipment | ||
| Magnifying Glass, 4x | LOCAL | Magnifying Glass, 4x | or greater |
Consumables, Materials and Expendables
NONESpares
NONESafety Requirements
NONEProcedure
Refer to SPM TASK 70-32-07-100-501.
Remove the coating from the inner diameter of the seal support assembly.
Refer to SPM TASK 70-32-06-320-501.
Remove the wear on the inner diameter of the seal support assembly.
SUBTASK 72-42-33-320-075 Machine the Front Flange Inner Diameter of the No. 4 Bearing Seal Support Assembly Before Coat
Refer to SPM TASK 70-11-03-300-503.
Clean the seal support assembly.
SUBTASK 72-42-33-110-089 Clean the No. 4 Bearing Seal Support Assembly
Do a fluorescent penetrant inspection of the seal support assembly repair area by TASK 72-42-33-200-000 and applicable part number.
SUBTASK 72-42-33-230-057 Examine the No. 4 Bearing Seal Support Assembly
Refer to SPM TASK 70-34-18-380-501.
Mask areas not to be coated.
Grit blast out of the area shown is not permitted. Apply a mask or maskants.
Prepare the part for coat.
SUBTASK 72-42-33-340-001 Restore the Front Flange Inner Diameter of the No. 4 Bearing Seal Support Assembly by Coat
Remove the remaining tape by SPM TASK 70-11-26-300-503.
Clean the seal support assembly.
SUBTASK 72-42-33-110-090 Clean the No. 4 Bearing Seal Support Assembly
If the measured diameter in a free condition is not satisfactory, a held condition is permitted.
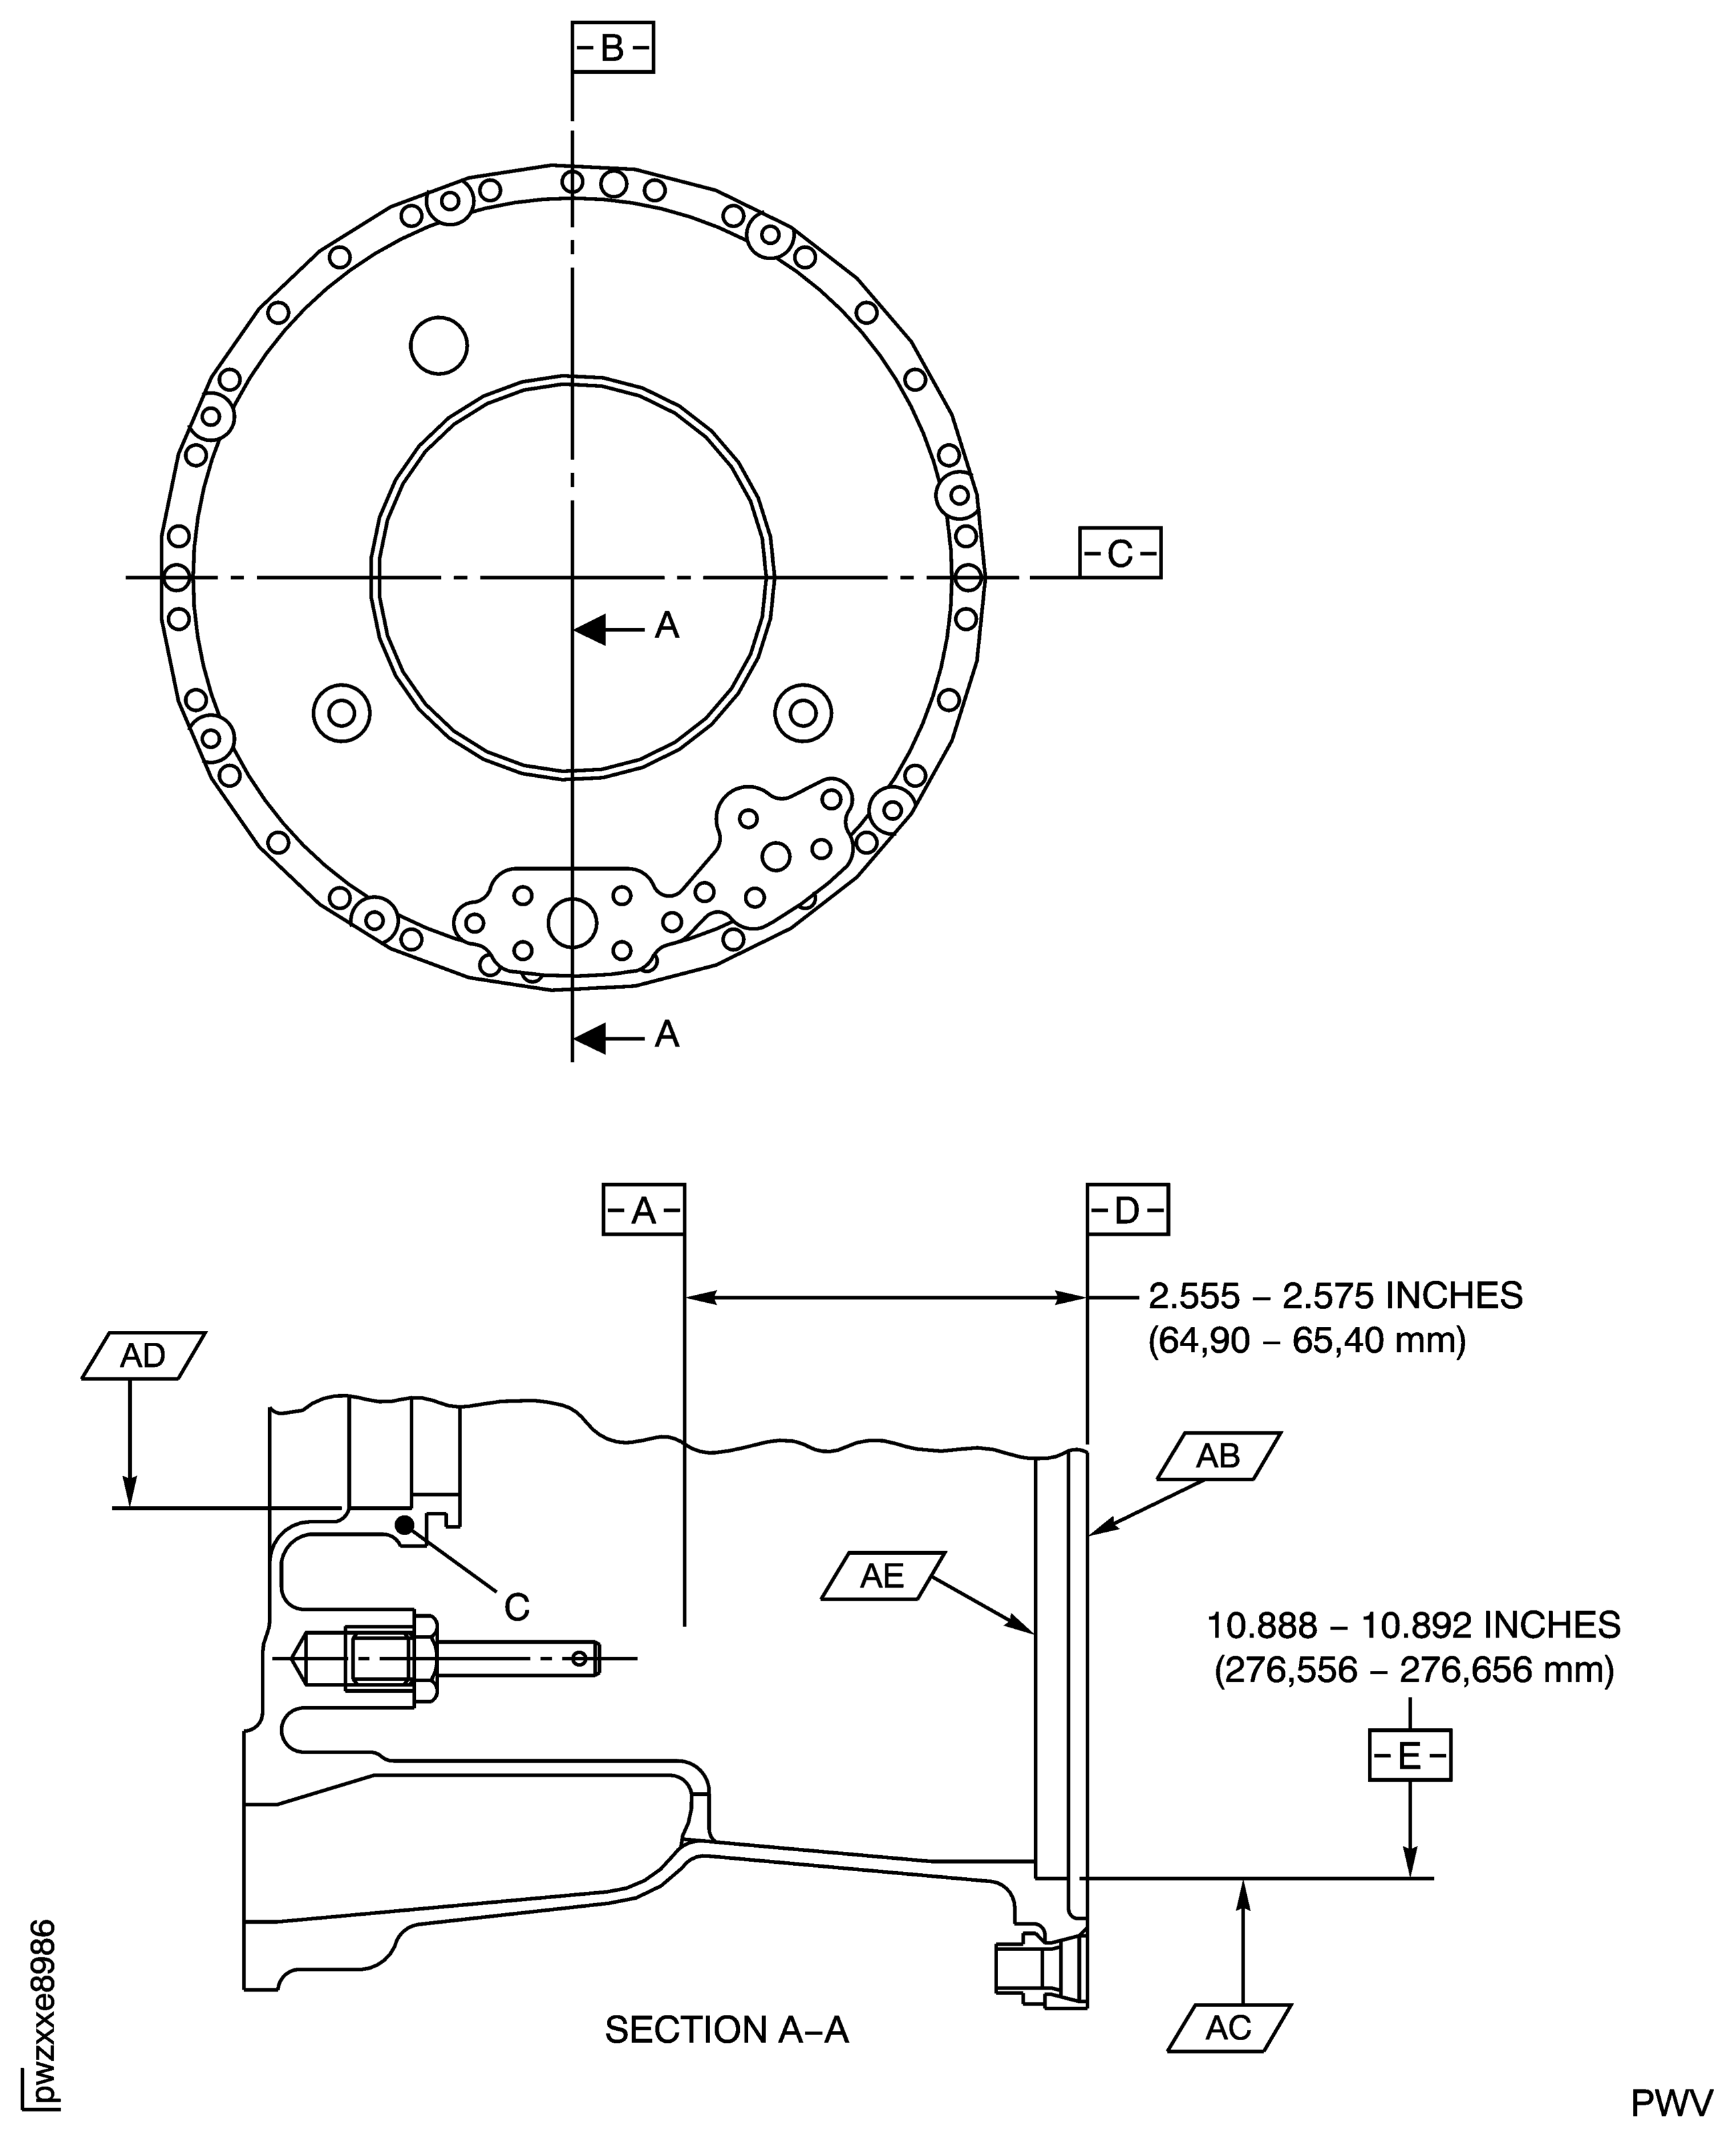
All dimensions are applicable when Surface AB is flat to a maximum of 0.002 in. (0.05 mm), Diameter AC keeps a clearance envelope of 10.887 in. (276.530 mm) and Diameter AD keeps a clearance envelope of 6.050 in. (153.67 mm) in a free or held condition.
Hold the seal support assembly only on Surface AB and AE and Diameters AC and AD.
NOTE
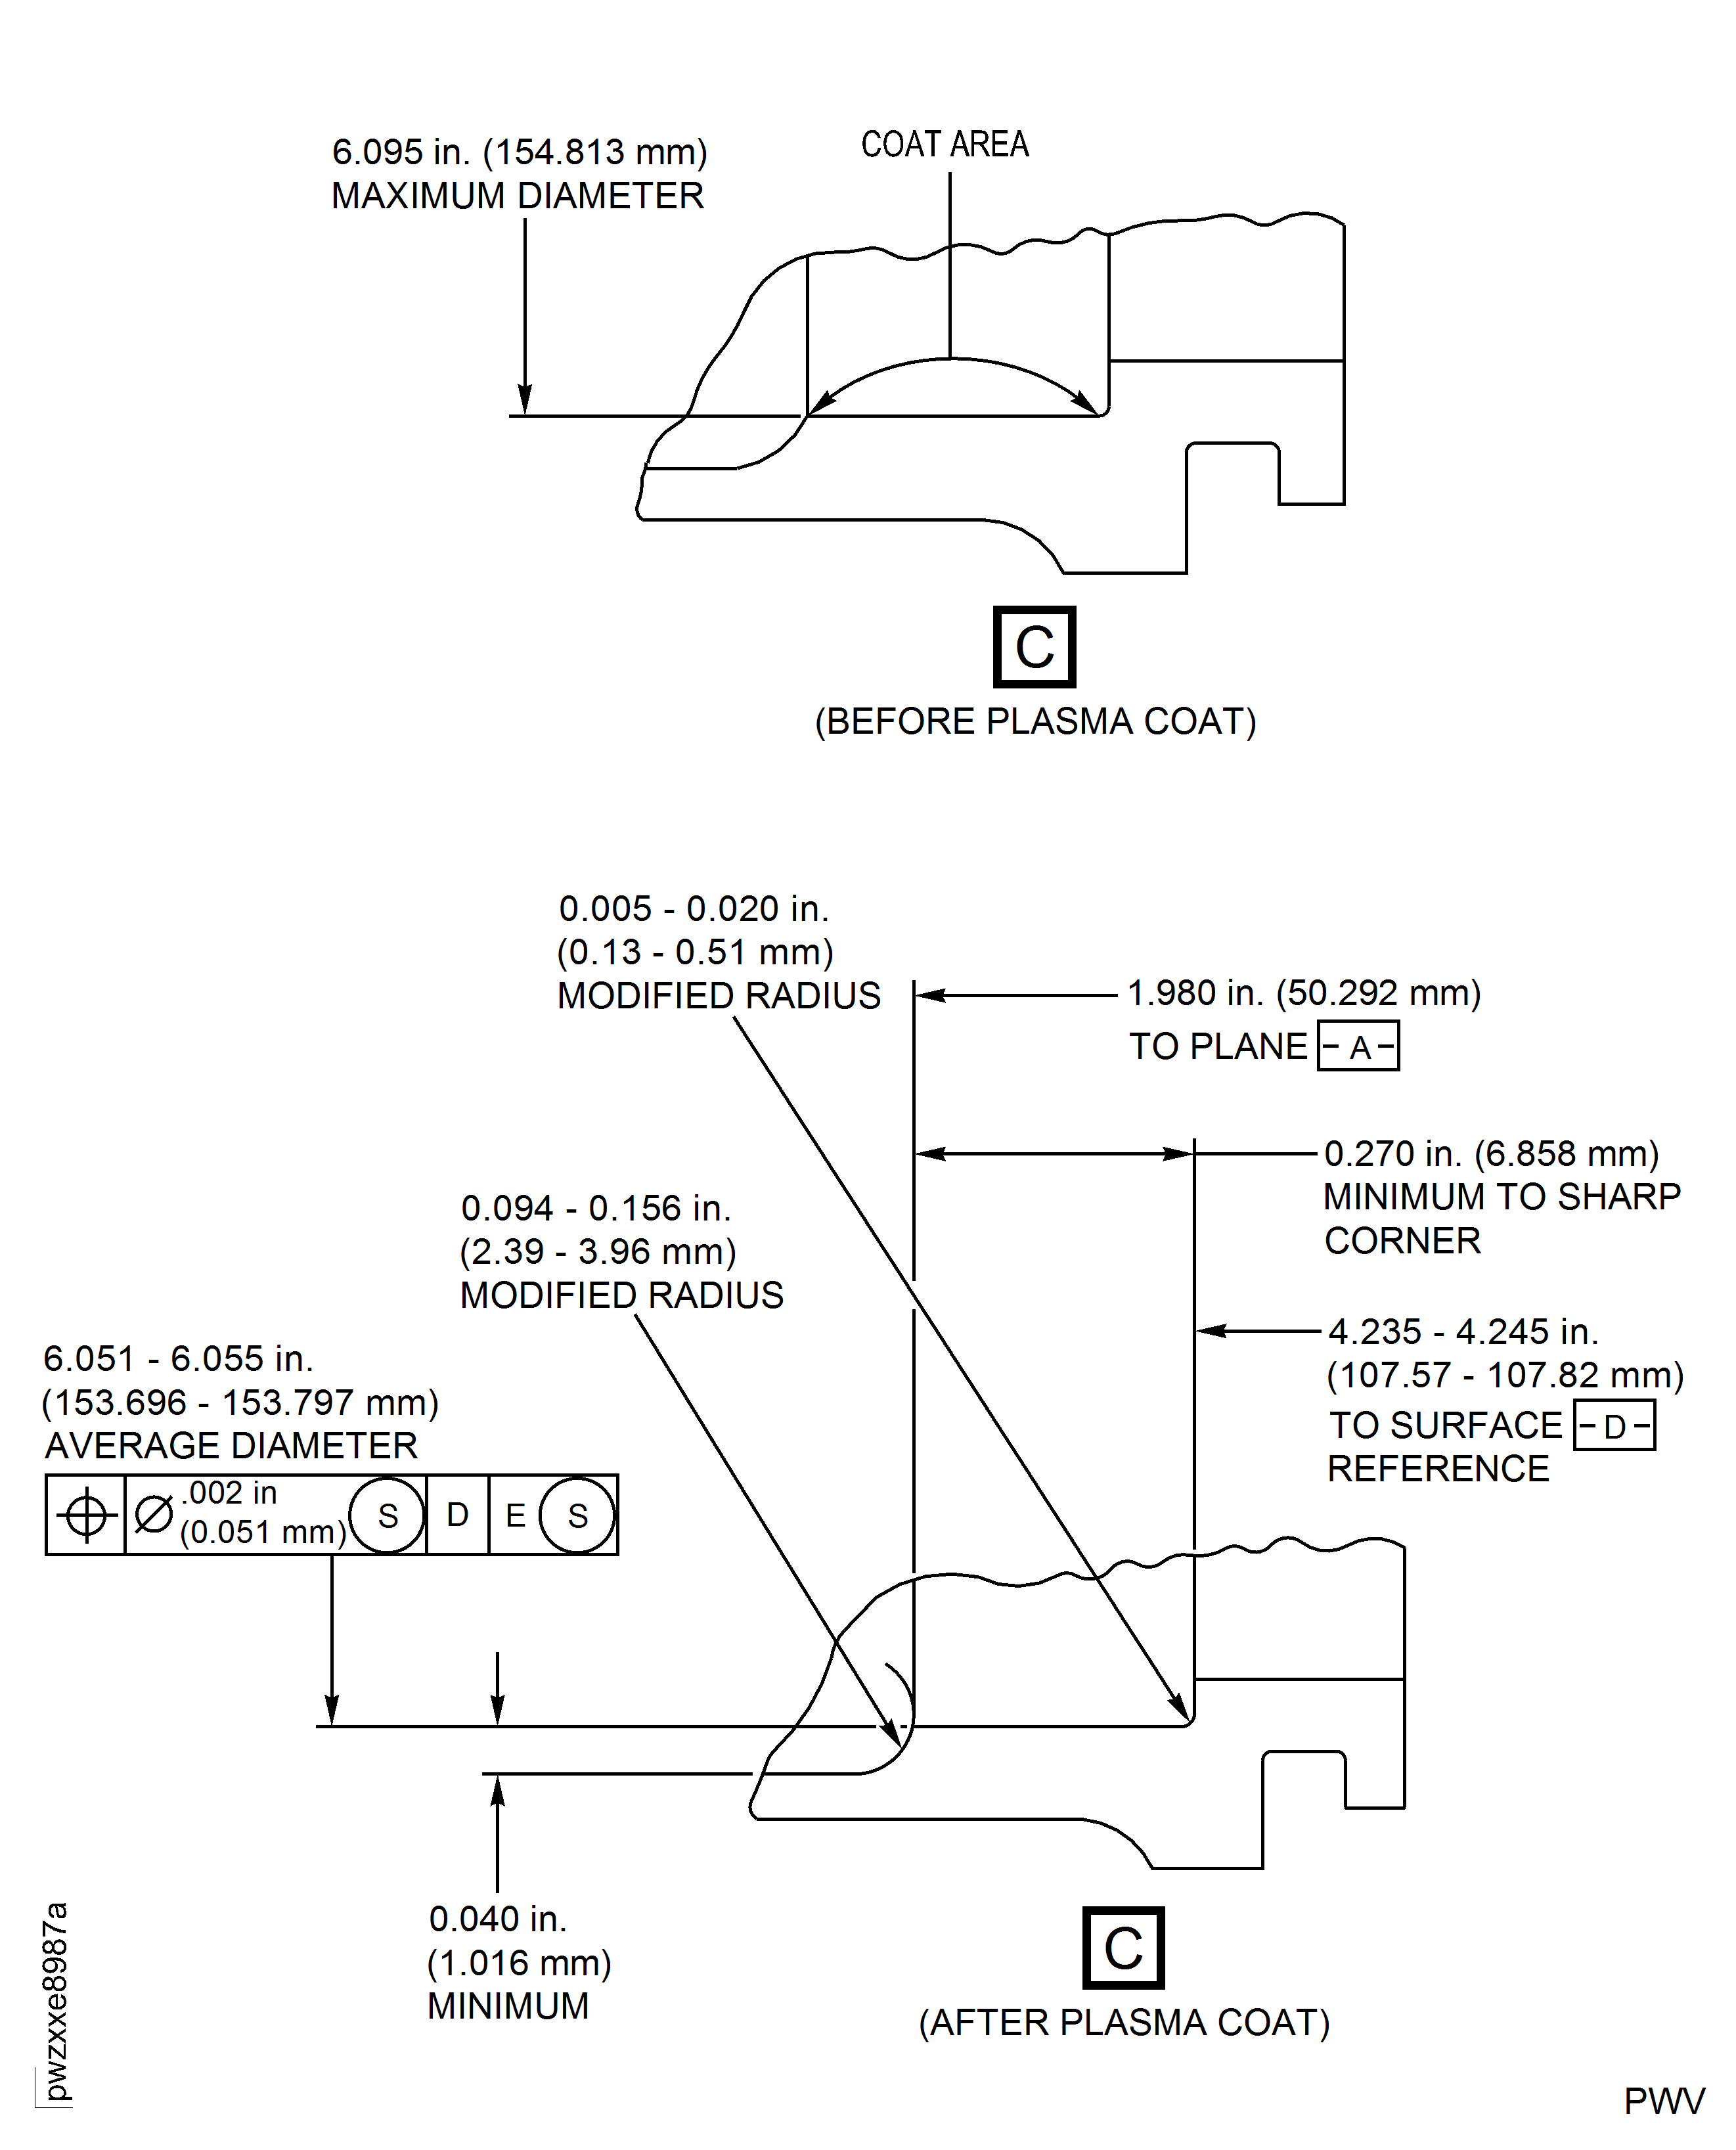
The thickness of the coat after finish machine must be 0.003 in. to 0.020 in. (0.08 mm to 0.51 mm) all around.
Machine the inner diameter of the support after coat. Refer to SPM TASK 70-32-07-100-501.
SUBTASK 72-42-33-320-076 Machine the Front Flange Inner Diameter of the No. 4 Bearing Seal Support Assembly
Refer to TASK 72-42-33-200-000 (INSPECTION-000).
Use a 4X (or more) magnifying glass to do a visual inspection of the coated area to examine for cracks and adhesion.
Examine the seal support assembly after coat and finish machine operation.
SUBTASK 72-42-33-220-112 Examine the Repair
Make a permanent mark by the procedure given in SPM TASK 70-09-00-400-501. Remove high material caused by marking the number.
Mark VRS3796 on the repaired No. 4 bearing seal support adjacent to the part number.
SUBTASK 72-42-33-350-085 Identify the Repair
Figure: Repair Details and Dimensions
Sheet 1

Figure: Repair Details and Dimensions
Sheet 2

