Export Control
EAR Export Classification: Not subject to the EAR per 15 C.F.R. Chapter 1, Part 734.3(b)(3), except for the following Service Bulletins which are currently published as EAR Export Classification 9E991: SBE70-0992, SBE72-0483, SBE72-0580, SBE72-0588, SBE72-0640, SBE73-0209, SBE80-0024 and SBE80-0025.Copyright
© IAE International Aero Engines AG (2001, 2014 - 2021) The information contained in this document is the property of © IAE International Aero Engines AG and may not be copied or used for any purpose other than that for which it is supplied without the express written authority of © IAE International Aero Engines AG. (This does not preclude use by engine and aircraft operators for normal instructional, maintenance or overhaul purposes.).Applicability
All
Common Information
TASK 72-43-20-300-016 No. 4 Bearing Face Seal - Repair Anti-Rotation Pin Slots, Repair-016 (VRS3675)
General
Do an inspection of the bearing face seal by TASK 72-43-20-200-002, INSPECTION.
Price and availability - refer to IAE
Make sure that the cleaning and inspection procedures are done before this repair.
Preliminary Requirements
Pre-Conditions
NONESupport Equipment
NONEConsumables, Materials and Expendables
| Name | Manufacturer | Part Number / Identification | Quantity | Remark |
|---|---|---|---|---|
| CoMat 03-392 WELDING WIRE | LOCAL | CoMat 03-392 |
Spares
| Name | Manufacturer | Part Number / Identification | Quantity | Remark |
|---|---|---|---|---|
| Bushing | 2A3857 | N/A | ||
| P-Sized Bushing | VRS3675-P1 | N/A | ||
| P-Sized Bushing | VRS3675-P2 | N/A | ||
| P-Sized Bushing | VRS3675-P3 | N/A | ||
| Rivet | (XL) AN 123488 | 2 (for each bushing) |
Safety Requirements
NONEProcedure
Refer to the SPM TASK 70-39-03-390-501.
Do an inspection of the rivet holes.
SUBTASK 72-43-20-320-062 Remove Bushings
NOTE
If this repair has been done before remove bushings as follows:Refer to Index in Figure.
Use a clean austenitic stainless steel brush or silicon carbide abrasives to remove oxides from the repair area for welding.
Refer to the SPM TASK 70-11-26-300-503.
Clean the repair area.
Refer to the SPM TASK 70-31-13-310-501. Use CoMat 03-392 WELDING WIRE and the Manual Gas Tungsten Arc (GTAW-MA) method.
Weld the rivet holes.
Refer to the SPM TASK 70-37-07-370-501.
Do a stress relieve of the face seal assembly.
Refer to the SPM TASK 70-23-01-230-501 or SPM TASK 70-23-02-230-501.
Do a fluorescent penetrant inspection of the face seal assembly.
Refer to Figure.
Do a dimensional inspection of the carbon interface bore.
Refer to the SPM TASK 70-11-26-300-503.
Clean the repair area.
If necessary, repair the rivet holes.
SUBTASK 72-43-20-350-072 If the Rivet Holes must be Restored to Repair Wear or to get the Correct Position of the new Bushings, do the Following
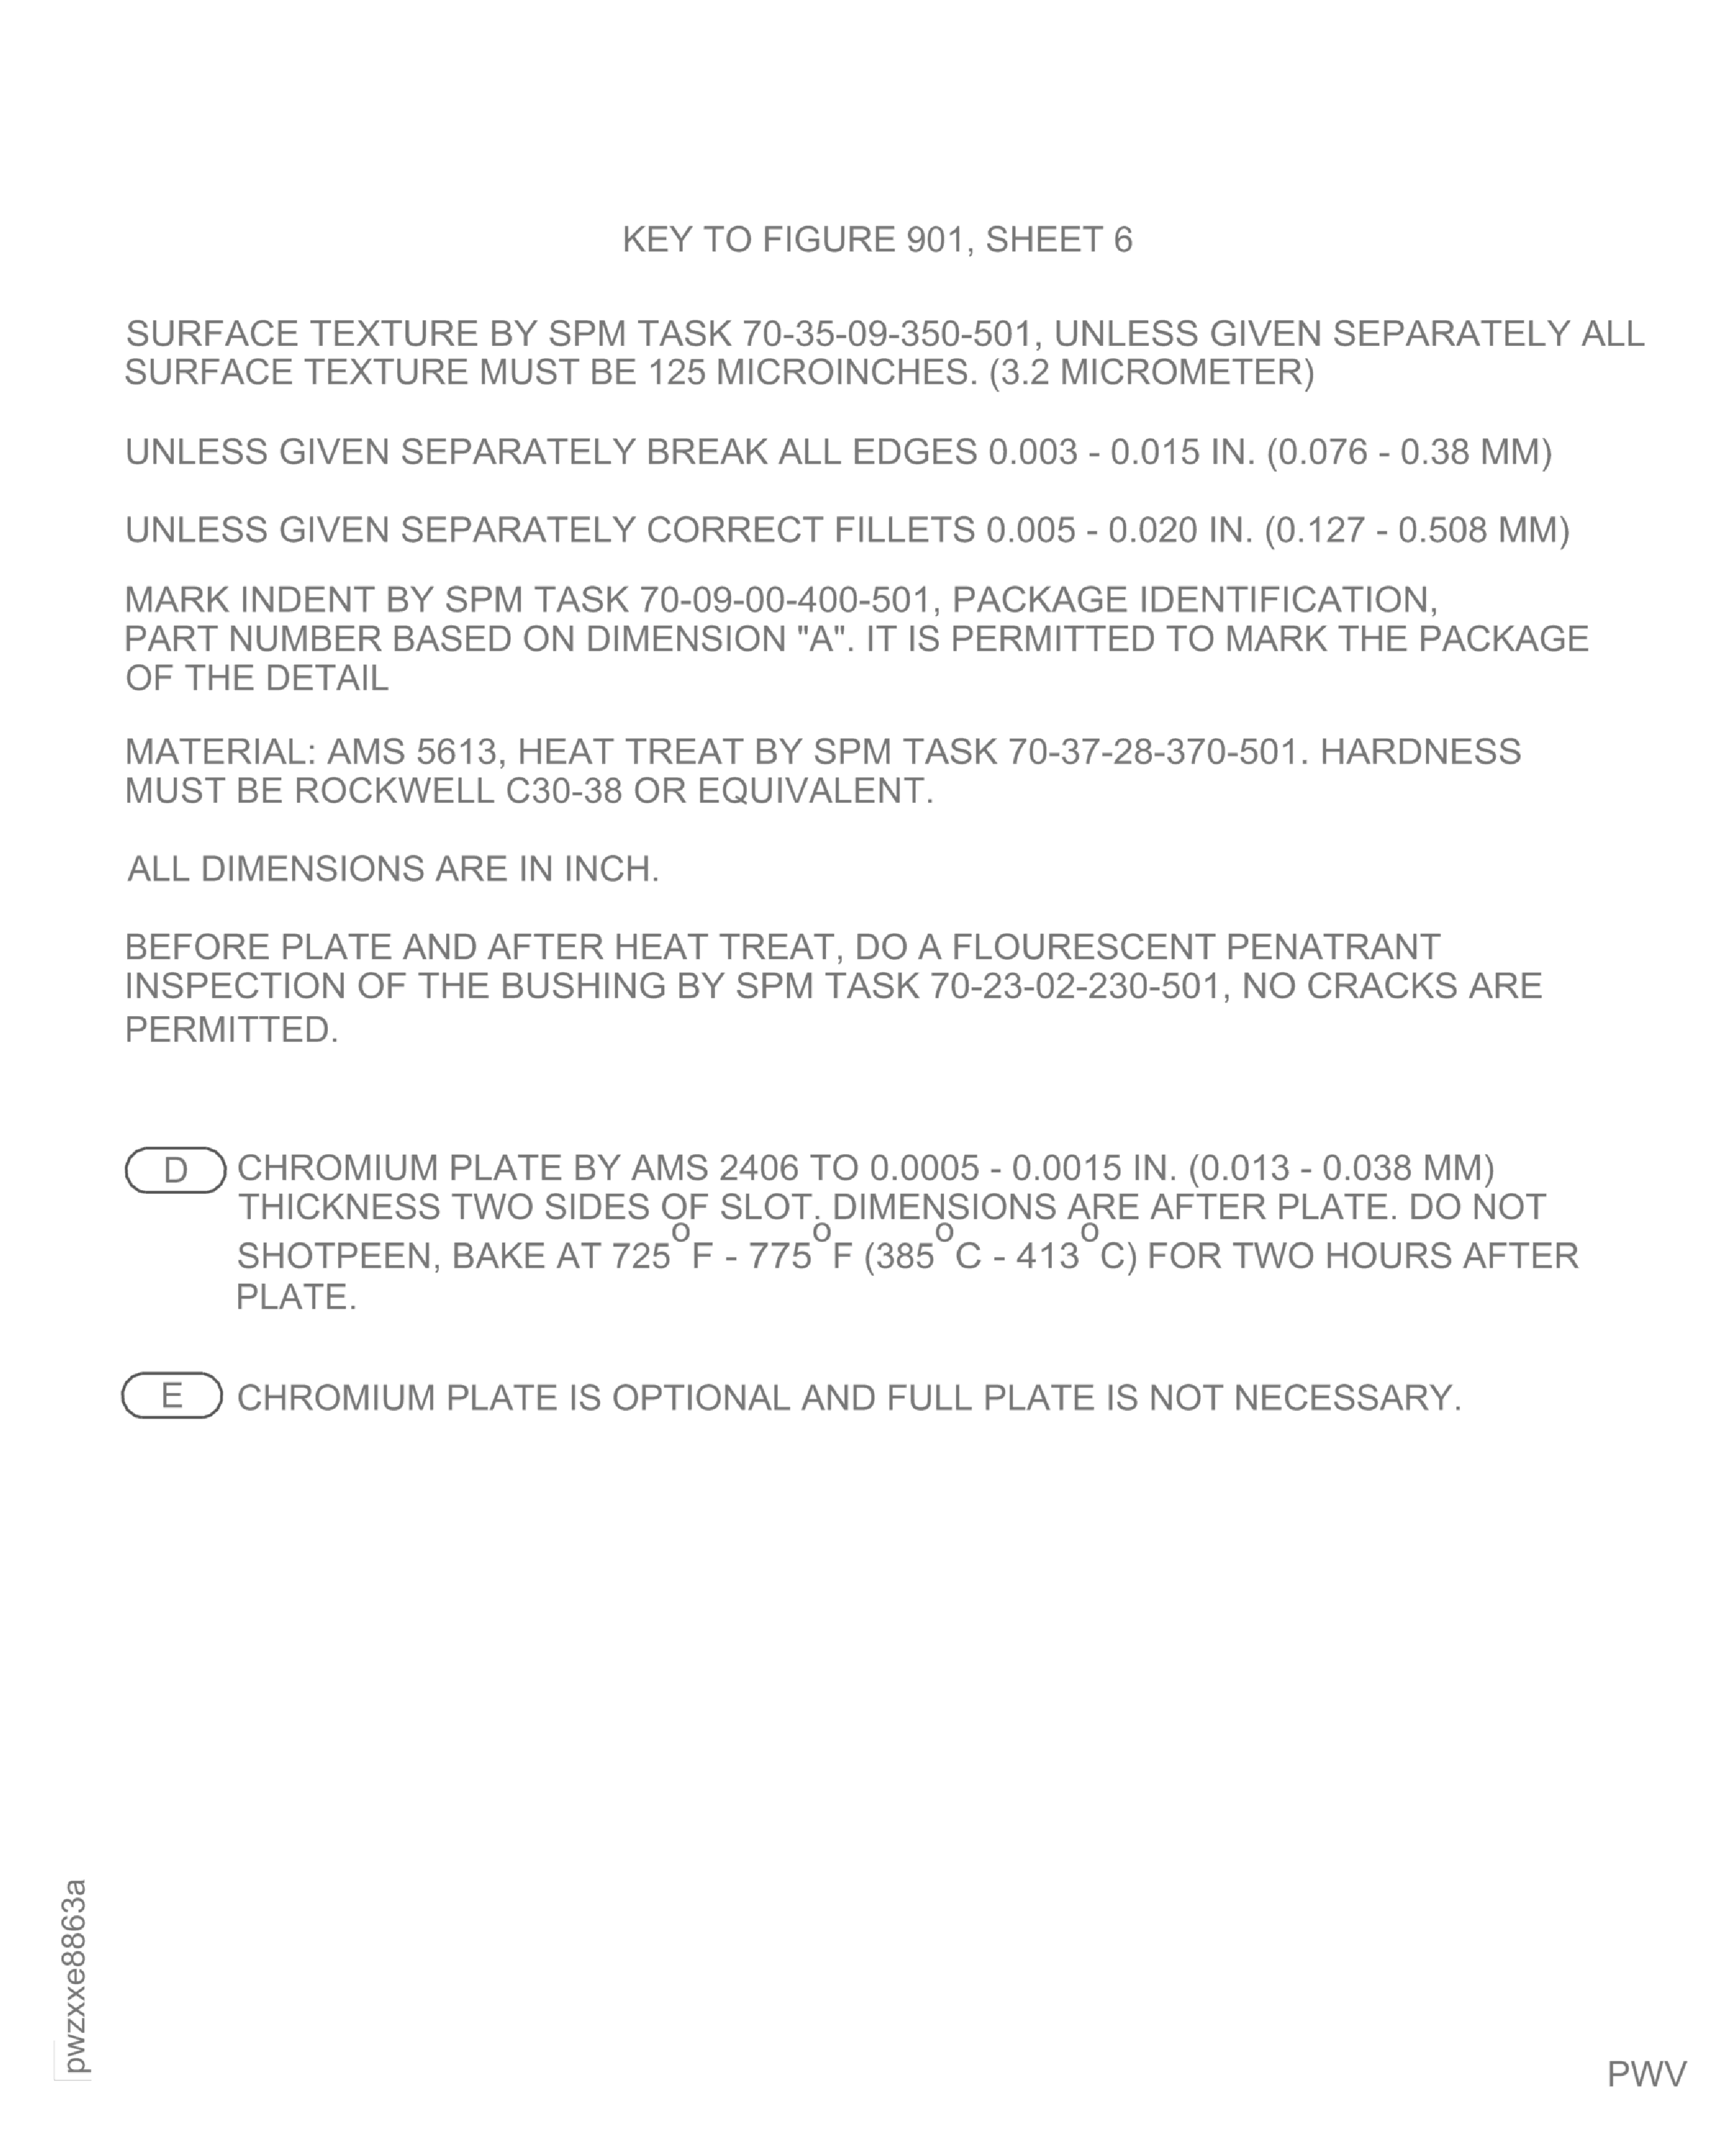
Do a machine operation of the slot width to the limits given in Figure.
If you use a P-sized bushing.
SUBTASK 72-43-20-320-064 Machine the Slots
Refer to Figure.
Refer to the SPM TASK 70-39-03-390-501, but it is permitted for the rivet head to be minus 0.010 in. (0.25 mm) to plus 0.005 in. (0.13 mm) above the part surface afer riveting.
NOTE
The minimum edge distance requirements of the SPM TASK 70-39-03-390-501 are waived.
Secure the bushings with rivets.
SUBTASK 72-43-20-350-069 Position the Bushings
Install the carbon detail by VRS3676 TASK 72-43-20-300-017 (72-43-20).
SUBTASK 72-43-20-350-070 Install the Carbon Detail
Figure: Repair Details and Dimensions
Sheet 1
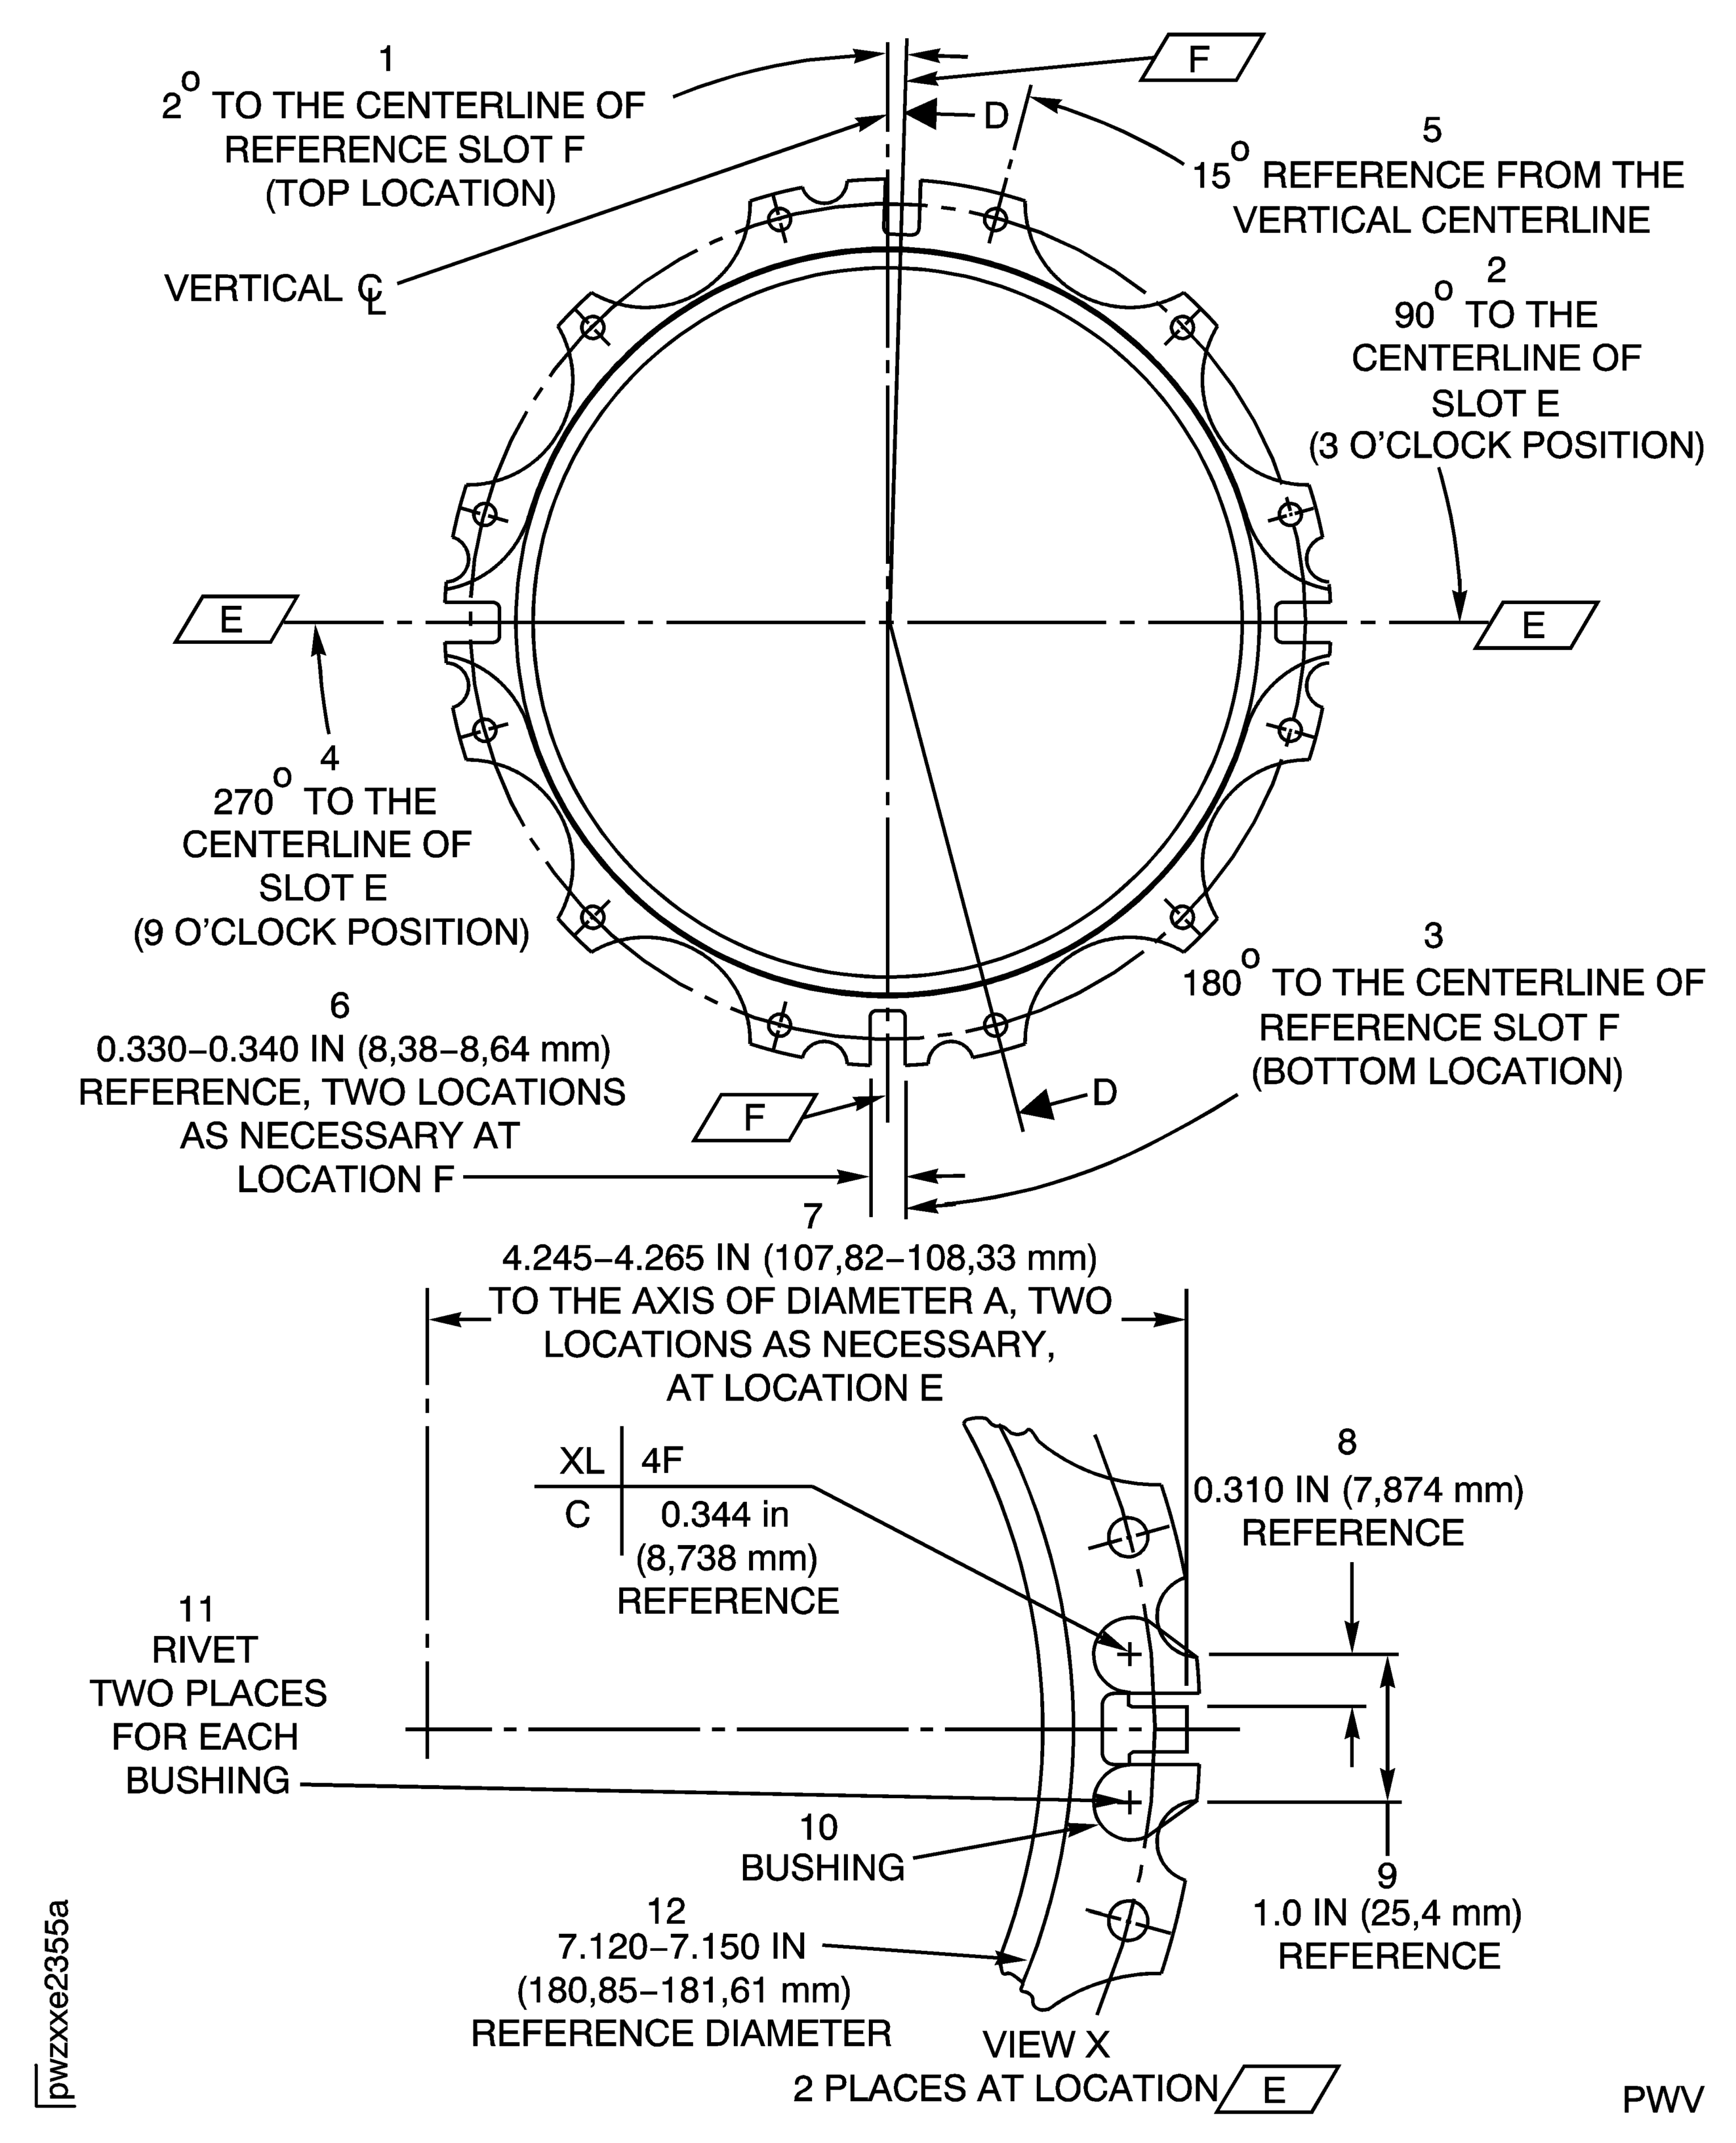
Figure: Repair Details and Dimensions
Sheet 2
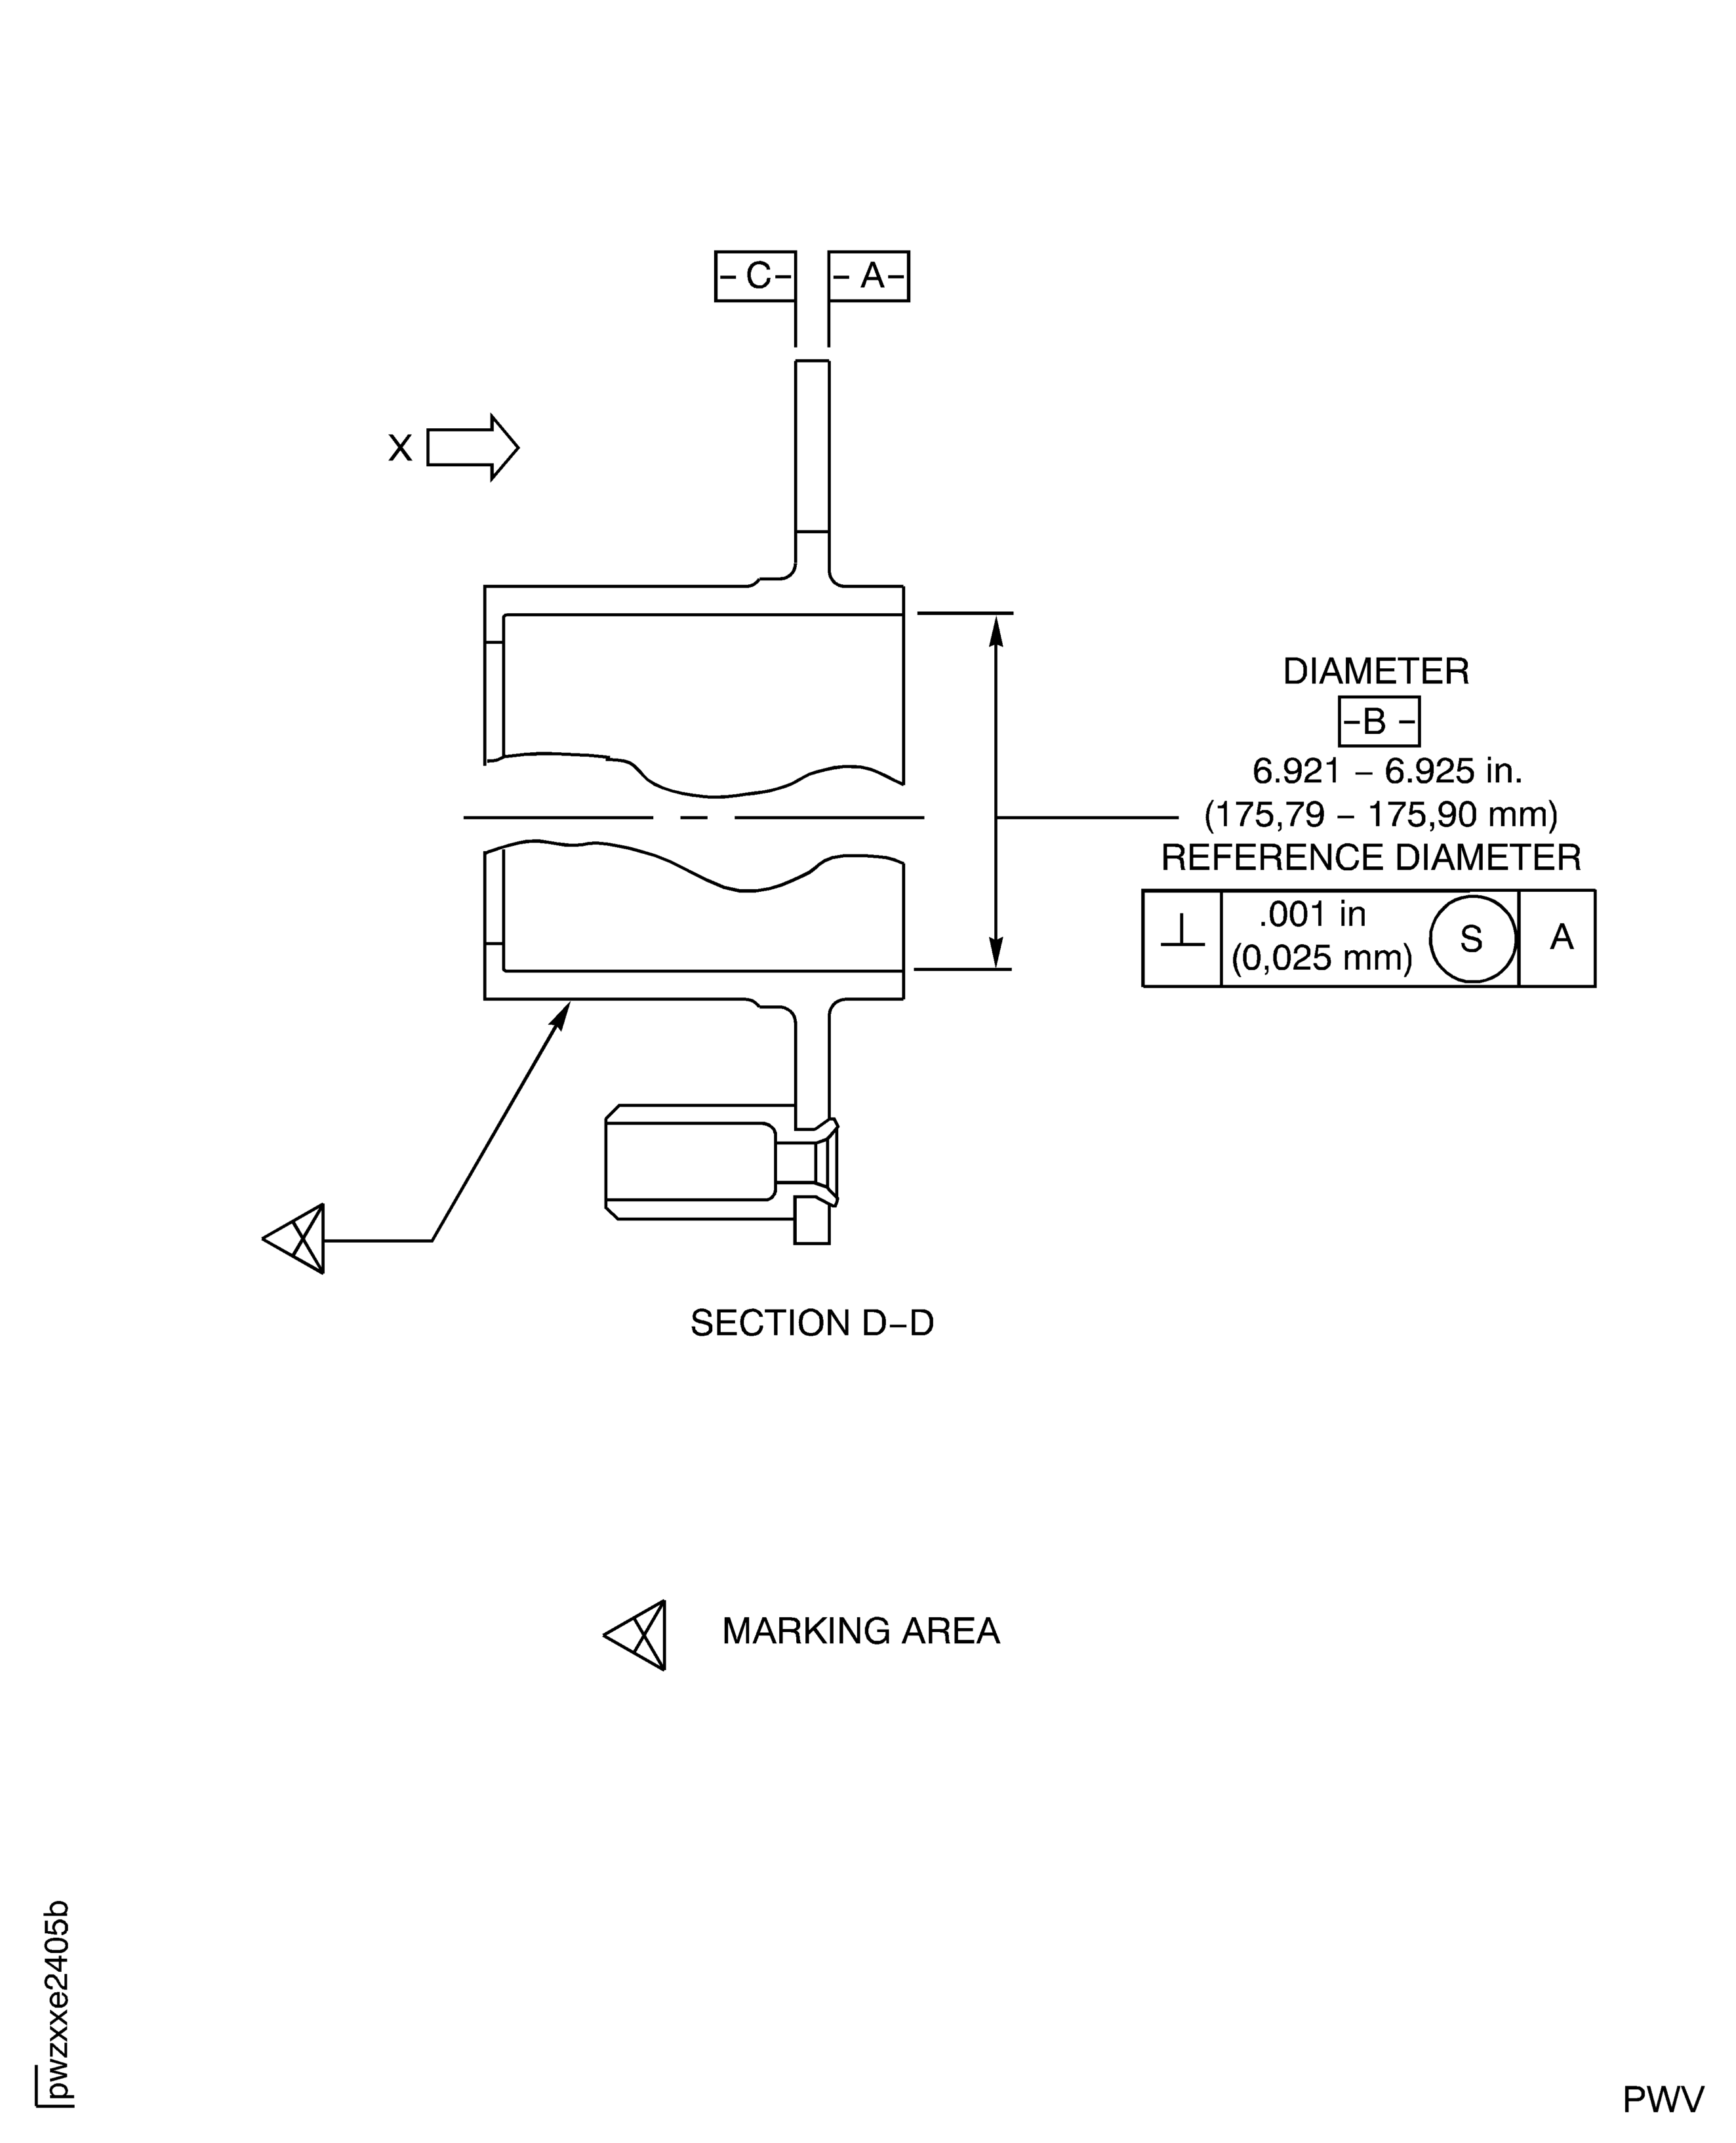
Figure: Repair Details and Dimensions
Sheet 3
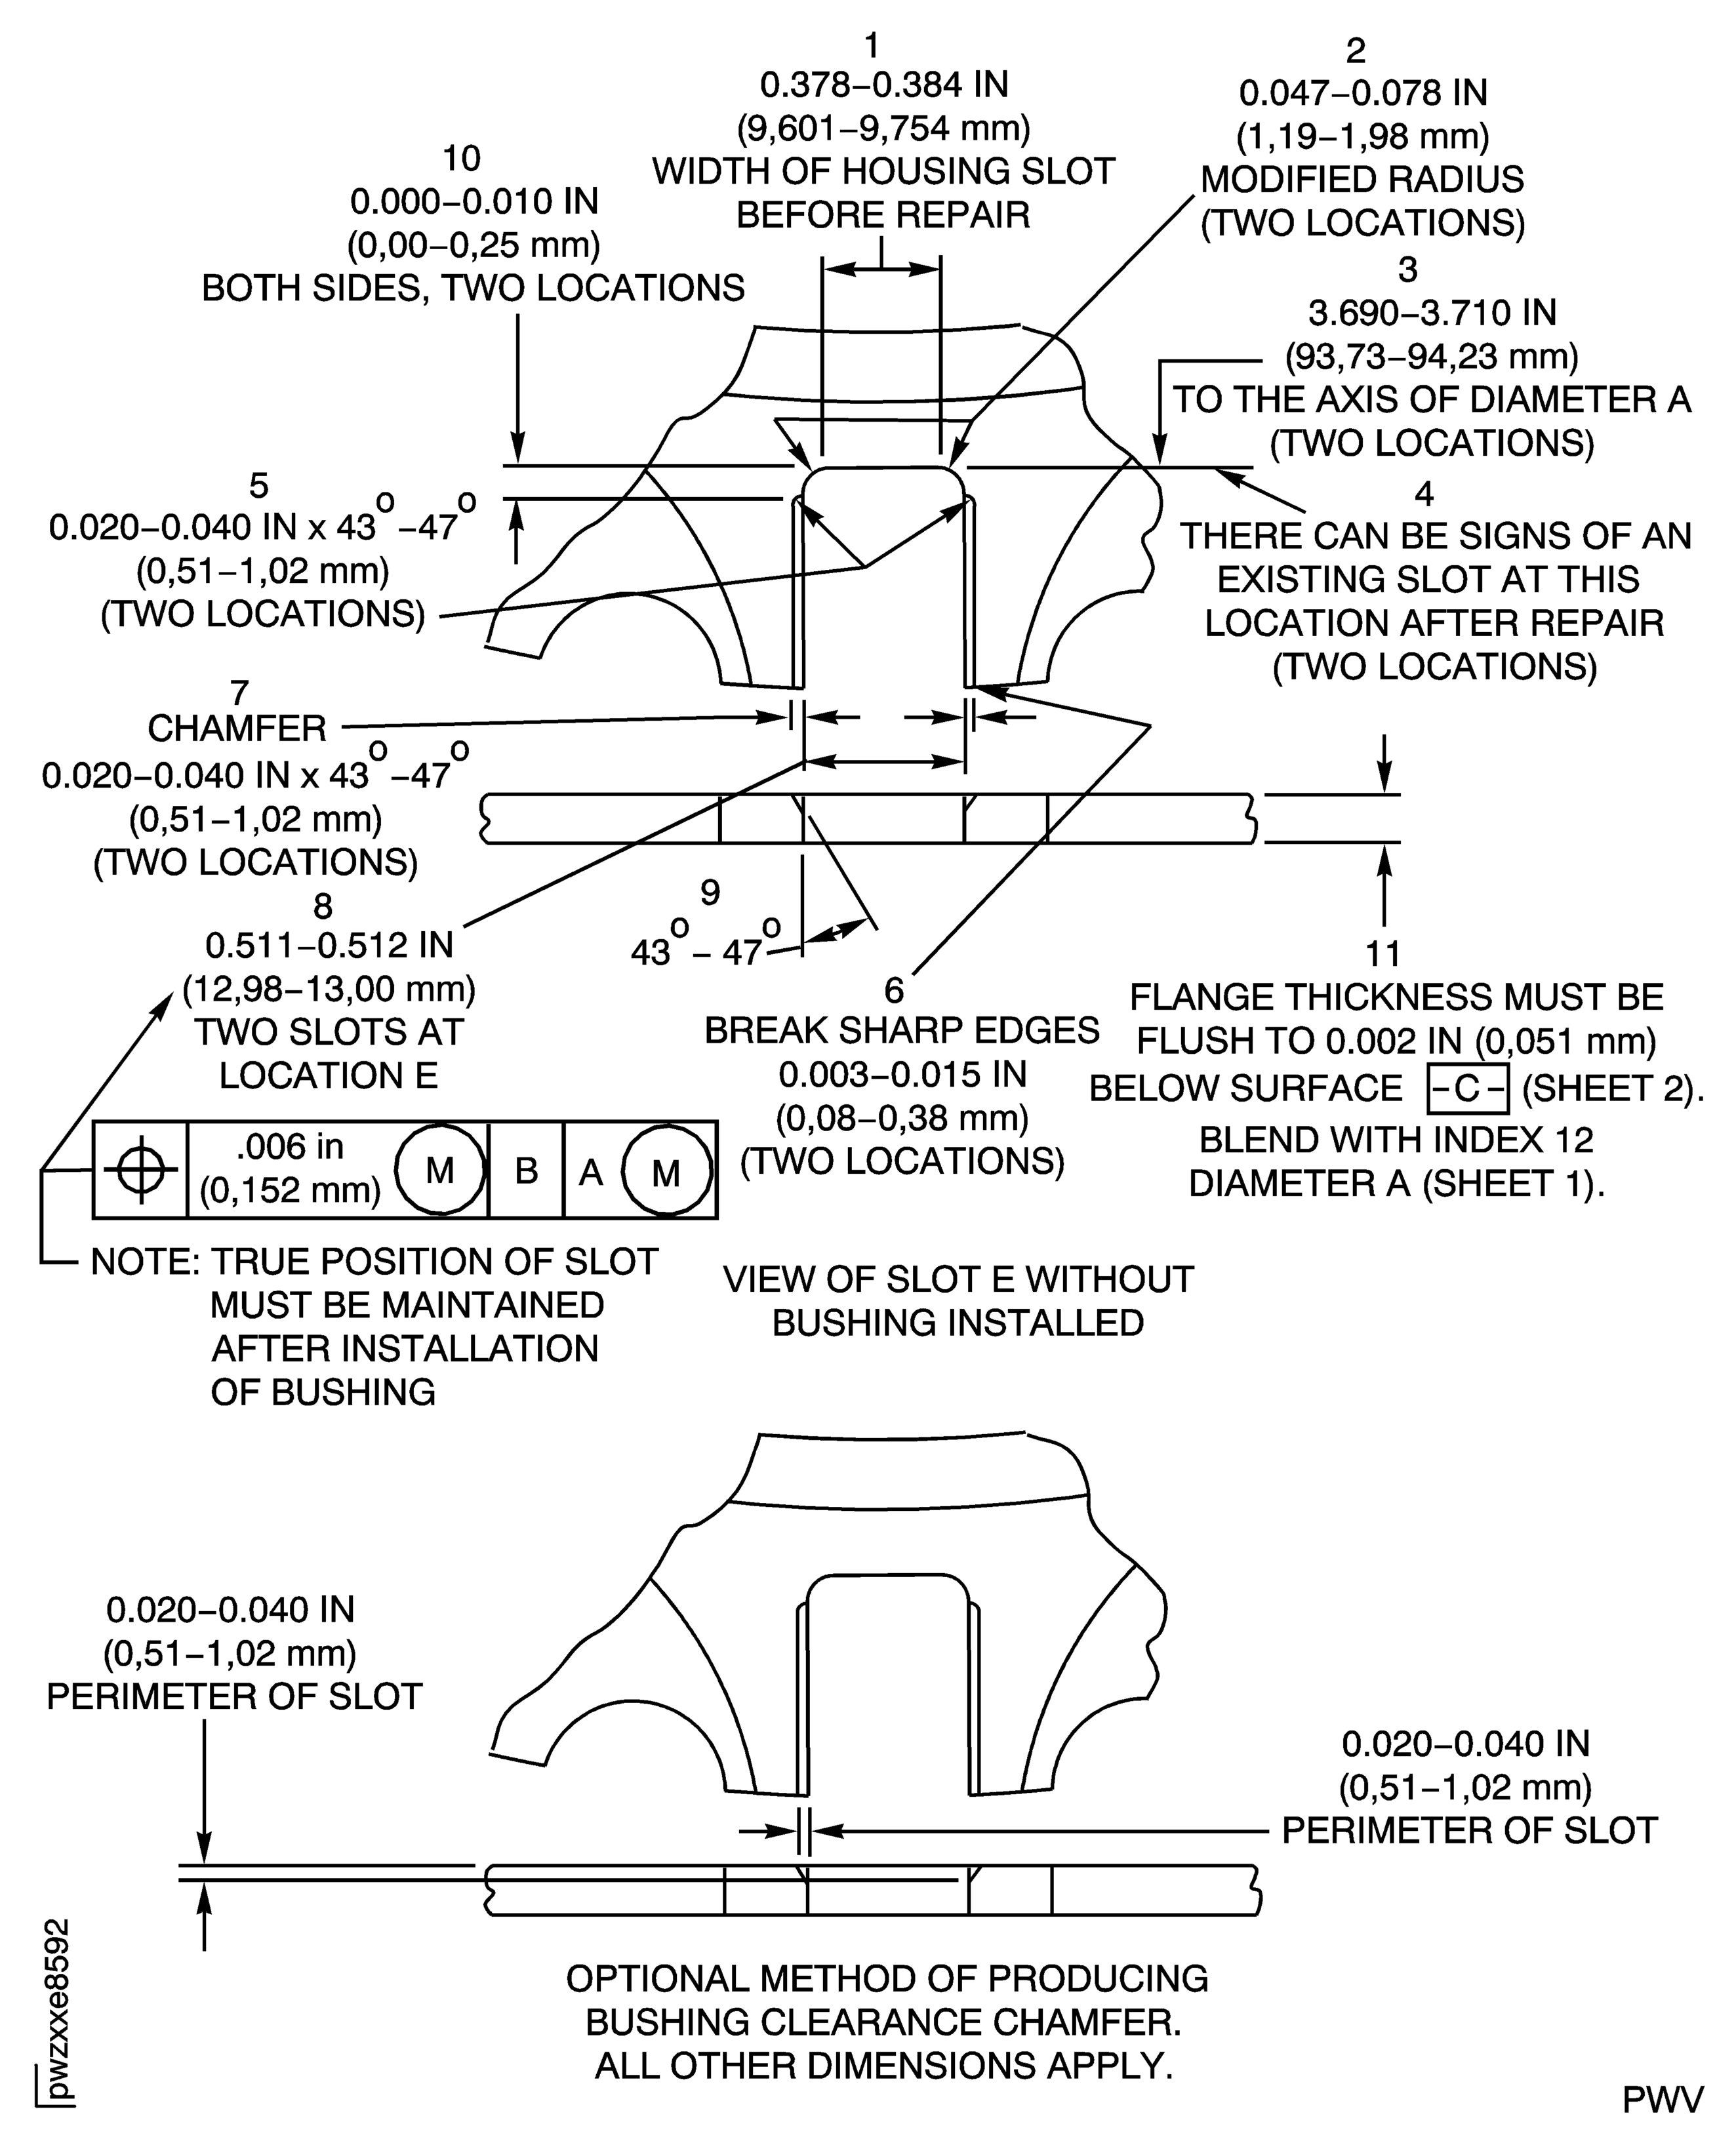
Figure: Repair Details and Dimensions
Sheet 4
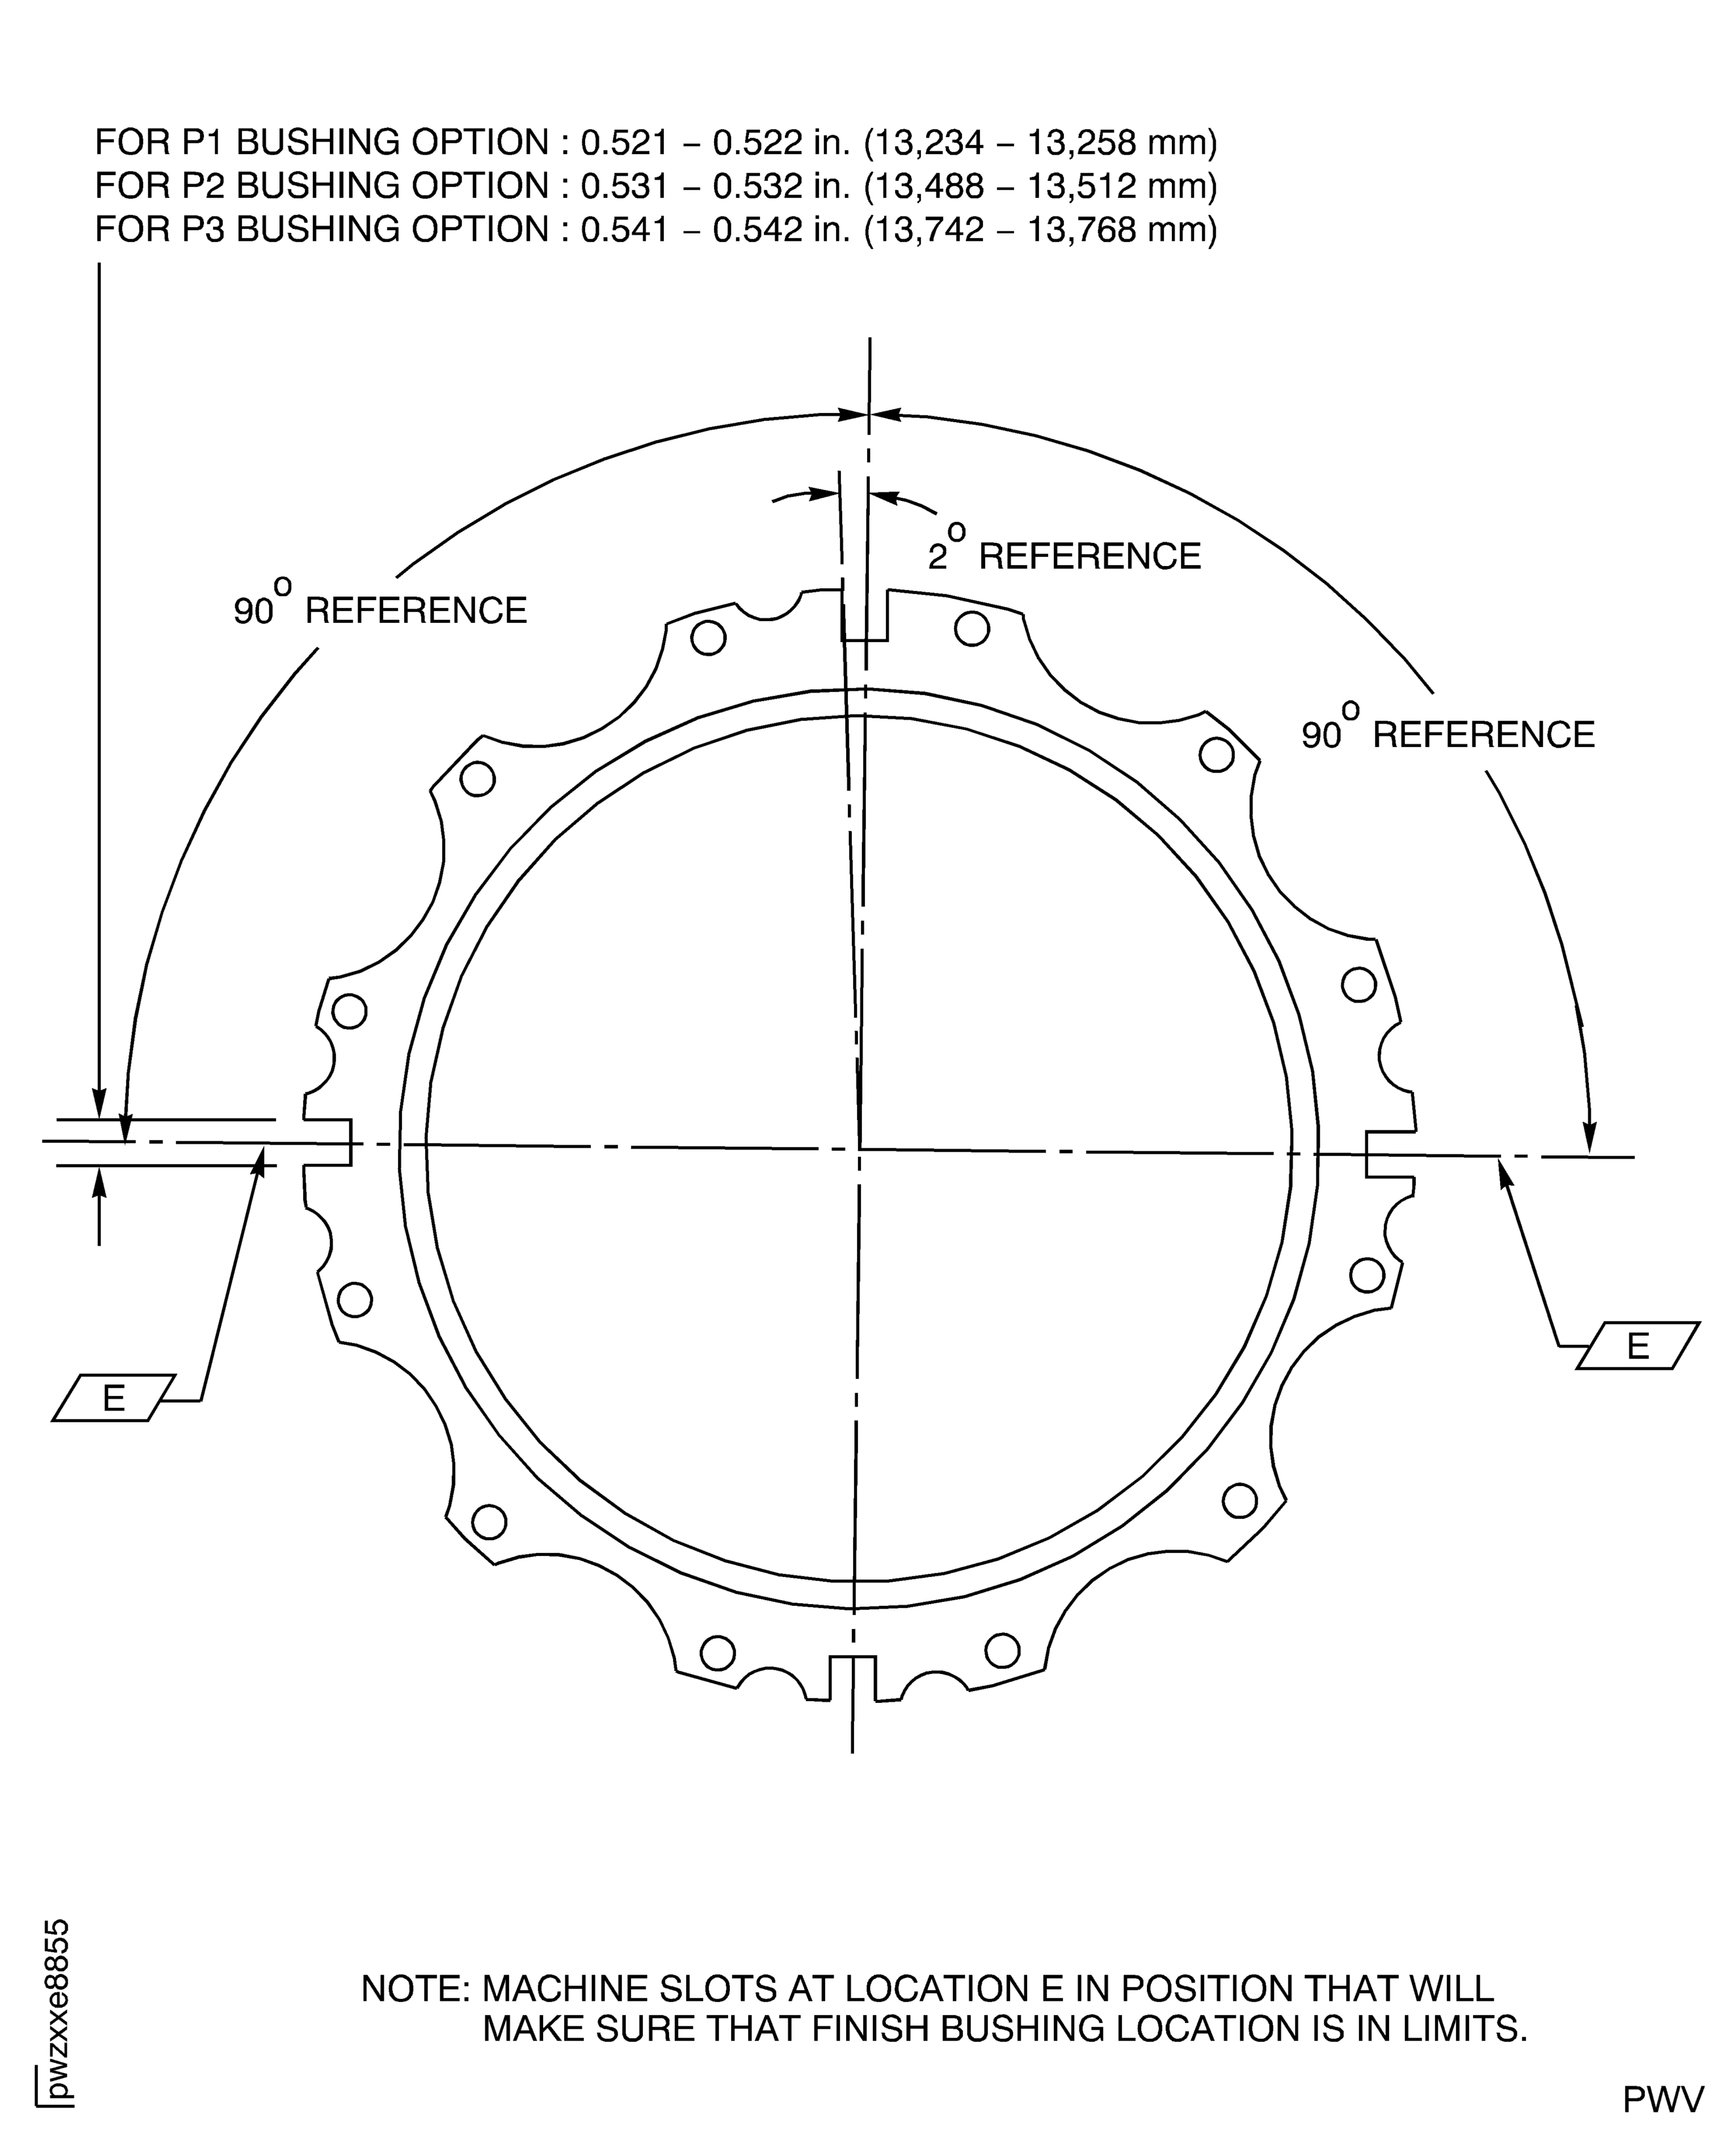
Figure: Repair Details and Dimensions
Sheet 5
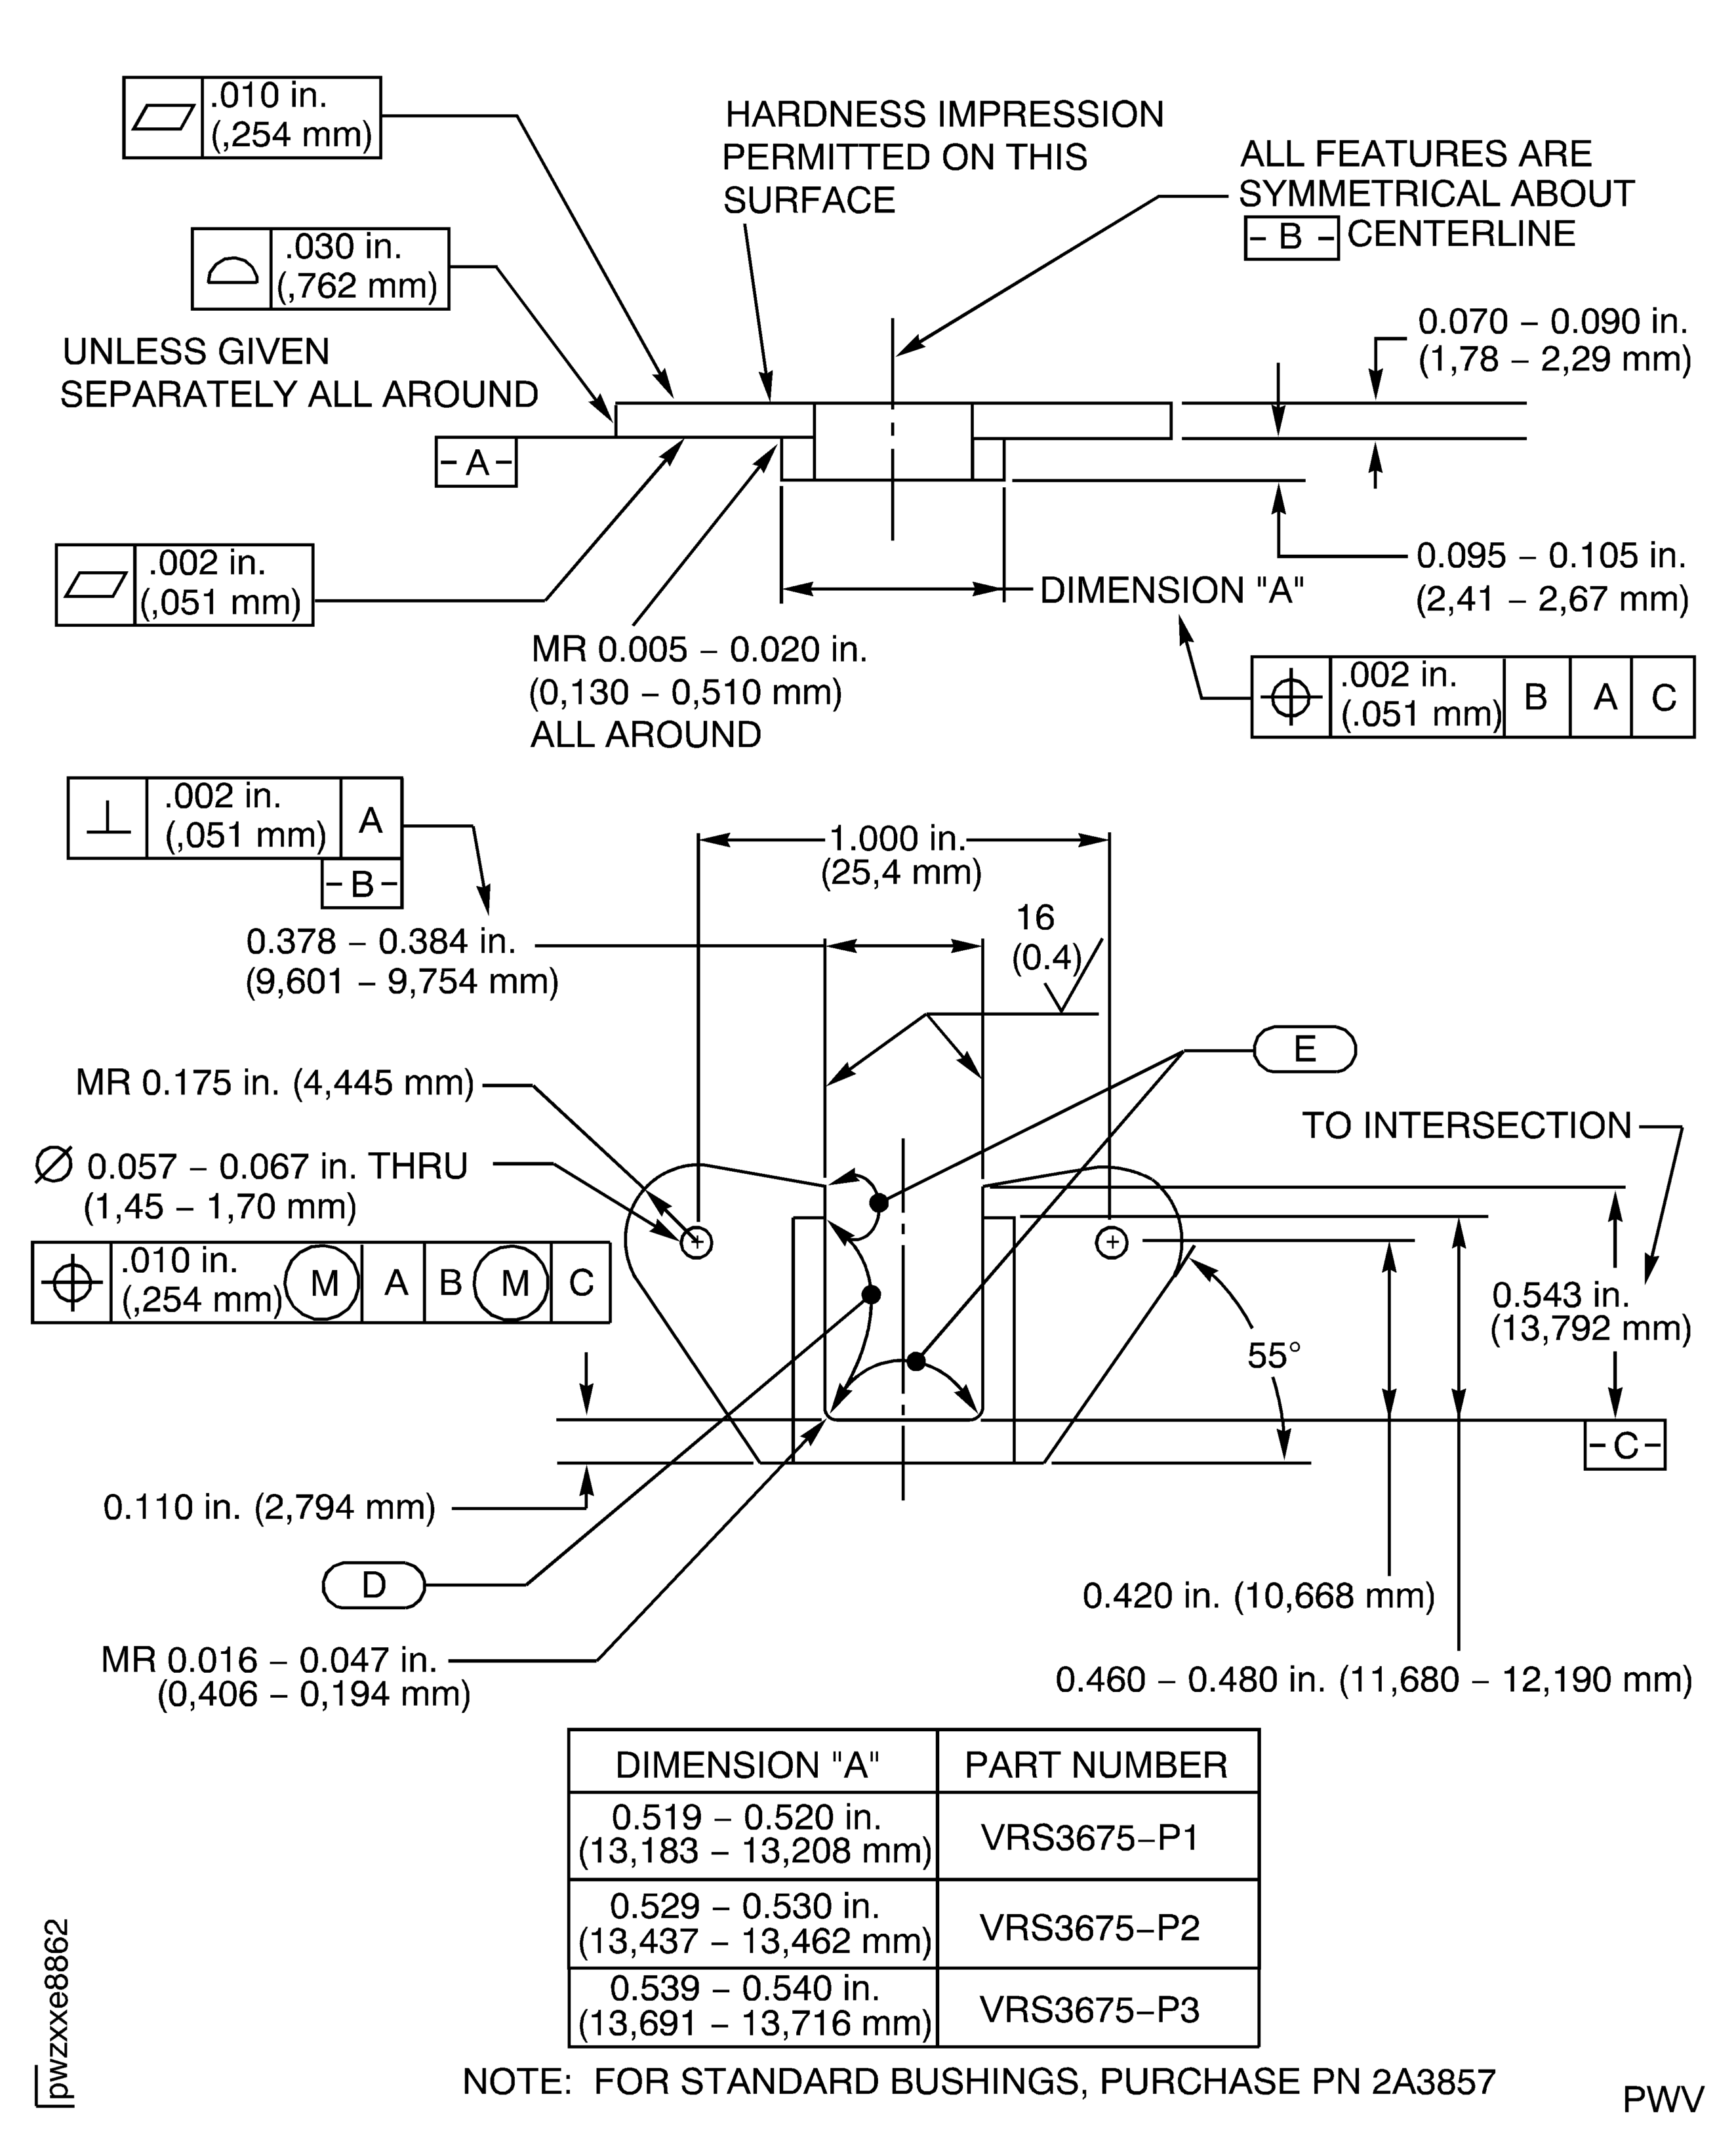
Figure: Repair Details and Dimensions
Sheet 6
