Export Control
EAR Export Classification: Not subject to the EAR per 15 C.F.R. Chapter 1, Part 734.3(b)(3), except for the following Service Bulletins which are currently published as EAR Export Classification 9E991: SBE70-0992, SBE72-0483, SBE72-0580, SBE72-0588, SBE72-0640, SBE73-0209, SBE80-0024 and SBE80-0025.Copyright
© IAE International Aero Engines AG (2001, 2014 - 2021) The information contained in this document is the property of © IAE International Aero Engines AG and may not be copied or used for any purpose other than that for which it is supplied without the express written authority of © IAE International Aero Engines AG. (This does not preclude use by engine and aircraft operators for normal instructional, maintenance or overhaul purposes.).Applicability
All
Common Information
TASK 73-11-49-200-102-B00 Control Fuel Tubes (Titanium) - Examine, Inspection-002
Effectivity
FIG./ITEM | PART NO. |
02-100 | 2A0616 |
03-100 | 2A0649 |
03-500 | 2A0650 |
05-100 | 2A0615 |
07-100 | 2A1417 |
07-500 | 2A0618 |
General
This TASK gives the procedure for the inspection of the titanium fuel tubes. For the other fuel tubes and parts, refer to Inspection-000 TASK 73-11-49-200-100 and TASK 73-11-49-200-400 in the Component Maintenance Manual (CMM-MECH-V2500-1IA).
Fig./item numbers in parentheses in the procedure agree with those used in the IPC. Only the primary Fig./item numbers are used. For the service bulletin alpha variants refer to the IPC.
The policy that is necessary for Inspection is given in the SPM TASK 70-20-01-200-501.
All the parts must be cleaned before they are examined. Refer to Cleaning-000 TASK 73-11-49-100-100.
All the parts must be visually examined for damage, corrosion and wear. Any defects that are not identified in the procedure must be referred to IAE.
The procedure for those parts which must have a crack test is given in the relevant SUBTASK. Do the crack test before the part is visually examined.
Do not discard a part until you are sure there are no repairs available. Refer to the instructions in Repair before a discarded part is used again or oversize parts are installed.
Parts which must be discarded can be held although no repair is available. The repair of a discarded part could be shown to be necessary at a subsequent date.
All parts must be examined to make sure that all the repairs are completed satisfactorily.
Practices and processes referred to in the procedure by the TASK/SUBTASK number are in the SPM.
NOTE
References
Refer to the SPM for data on these items.
Definitions of Damage - Specified Types of Damage, SPM TASK 70-02-02-350-501.
Inspection Policy and Inspection of Parts, SPM TASK 70-20-01-200-501.
Some data on these items is contained in this TASK. For more data on these items refer to the SPM.
Method of Testing for Crack Indications
Chemical Processes
Surface Protection
Preliminary Requirements
Pre-Conditions
NONESupport Equipment
NONEConsumables, Materials and Expendables
NONESpares
NONESafety Requirements
NONEProcedure
Clean the parts. Refer to Cleaning-000 TASK 73-11-49-100-100.
Reject
Cracked
Fuel tubes (02-100), (03-100), (03-500), (05-100), (07-100) and (07-500). Refer to SPM TASK 70-23-05-230-501.
Do the crack test on the parts that are given below. Use the applicable penetrant inspection procedure.
SUBTASK 73-11-49-230-053 Examine the Fuel Tubes for Cracks
Refer to Figure.
Repair, VRS1630 (Repair 004) TASK 73-11-49-300-004.
Other than Step.
Pitted
Repair, VRS1630 (Repair 004) TASK 73-11-49-300-004.
Other than Step.
Pit cluster; within 0.250 in. (6.35 mm) diameter.
Repair, VRS1630 (Repair 004) TASK 73-11-49-300-004.
Dented
Reject
Nicks more than Step.
Nicked
Repair, VRS1630 (Repair 004) TASK 73-11-49-300-004.
Fretting not more than a maximum depth of 0.004 in. (0.10 mm) on the outside surface of the tube.
Reject
More than Step.
Galled
Repair, VRS1630 (Repair 004) TASK 73-11-49-300-004.
Up to 0.004 in. (0.1 mm) in depth.
Reject
More than in Step.
Scratched or scored
Reject
More than in Step.
Wrinkled on inside bend radius.
Examine all the tube surfaces.
SUBTASK 73-11-49-220-075 Examine the Fuel Tubes Surfaces
Reject
On union nut with thrust wire.
Reject
On other part
Damaged
Examine the thread on the tubes
SUBTASK 73-11-49-220-076 Examine the Fuel Tube Threads
Refer to Figure.
Repair, VRS1630 (Repair 004) TASK 73-11-49-300-004.
Worn
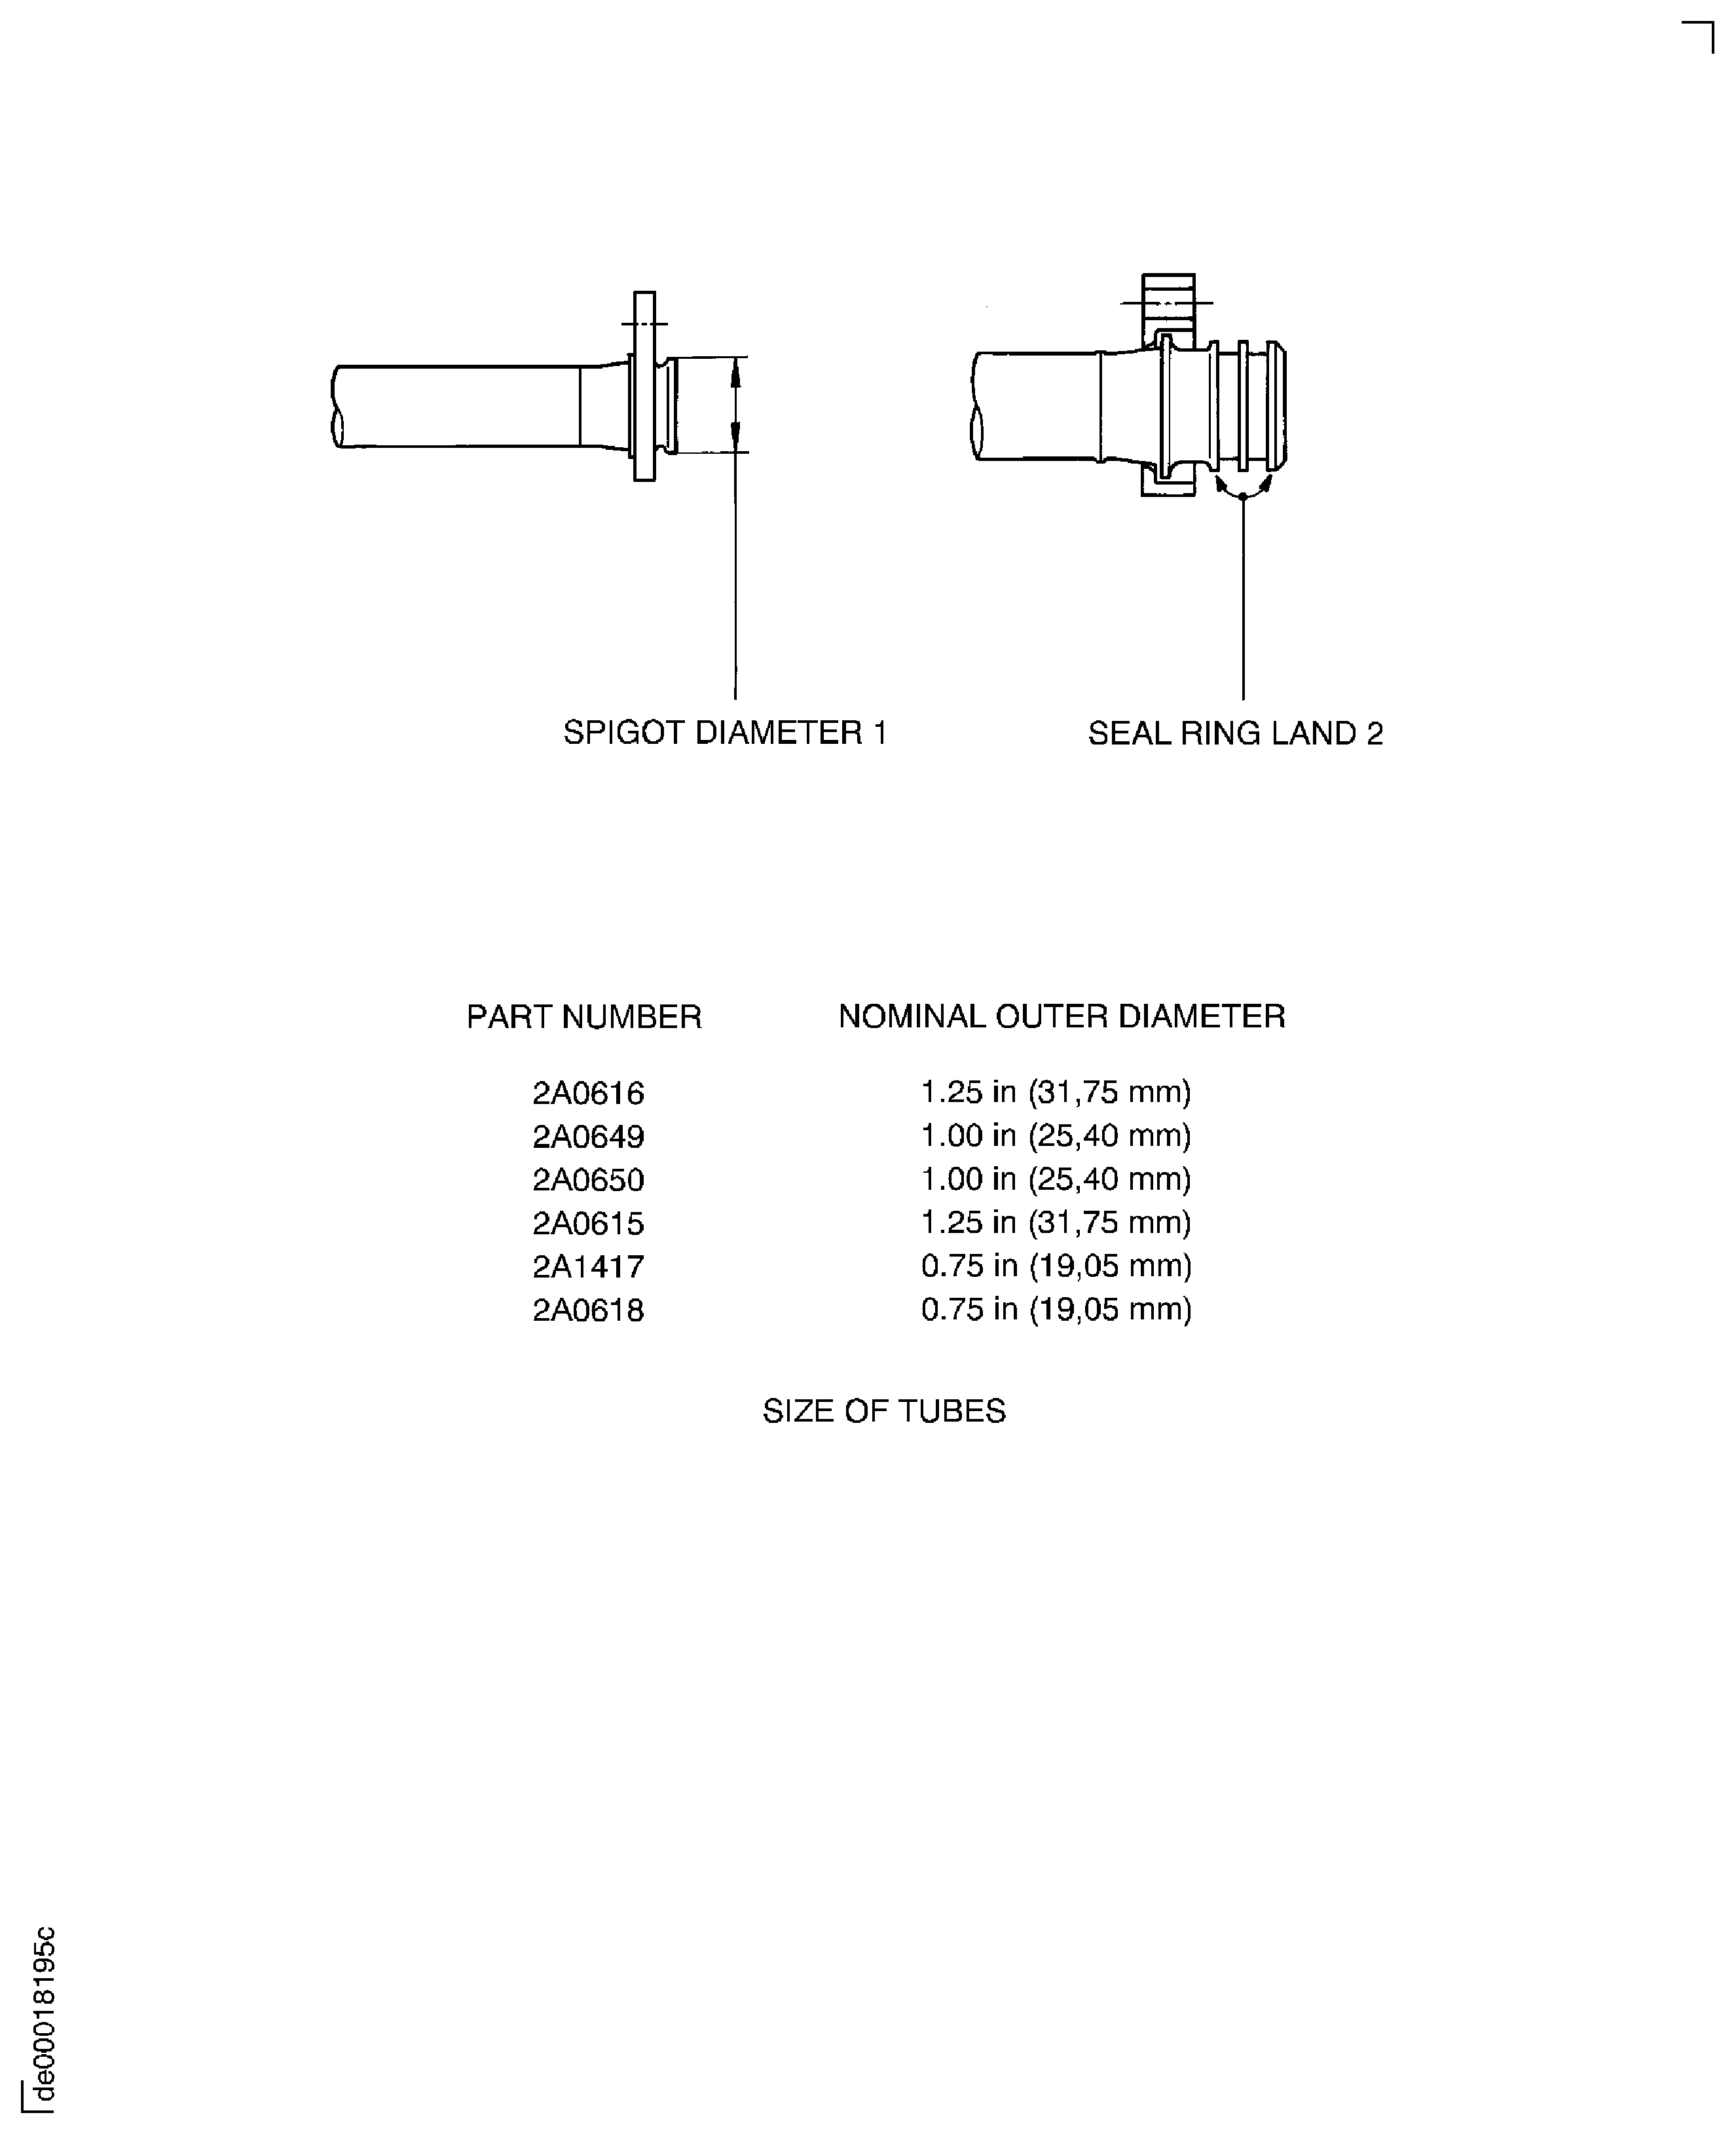
Examine the spigot diameter of the spigot joint type fitting at location 1.
SUBTASK 73-11-49-220-077 Examine the Fuel Tubes Spigot Diameter of the Spigot Joint Type Fitting
Refer to Figure.
Repair, VRS1630 (Repair 004) TASK 73-11-49-300-004.
Worn
Examine the seal ring land of the slide joint type fitting at location 2.
SUBTASK 73-11-49-220-078 Examine the Fuel Tubes Seal Ring Land of the Slide Joint Type Fitting
Repair, VRS1630 (Repair 004) TASK 73-11-49-300-004.
Worn
Examine the flange of the spigot type fitting.
SUBTASK 73-11-49-220-079 Examine the Fuel Tubes Flange of the Spigot Type Fitting
Reject
Worn
Examine the conical seat.
SUBTASK 73-11-49-220-080 Examine the Fuel Tubes Conical Seat
Reject
Worn
Examine the spherical seat.
SUBTASK 73-11-49-220-081 Examine the Fuel Tubes Spherical Seat
Figure: Inspection of the Fuel Tubes
Inspection of the Fuel Tubes

