Export Control
EAR Export Classification: Not subject to the EAR per 15 C.F.R. Chapter 1, Part 734.3(b)(3), except for the following Service Bulletins which are currently published as EAR Export Classification 9E991: SBE70-0992, SBE72-0483, SBE72-0580, SBE72-0588, SBE72-0640, SBE73-0209, SBE80-0024 and SBE80-0025.Copyright
© IAE International Aero Engines AG (2001, 2014 - 2021) The information contained in this document is the property of © IAE International Aero Engines AG and may not be copied or used for any purpose other than that for which it is supplied without the express written authority of © IAE International Aero Engines AG. (This does not preclude use by engine and aircraft operators for normal instructional, maintenance or overhaul purposes.).Applicability
All
Common Information
TASK 73-22-15-200-401 P3/T3 Sensor - Related Parts - Examine The P3/T3 Sensor, Inspection-001
General
This TASK gives the procedure for the inspection of the P3/T3 sensor.
Fig/item numbers in parentheses in the procedure agree with those used in the IPC.
The policy that is necessary for inspection is given in the SPM TASK 70-20-00-200-501.
All the parts must be cleaned before any part is examined. Refer to Cleaning-000 TASK 73-22-15-100-400.
All parts must be visually examined for damage, corrosion and wear. Any defects that are not identified in the procedure must be referred to IAE.
Do not discard any part until you are sure there are no repairs available. Refer to the instructions in Repair before a discarded part is used again or oversize parts are installed.
Parts which should be discarded can be held although no repair is available. The repair of a discarded part could be shown to be necessary at a later date.
All parts must be examined to make sure that all the repairs have been completed satisfactorily.
The practices and processes referred to in the procedure by the TASK numbers are in the SPM.
References
Refer to the SPM for data on these items.
Definitions of Damage, SPM TASK 70-02-02-350-501.
Inspection of Parts, SPM TASK 70-20-01-200-501.
Preliminary Requirements
Pre-Conditions
NONESupport Equipment
NONEConsumables, Materials and Expendables
NONESpares
NONESafety Requirements
NONEProcedure
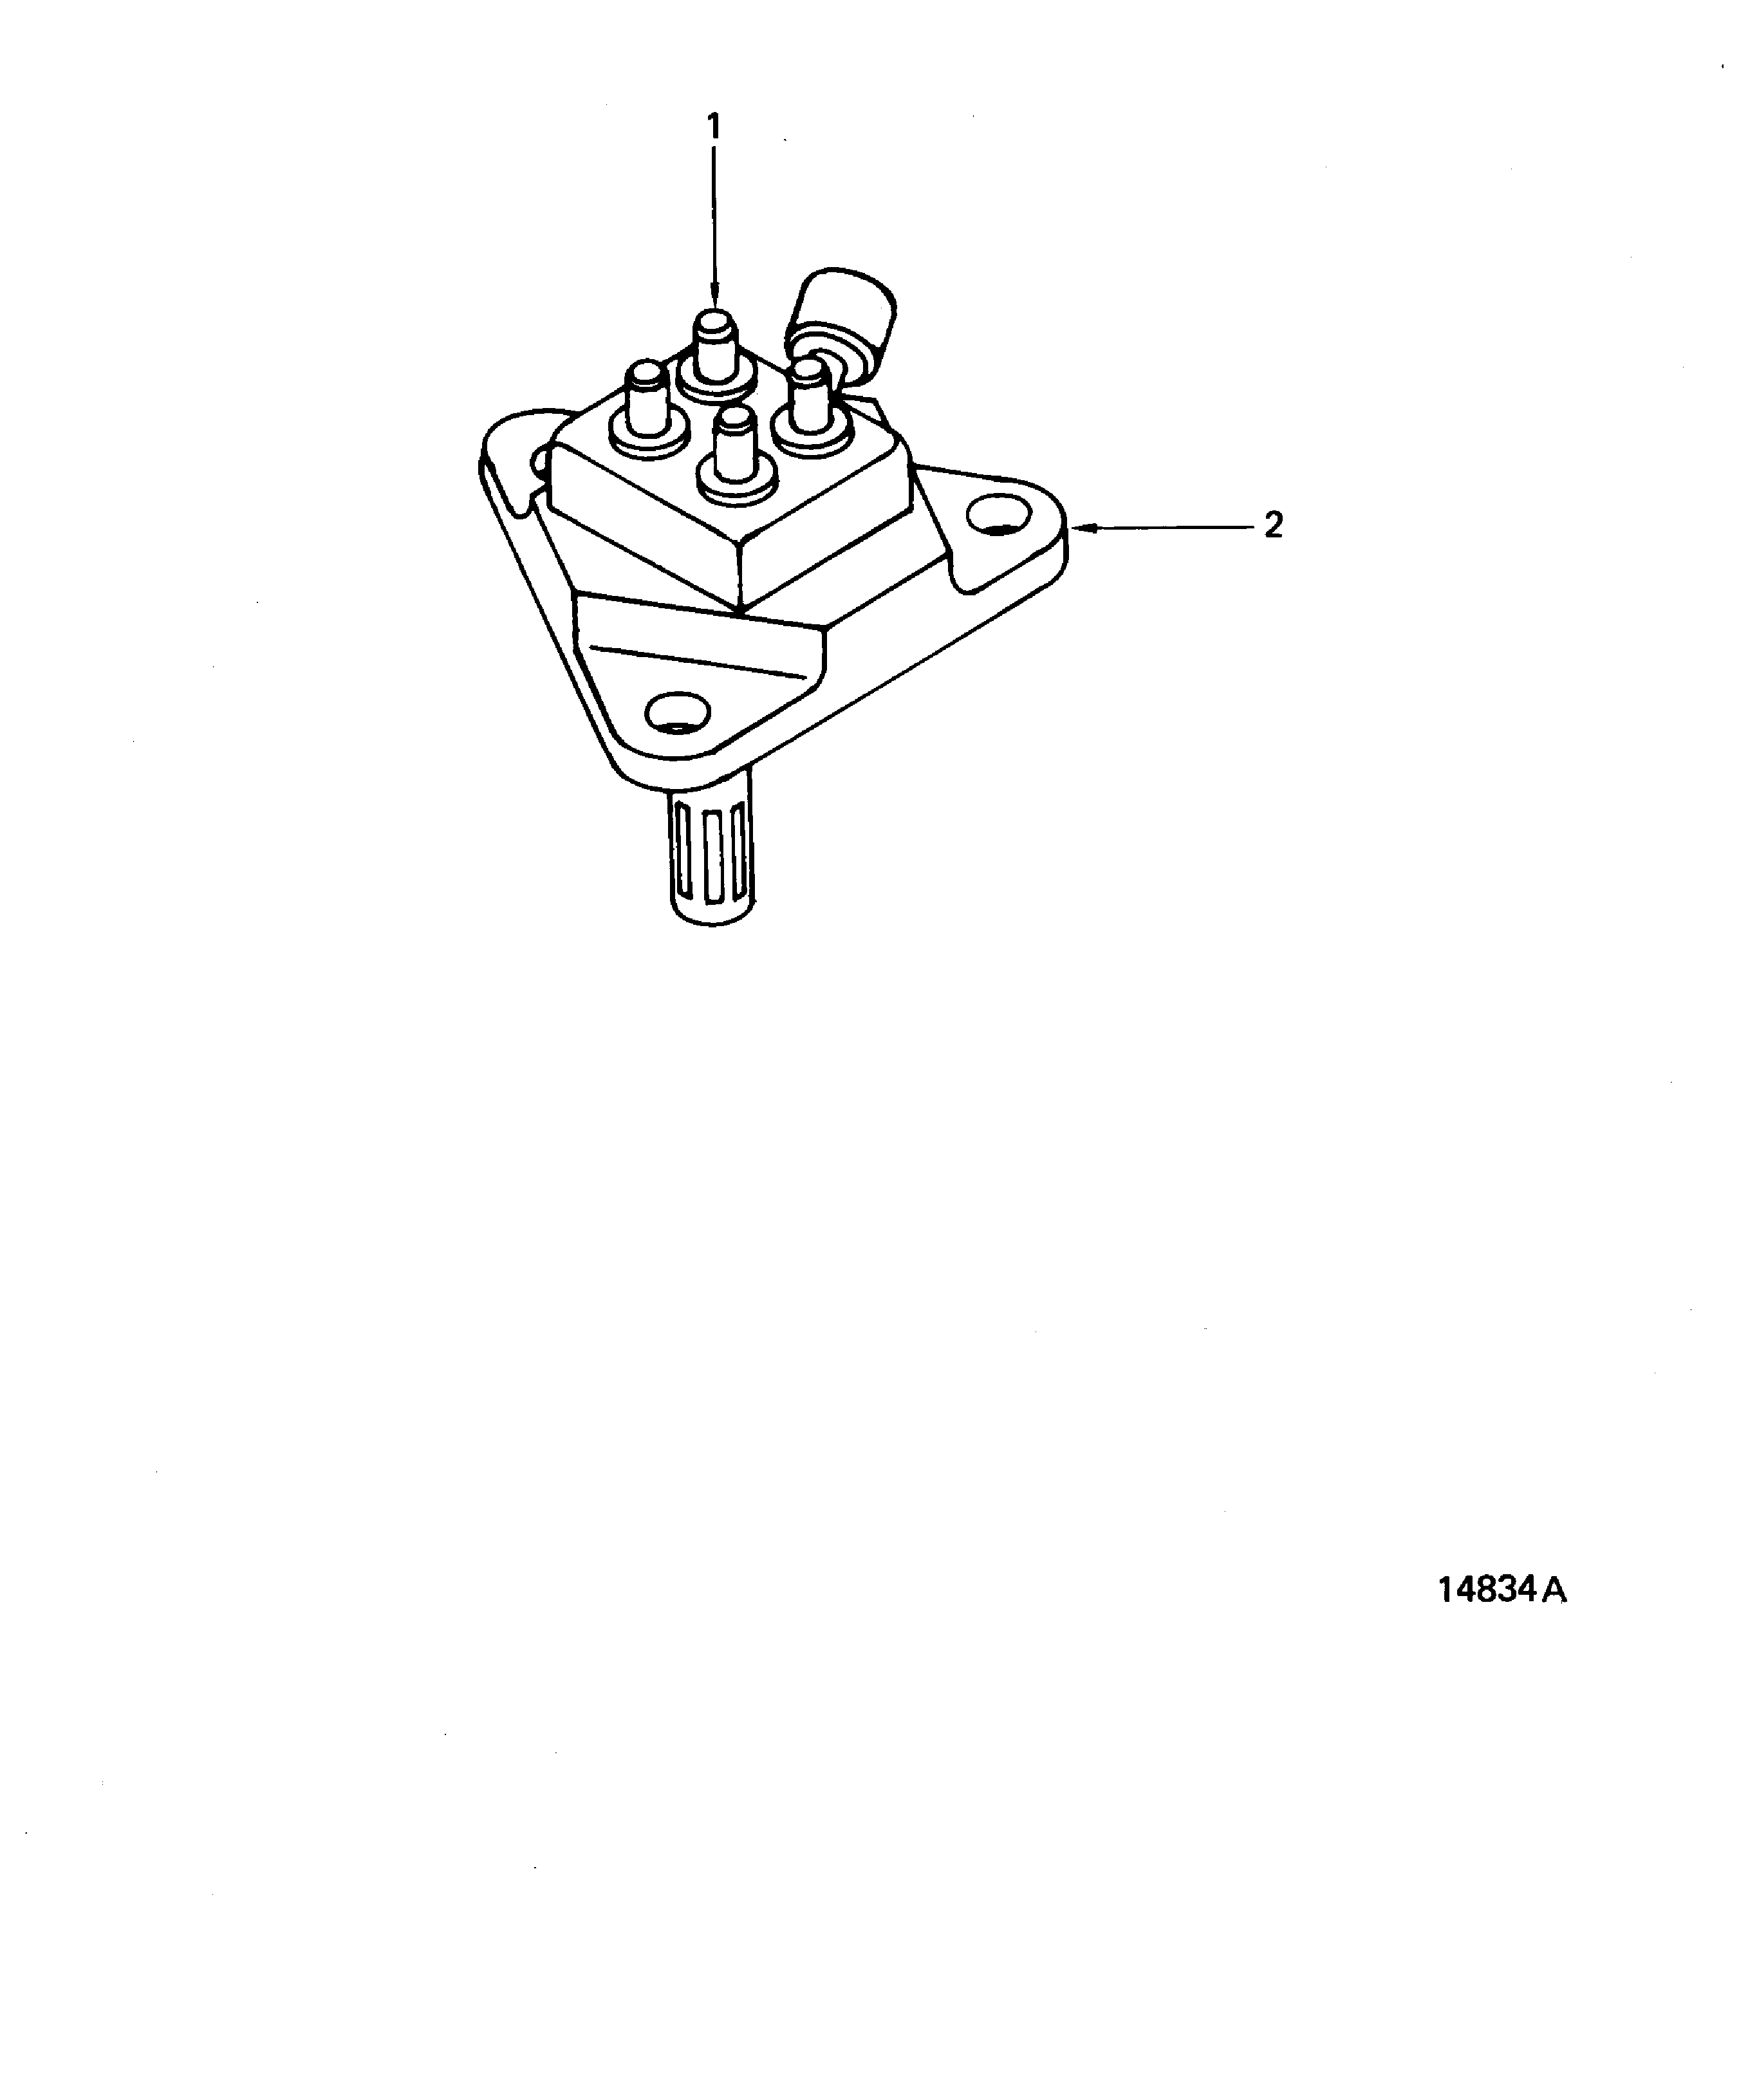
Refer to Figure.
Clean, Cleaning-001 TASK 73-22-15-100-401.
Unwanted particles.
Examine the sensor for unwanted particles between the studs.
Repair, VRS3480 (Repair-001) TASK 73-22-15-300-001.
Damaged threads.
Examine the sensor at location 1, for damaged threads on the studs.
Accept.
Nicks.
Reject.
Cracks.
Examine the sensor at location 2, for nicks or cracks on the protective housing.
SUBTASK 73-22-15-220-051 Examine the P3/T3 Sensor (01-030) for Unwanted Particles, Nicks, Cracks, Damaged Stud Threads
Refer to Figure.
Attach nuts to thermocouple terminal studs.
Using an approved marker, make a witness mark from the 12 o'clock position of the stud to the thermocouple housing.
Use a torque wrench set to 15 lbfin (1.69 Nm) to torque nuts on alumel (larger) studs. If witness mark moves, reject probe.
Use a torque wrench set to 12 lbfin (1.35 Nm) to torque nuts on chromel (smaller) studs. If witness mark moves, reject probe.
SUBTASK 73-22-15-220-052 Examine the P3/T3 Sensor (01-030) for Loose Studs
Figure: P3/T3 Sensor Inspection Locations
P3/T3 Sensor Inspection Locations

