Export Control
EAR Export Classification: Not subject to the EAR per 15 C.F.R. Chapter 1, Part 734.3(b)(3), except for the following Service Bulletins which are currently published as EAR Export Classification 9E991: SBE70-0992, SBE72-0483, SBE72-0580, SBE72-0588, SBE72-0640, SBE73-0209, SBE80-0024 and SBE80-0025.Copyright
© IAE International Aero Engines AG (2001, 2014 - 2021) The information contained in this document is the property of © IAE International Aero Engines AG and may not be copied or used for any purpose other than that for which it is supplied without the express written authority of © IAE International Aero Engines AG. (This does not preclude use by engine and aircraft operators for normal instructional, maintenance or overhaul purposes.).Applicability
All
Common Information
TASK 79-22-41-200-407 Oil Scavenge Pump - Related Parts - Examine The Drive Gear, Inspection-007
General
This TASK gives the procedure for the inspection of the drive gear. For the other parts of the oil scavenge pump assembly, refer to Inspection-000 TASK 79-22-41-200-400.
Fig/item numbers in parentheses in the procedure agree with those used in the IPC.
The policy that is necessary for inspection is given in SPM TASK 70-20-01-200-501.
All parts must be visually examined for damage, corrosion and wear. Any defects that are not identified in the procedure must be referred to IAE.
Do not discard any part until you are sure there are no repairs available. Refer to the instructions in repair before a discarded part is used again or oversize parts are installed.
Parts which should be discarded can be held although no repair is available. The repair of a discarded part could be shown to be necessary at a later date.
All parts must be examined to make sure that all the repairs have been completed satisfactorily.
The practices and processes referred to in the procedure by the TASK numbers are in the SPM.
References
Refer to the SPM for data on these items.
Definitions of Damage, SPM TASK 70-02-02-350-501.
Record and Control of the Lives of Parts, SPM TASK 70-05-00-220-501.
Inspection of Parts, SPM TASK 70-20-00-200-501.
Some data on these items is contained in this TASK. For more data on these items refer to the SPM.
Method of Testing for Crack Indications
Chemical Processes
Surface Protection
Preliminary Requirements
Pre-Conditions
NONESupport Equipment
| Name | Manufacturer | Part Number / Identification | Quantity | Remark |
|---|---|---|---|---|
| Workshop inspection equipment | LOCAL | Workshop inspection equipment | ||
| Magnetizing unit | LOCAL | Magnetizing unit | ||
| Demagnetizing unit | LOCAL | Demagnetizing unit | ||
| Hardness Tester | LOCAL | Hardness Tester |
Consumables, Materials and Expendables
NONESpares
NONESafety Requirements
NONEProcedure
Clean the part. Refer to Cleaning-000 TASK 79-22-41-100-400.
Reject
Cracked
Do the test for cracks on the part that is given below.
PART IDENT
PROCEDURE
CURRENT/INSPECT
TASK/SUBTASK
Drive Gear
C.F Two shots 90 degrees apart
1000A
Refer to SPM TASK 70-24-01-240-501 SUBTASK 70-24-01-240-010
TB
1500A
Refer to SPM TASK 70-24-01-240-501 SUBTASK 70-24-01-240-011
SUBTASK 79-22-41-240-055 Do a Crack Test on the Drive Gear (Magnetic)
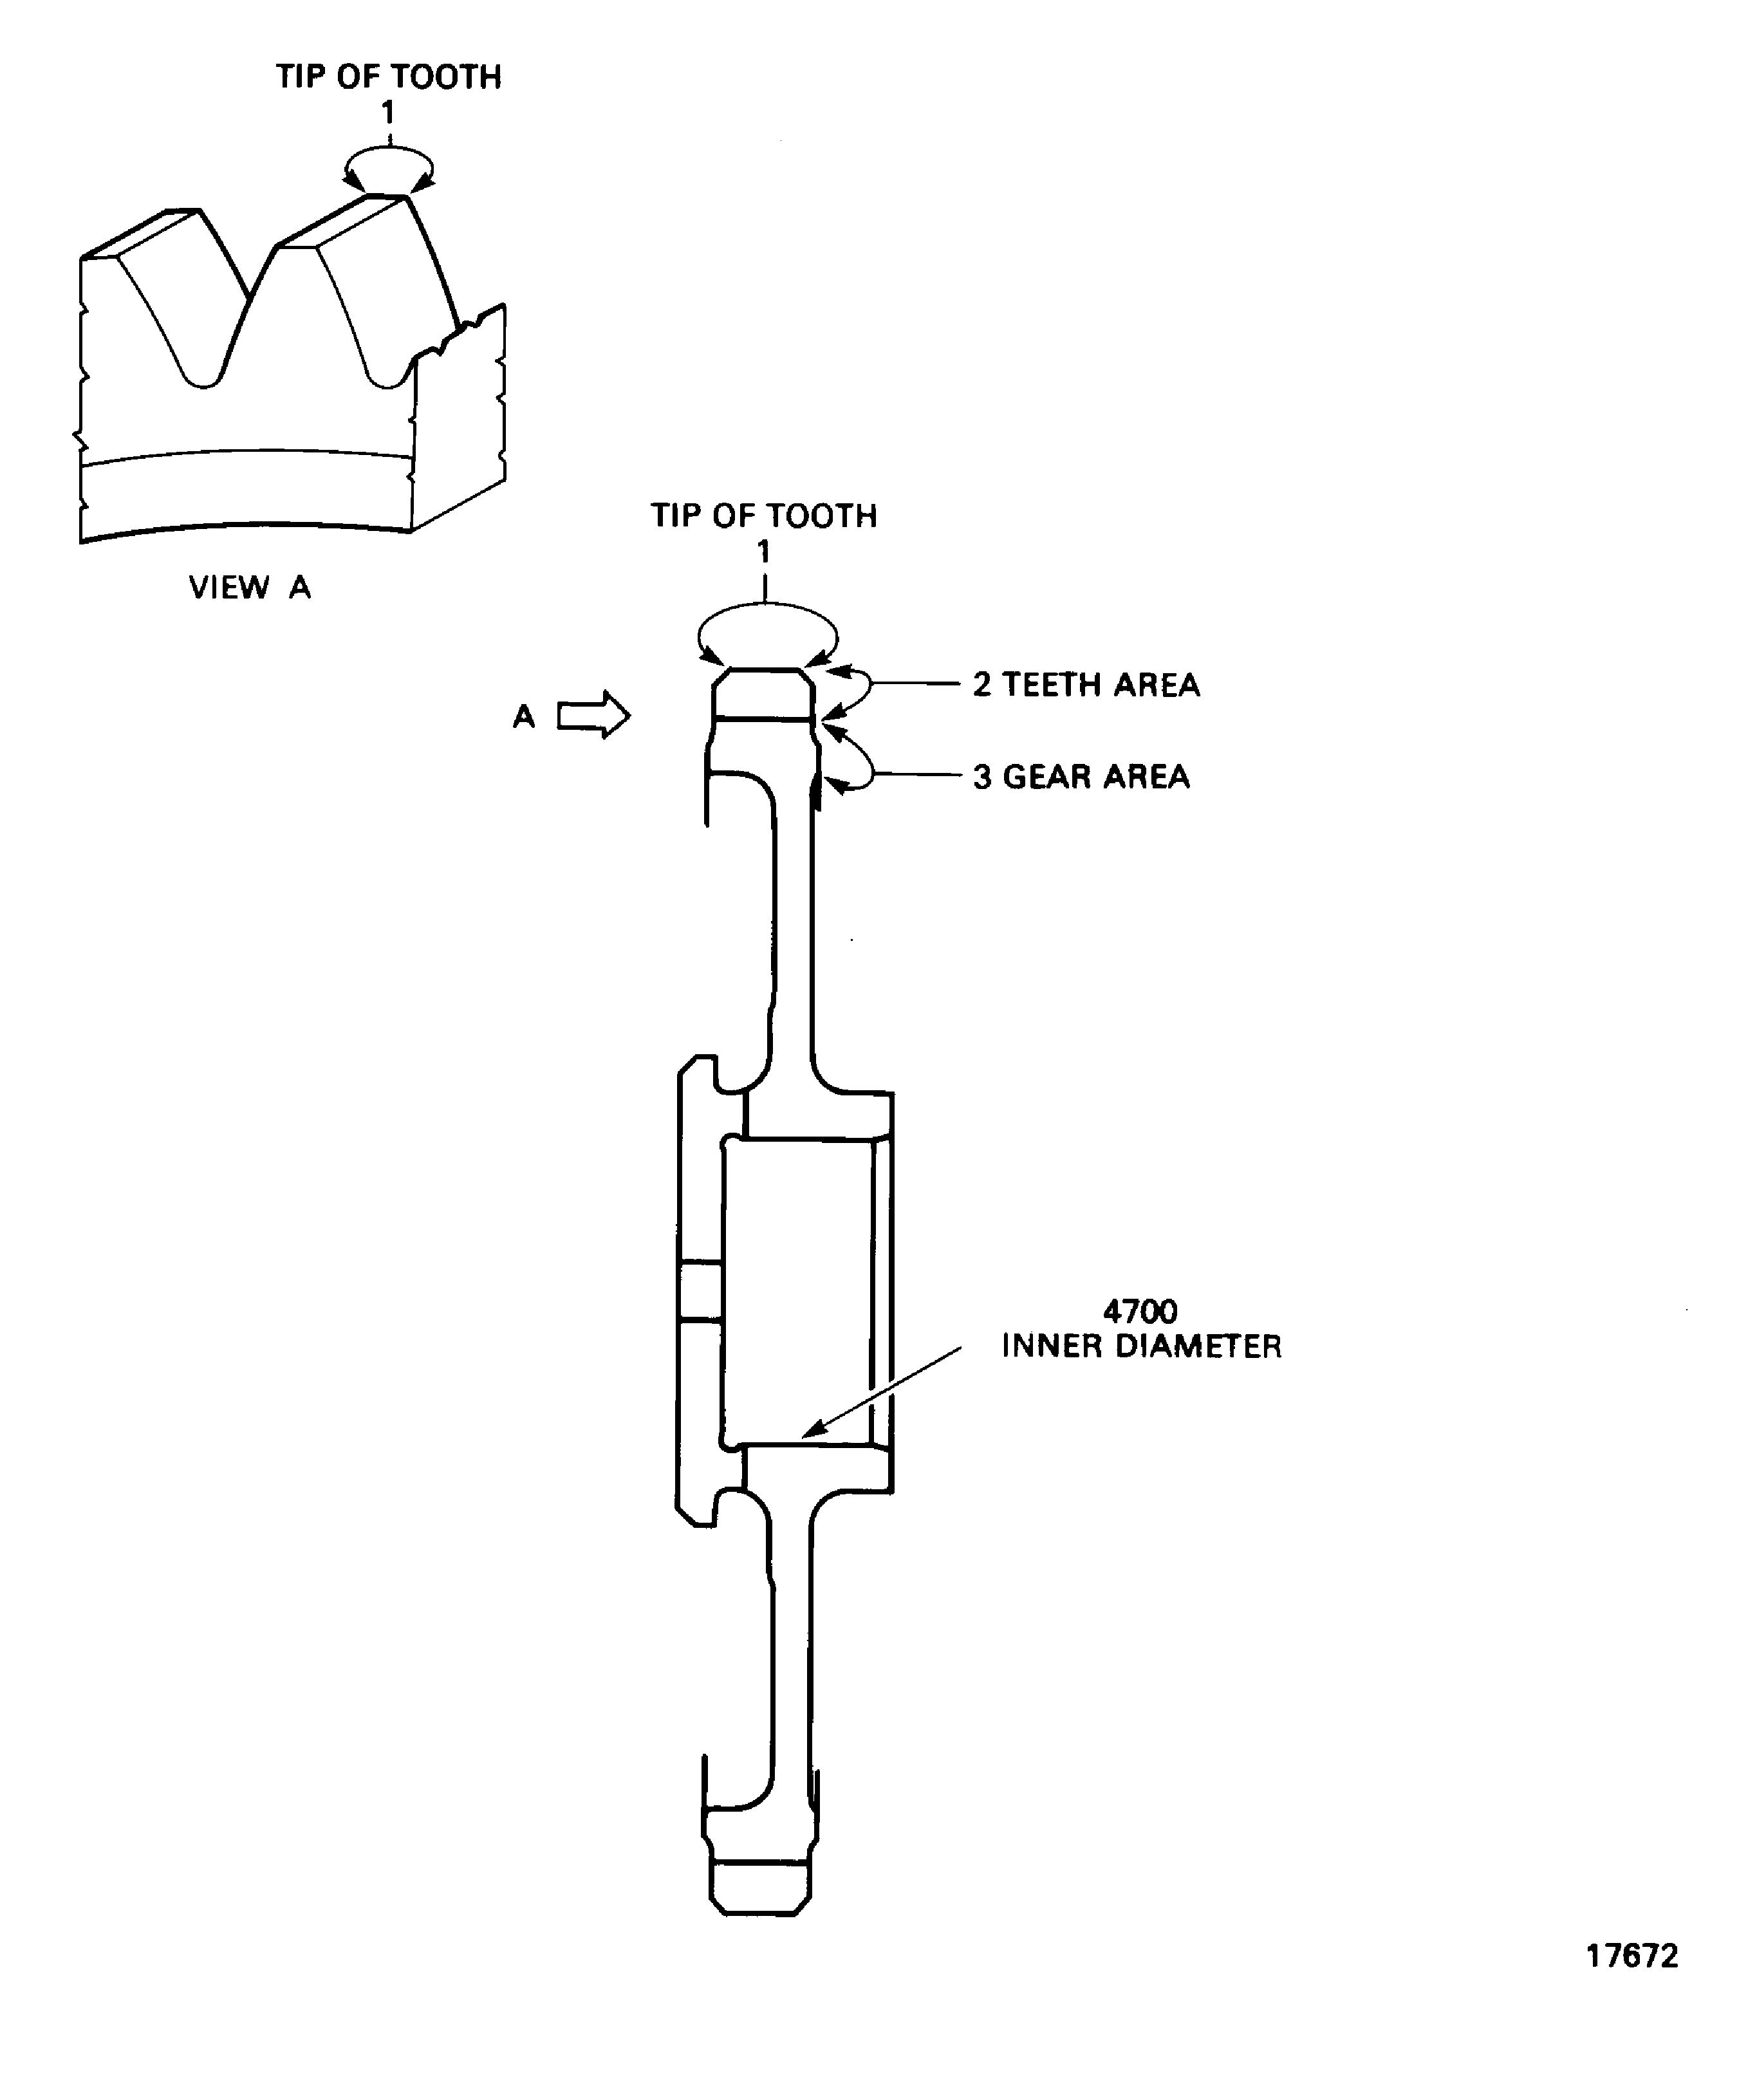
Refer to Figure.
Repair, VRS5346 (Repair-011) TASK 79-22-41-300-011.
More than Step.
Nicked on the tip of tooth area at Location 1
Repair, VRS5346 (Repair-011) TASK 79-22-41-300-011.
Nicks external to tip of tooth area
Reject
Chipped, flaking or fretting
Accept
Between 3.5312 and 3.5205 in. (89.693 and 89.52 mm).
Reject
Less than 3,5205 in. (89.52 mm).
Measure the dimension over diametrically opposed 0.118 in. (3.00 mm) diameter pins.
Damage and obvious sign of wear
SUBTASK 79-22-41-220-092 Examine the Drive Gear Teeth
Refer to Figure.
Reject
Less than 56 HRC measured at different locations.
Measure the hardness of teeth
Hardness of teeth
NOTE
Do this check only if overheating or some other condition makes it necessary. A blue discoloration of the part is an indication of overheating.
SUBTASK 79-22-41-220-093 Examine the Drive Gear Teeth Area at Location 2
Refer to Figure.
Reject
Less than 30 HRC measured at different locations.
Measure the hardness of teeth
Hardness of teeth
SUBTASK 79-22-41-220-094 Examine the Drive Gear Adjacent to Teeth at Location 3
Repair, VRS5346 (Repair-011) TASK 79-22-41-300-011.
More than Step
Nicked, scored, dented or scratched.
SUBTASK 79-22-41-220-095 Examine the Drive Gear Web Surfaces
Refer to Figure.
Accept
Between 0.8648 and 0.8654 in. (21.965 and 21.981 mm).
Repair, VRS5347 (Repair-012) TASK 79-22-41-300-012.
More than 0.8654 in. (21.981 mm).
Diameter
SUBTASK 79-22-41-220-096 Examine the Drive Gear Inner Diameter at Location 4700
Figure: Locations on the Drive Gear
Locations on the Drive Gear

