Export Control
EAR Export Classification: Not subject to the EAR per 15 C.F.R. Chapter 1, Part 734.3(b)(3), except for the following Service Bulletins which are currently published as EAR Export Classification 9E991: SBE70-0992, SBE72-0483, SBE72-0580, SBE72-0588, SBE72-0640, SBE73-0209, SBE80-0024 and SBE80-0025.Copyright
© IAE International Aero Engines AG (2001, 2014 - 2021) The information contained in this document is the property of © IAE International Aero Engines AG and may not be copied or used for any purpose other than that for which it is supplied without the express written authority of © IAE International Aero Engines AG. (This does not preclude use by engine and aircraft operators for normal instructional, maintenance or overhaul purposes.).Applicability
V2500-A5
Common Information
TASK 72-32-85-200-004-A00 Fan Case Name Plate Bracket - Examine, Inspection-004
General
This TASK gives the procedure for the inspection of the name plate bracket. For the other parts of the LP compressor/intermediate case module refer to TASK 72-32-85-200-000 (INSPECTION-000).
The policy that is necessary for inspection is given in SPM TASK 70-20-00-501.
All the parts must be cleaned before any parts are examined. Refer to SPM TASK 70-32-85-100-000. (CLEANING-000).
All parts must be visually examined for damage, corrosion and wear. Any defects that are not identified in the procedure must be referred to IAE.
The procedure for those parts which have a crack test is given in Step. Do the test before the parts are visually examined.
Do not discard any part until you are sure there are no repairs available.
Parts which should be discarded can be held although no repair is available. The repair of a discarded part could be shown to be necessary at a later date.
All the parts must be examined to make sure that all the repairs have been completed satisfactorily.
The practices and processes referred to in the procedure by the TASK numbers are in the SPM.
References
Refer to the SPM for the data on these items
Definitions of damages, SPM TASK 70-02-02-350-501
Record and control of the lives of parts, SPM TASK 70-05-00-220-501
Inspection of parts, SPM TASK 70-20-00-200-501
Same data on these items are contained in this TASK. For more data on these items refer to the SPM
Method of testing for crack indications
Chemical Processes
Surface Protection
Preliminary Requirements
Pre-Conditions
NONESupport Equipment
| Name | Manufacturer | Part Number / Identification | Quantity | Remark |
|---|---|---|---|---|
| Fluorescent Penetrant Inspection Equipment | LOCAL | Fluorescent penetrant inspection equipment |
Consumables, Materials and Expendables
NONESpares
NONESafety Requirements
NONEProcedure
Refer to TASK 72-32-85-100-000 (CLEANING-000)
Clean the parts
SUBTASK 72-32-85-230-063 Examine the Name Plate Bracket (03-150) for Cracks
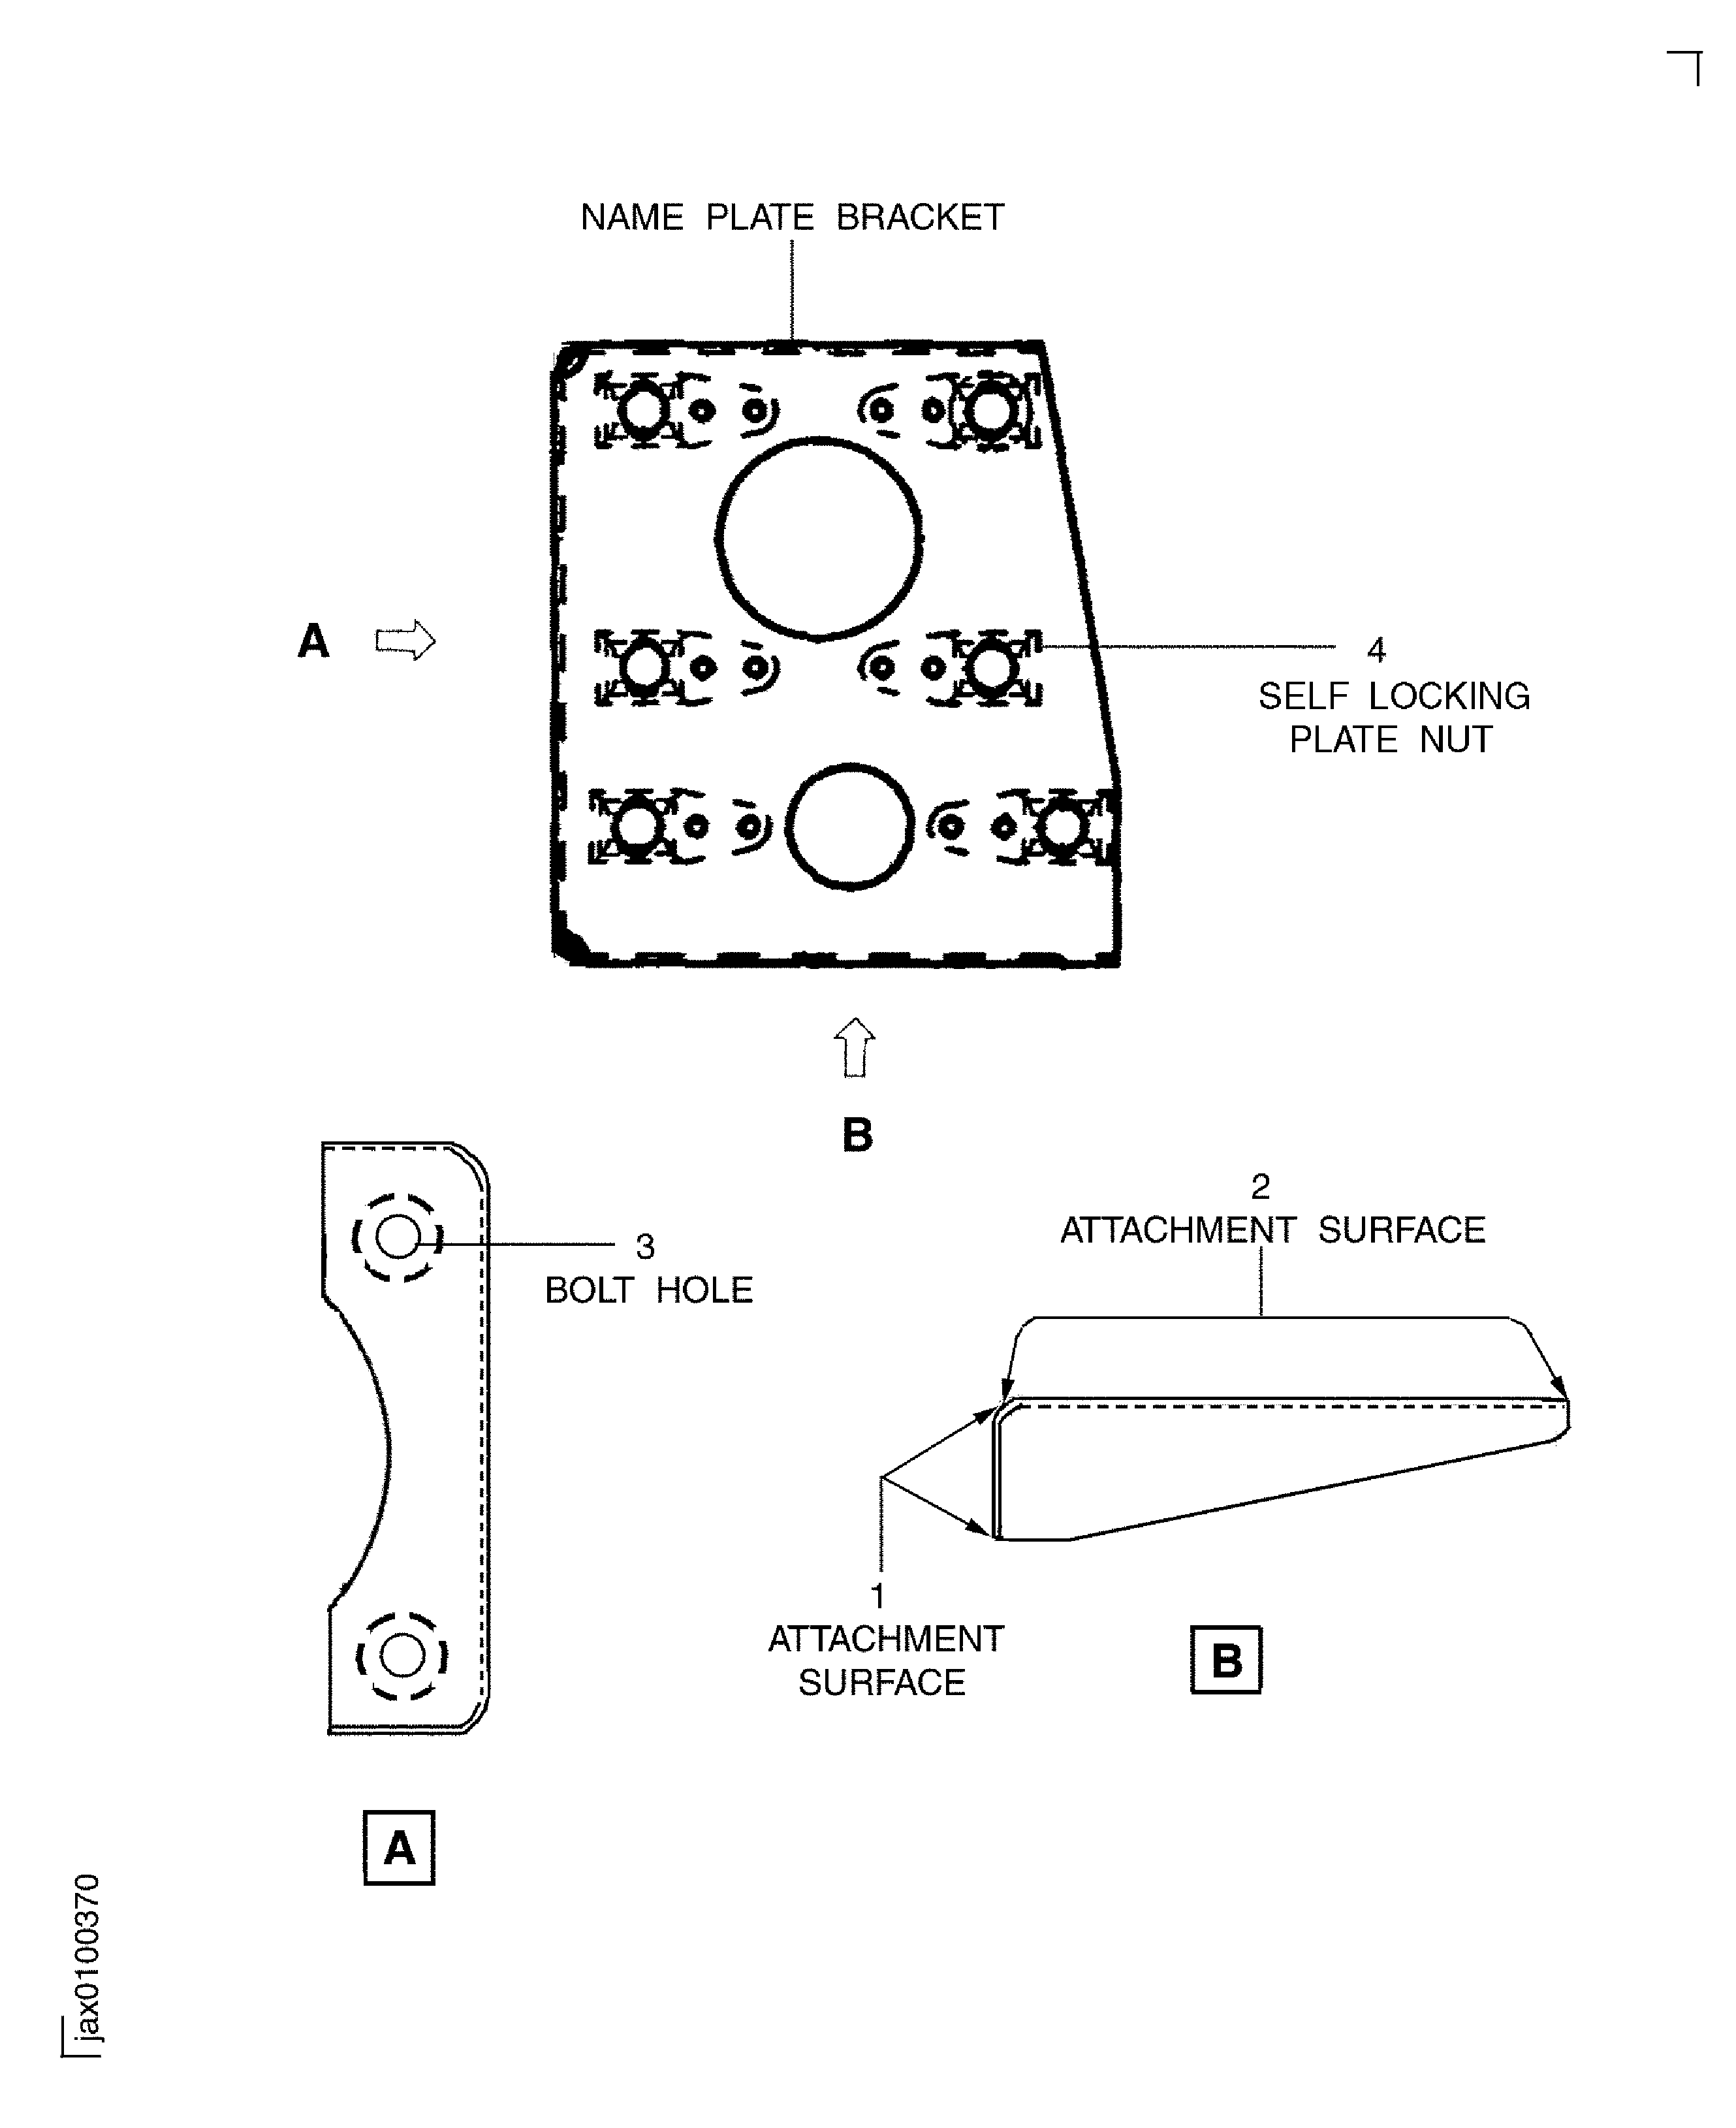
Refer to Figure.
Repair, VRS1380 TASK 72-32-85-300-053
Scratched
Repair, VRS1380 TASK 72-32-85-300-053
Scored
More than Step
Dent
Examine the attachment surface at location 1.
SUBTASK 72-32-85-220-179 Examine the Name Plate Bracket (03-150) Attachment Surface
Refer to Figure.
Repair, VRS1380 TASK 72-32-85-300-053
Scratched
Repair VRS1380 TASK 72-32-85-300-053
Scored
More than Step
Dent
Examine the attachment surface at location 2.
SUBTASK 72-32-85-220-180 Examine the Name Plate Bracket (03-150) Attachment Surface
Refer to Figure.
Repair, VRS1380 TASK 72-32-85-300-053
Scratched
Repair, VRS1380 TASK 72-32-85-300-053
Scored
Examine the bolt holes at location 3.
SUBTASK 72-32-85-220-181 Examine the Name Plate Bracket (03-150) Bolt Hole
Refer to Figure.
Repair, VRS1381 TASK 72-32-85-300-054 (REPAIR-054)
Damaged self locking nut threads
Repair, VRS1381 TASK 72-32-85-300-054 (REPAIR-054)
Other than the torque limits as given in the SPM TASK 70-42-01-400-501
Locking torque of the self locking nuts
Repair, VRS1381 TASK 72-32-85-300-054 (REPAIR-054)
Loose and/or missing rivets
Examine the self locking nut at location 4.
SUBTASK 72-32-85-220-182 Examine the Name Plate Bracket, (03-150) Self Lock Nut
Refer to Figure.
Repair, VRS1380 TASK 72-32-85-300-053
Scratched
Repair, VRS1380 TASK 72-32-85-300-053
Scored
More than Step
Dent
Examine all surfaces which do not include the identified location.
SUBTASK 72-32-85-220-183 Examine the Name Plate Bracket, (03-150) Surface
Figure: Locations on the Name Plate Bracket
Locations on the Name Plate Bracket

