Export Control
EAR Export Classification: Not subject to the EAR per 15 C.F.R. Chapter 1, Part 734.3(b)(3), except for the following Service Bulletins which are currently published as EAR Export Classification 9E991: SBE70-0992, SBE72-0483, SBE72-0580, SBE72-0588, SBE72-0640, SBE73-0209, SBE80-0024 and SBE80-0025.Copyright
© IAE International Aero Engines AG (2001, 2014 - 2021) The information contained in this document is the property of © IAE International Aero Engines AG and may not be copied or used for any purpose other than that for which it is supplied without the express written authority of © IAE International Aero Engines AG. (This does not preclude use by engine and aircraft operators for normal instructional, maintenance or overhaul purposes.).Applicability
All
Common Information
TASK 72-41-23-300-027 HPC Rear Outer Case - Forward Inner Flange Pin Holes Weld Repair-027 (VRS9281)
Effectivity
FIG/ITEM | PART NO. |
|---|---|
02-400 | 6A2949 |
02-400 | 6A3557 |
02-400 | 6A4154 |
02-400 | 6A5495 |
02-400 | 6A5682 |
02-400 | 6A8162 |
02-400 | 6B1427 |
General
This repair must only be done when the instruction to do so is given in 72-41-23 Repair, VRS6278 TASK 72-41-23-300-021 (REPAIR-021).
Preliminary Requirements
Pre-Conditions
| Action/Condition | Data Module/Technical Publication |
|---|---|
| Make sure that all cleaning and inspection procedures are performed before this repair. |
Support Equipment
NONEConsumables, Materials and Expendables
| Name | Manufacturer | Part Number / Identification | Quantity | Remark |
|---|---|---|---|---|
| CoMat 03-181 WELDING WIRE 12% Cr. STEEL | LOCAL | CoMat 03-181 |
Spares
NONESafety Requirements
NONEProcedure
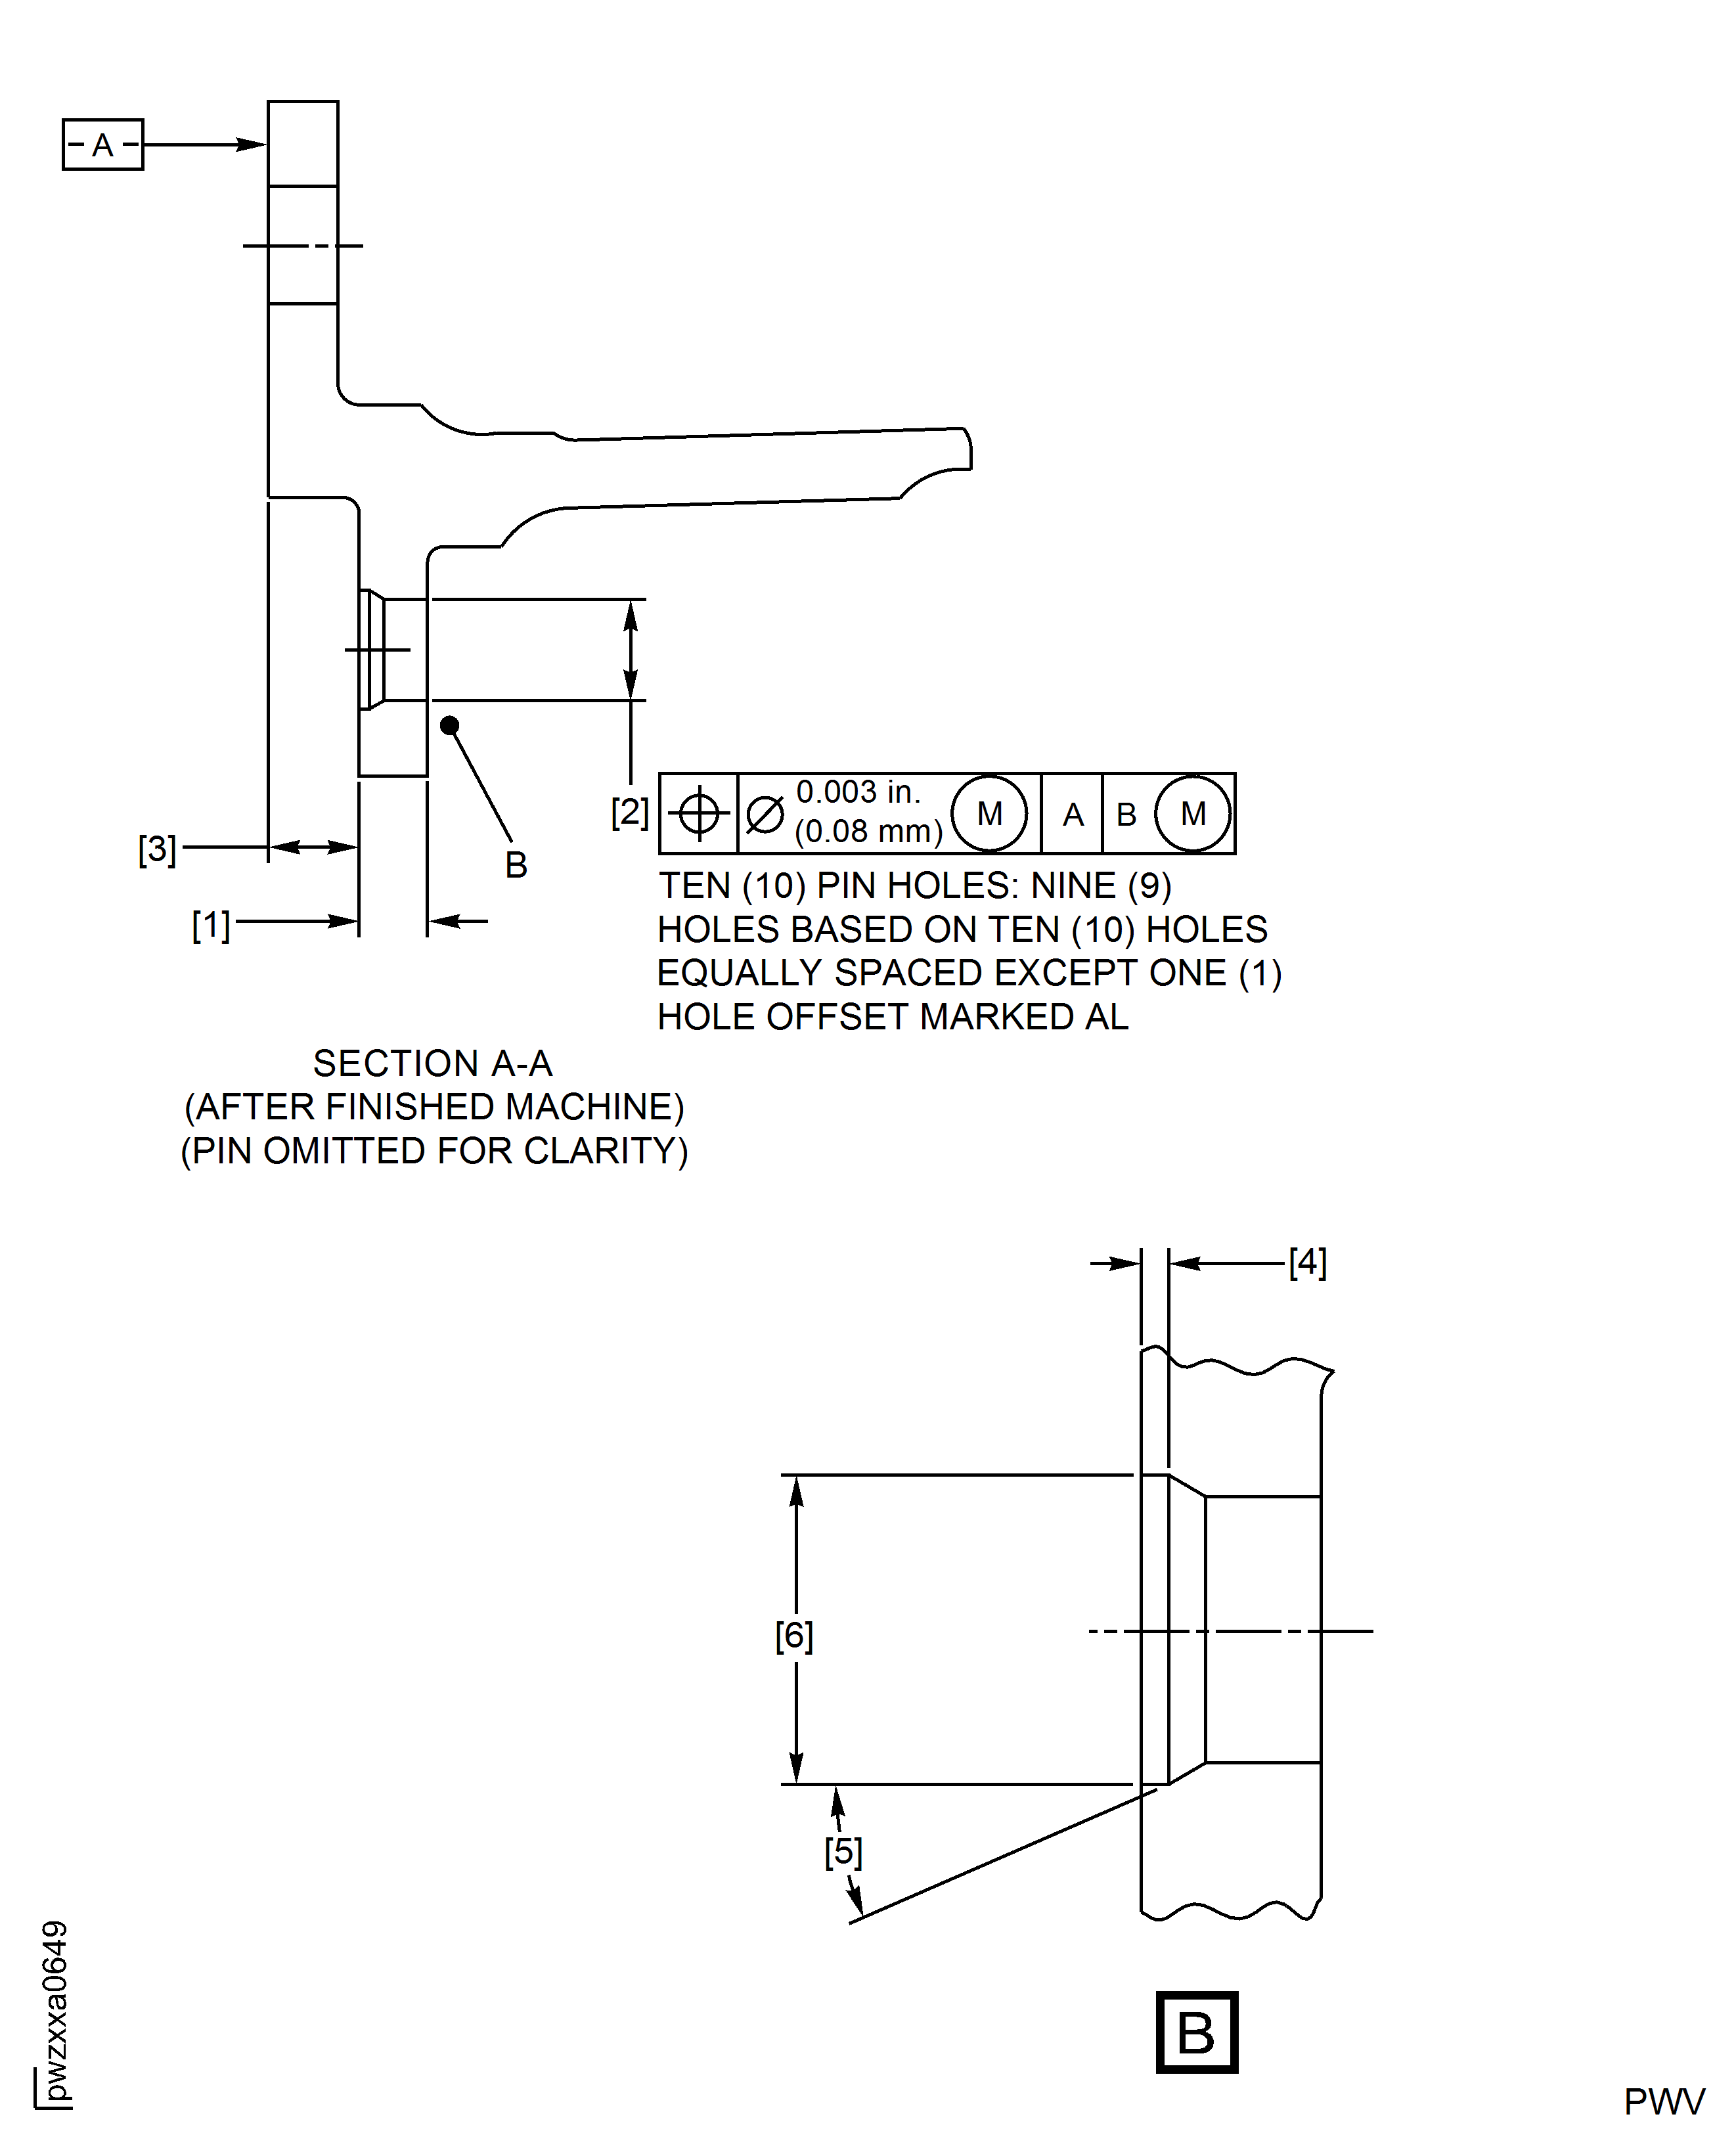
Blend to remove wear and prepare the area for weld. Refer to SPM TASK 70-35-03-300-501. See Figure.
Do not increase the diameter of the pin hole(s) beyond 0.260 in. (6.60 mm).
SUBTASK 72-41-23-350-143 Remove Surface Damage From Forward Inner Flange Pin Hole(s)
Locally clean the repair area(s). Refer to SPM TASK 70-11-26-300-503.
SUBTASK 72-41-23-110-107 Chemically Clean
Use a rotary austenitic stainless steel wire brush or silicon carbide abrasive wheels to remove oxides and prepare the repair area(s) for weld. Refer to SPM TASK 70-31-02-310-501-001.
SUBTASK 72-41-23-350-144 Remove Oxides And Prepare For Weld
Locally clean the repaired area(s). Refer to SPM TASK 70-11-26-300-503.
SUBTASK 72-41-23-110-108 Chemically Clean
Use the Manual Gas Tungsten Arc Weld (GTAW-MA) method.
Surface or plug weld the damaged pin hole(s). Refer to SPM TASK 70-31-02-310-501-001 and TASK 70-31-02-310-501-008. See Figure.
SUBTASK 72-41-23-310-001 Weld the HPC Rear Outer Case Forward Flange Pin Hole(s)
Do a locally heat treat at the repaired area(s). Refer to SPM TASK 70-31-02-310-501-001.
Heat to 1115 deg F - 1145 deg F (602 deg C - 618 deg C) for 58 to 62 minutes in air or inert atmosphere.
SUBTASK 72-41-23-350-145 Do A Local Heat Treat
Do a visual inspection of the repaired area(s) for distortion and discoloration. Refer to SPM TASK 70-31-02-310-501-001.
SUBTASK 72-41-23-220-222 Visually Examine
Hardness must be 321-352 HB (334-366 Vickers) or equivalent.
Do a hardness check on the surfaces adjacent to the welded area.
SUBTASK 72-41-23-350-146 Do A Hardness Check on the HPC Rear Outer Case
Blend weld repaired area(s) flush to or 0.002 in. (0.050 mm) maximum below, adjacent non-repair flange surfaces. Refer to SPM TASK 70-35-03-300-501.
SUBTASK 72-41-23-350-147 Restore the Casing Contour
Clean the part. Refer to SPM TASK 70-11-03-300-503.
SUBTASK 72-41-23-110-109 Chemically Clean
Do a local fluorescent penetrant inspection at the repair area(s), high sensitivity. No crack(s) permitted. Refer to SPM TASK 70-23-05-230-501.
Do a full part fluorescent penetrant inspection. Refer to SPM TASK 70-23-03-230-501.
Do a fluorescent penetrant inspection by one of the following methods:
SUBTASK 72-41-23-230-252 Perform A Fluorescent Penetrant Inspection
Do a visual inspection of the repaired area(s). Refer to SPM TASK 70-31-02-310-501-001.
SUBTASK 72-41-23-220-223 Visually Examine
Permanently mark the repaired part with "VRS9281" adjacent to the assembly part number using vibration peen method. Refer to SPM TASK 70-09-00-400-501.
SUBTASK 72-41-23-350-148 Identify the Repair
Figure: HPC Rear Outer Case, Forward Inner Flange Pin Holes Weld Repair, Repair-027 (VRS9281)
HPC Rear Outer Case, Forward Inner Flange Pin Holes Weld Repair, Repair-027 (VRS9281)

Figure: HPC Rear Outer Case, Forward Inner Flange Pin Holes Weld Repair, Repair-027 (VRS9281)
HPC Rear Outer Case, Forward Inner Flange Pin Holes Weld Repair, Repair-027 (VRS9281)

Requirements After Job Completion
Follow-On Conditions
| Action/Condition | Data Module/Technical Publication |
|---|---|
| Locally touch-up missing surface protection as necessary including identity marking. | TASK 72-41-23-300-003 |
| Replace the removed pin(s). | TASK 72-41-23-300-021 |
