Export Control
EAR Export Classification: Not subject to the EAR per 15 C.F.R. Chapter 1, Part 734.3(b)(3), except for the following Service Bulletins which are currently published as EAR Export Classification 9E991: SBE70-0992, SBE72-0483, SBE72-0580, SBE72-0588, SBE72-0640, SBE73-0209, SBE80-0024 and SBE80-0025.Copyright
© IAE International Aero Engines AG (2001, 2014 - 2021) The information contained in this document is the property of © IAE International Aero Engines AG and may not be copied or used for any purpose other than that for which it is supplied without the express written authority of © IAE International Aero Engines AG. (This does not preclude use by engine and aircraft operators for normal instructional, maintenance or overhaul purposes.).Applicability
All
Common Information
TASK 72-41-31-200-003-A00 HPC Stage 4 Rotor Path Segment - Examine, Inspection-003
General
This TASK gives the procedure for the inspection of the stage 4 rotor path ring segments.
Fig/item numbers in parentheses in the procedure agree with those used in the IPC. Only the primary Fig/Item numbers are used. For the service bulletin alpha variants refer to the IPC.
The policy that is necessary for inspection is given in the SPM TASK 70-20-01-200-501.
All the parts must be cleaned before any part is examined.
All the parts must be visually examined for damage, corrosion and wear. Any defects that are not identified in the procedure must be referred to IAE.
The procedure for the parts which must have a crack test is given in Step. Do the crack test before the part is visually examined.
Do not discard any part until you are sure there are no repairs available. Refer to the instructions in Repair before a discarded part is used again or oversize parts are installed.
Parts which should be discarded can be held although no repair is available. The repair of a discarded part can be shown to be necessary at a subsequent date.
All the parts must be examined to make sure that all the repairs have been completed satisfactorily.
The practices and processes referred to in the procedure by the TASK/SUBTASK numbers are in the SPM.
The segments must be kept as a full set and examined as a full set. If one segment is rejected then the set must be rejected. Repair segments as necessary. Replacement set of segments to be final machined on re-assembly.
References
Refer to the SPM for data on these items:
Definition of Damage, SPM TASK 70-02-02-350-501,
Inspection of Parts, SPM TASK 70-20-01-200-501.
Some data on these items is contained in this TASK. For more data on these items refer to the SPM:
Methods of Testing for Crack Indications,
Chemical Processes,
Surface Protection.
Preliminary Requirements
Pre-Conditions
NONESupport Equipment
NONEConsumables, Materials and Expendables
NONESpares
NONESafety Requirements
NONEProcedure
Refer to TASK 72-41-31-100-000 (CLEANING-000)
Clean the parts
SUBTASK 72-41-31-230-053 Examine the Stage 4 Rotor Path Ring Segments for Cracks
Refer to Figure.
Repair VRS6243, TASK 72-41-31-300-006 (REPAIR-006)
More than in (a)
Worn.
Repair VRS6243, TASK 72-41-31-300-006 (REPAIR-006)
Gouged
Repair VRS6243, TASK 72-41-31-300-006 (REPAIR-006)
More than in (a)
Chipped.
Repair VRS6243, TASK 72-41-31-300-006 (REPAIR-006)
More than in (a)
Scored.
Rotor path ring lining radius. Use the data written as a note in TASK 72-41-00-040-001-A00 (DISASSEMBLY, CONFIG-001).
SUBTASK 72-41-31-220-072 Examine the Stage 4 Rotor Path Ring Segments Lining at Location 1
NOTE
Accept or reject as set. Rejected set must be re-lined before use in a new set.Refer to Figure.
Repair, VRS6208 TASK 72-41-31-300-007 (REPAIR-007)
More than in (1)
Scored.
Repair, VRS6208 TASK 72-41-31-300-007 (REPAIR-007)
More than in (1)
Scratched.
SUBTASK 72-41-31-220-073 Examine the Stage 4 Rotor Path Ring Segments Lands at Location 1221
Refer to Figure.
SUBTASK 72-41-31-220-074 Examine the Stage 4 Rotor Path Ring Segments Faces at Locations 2 and 3
Refer to Figure.
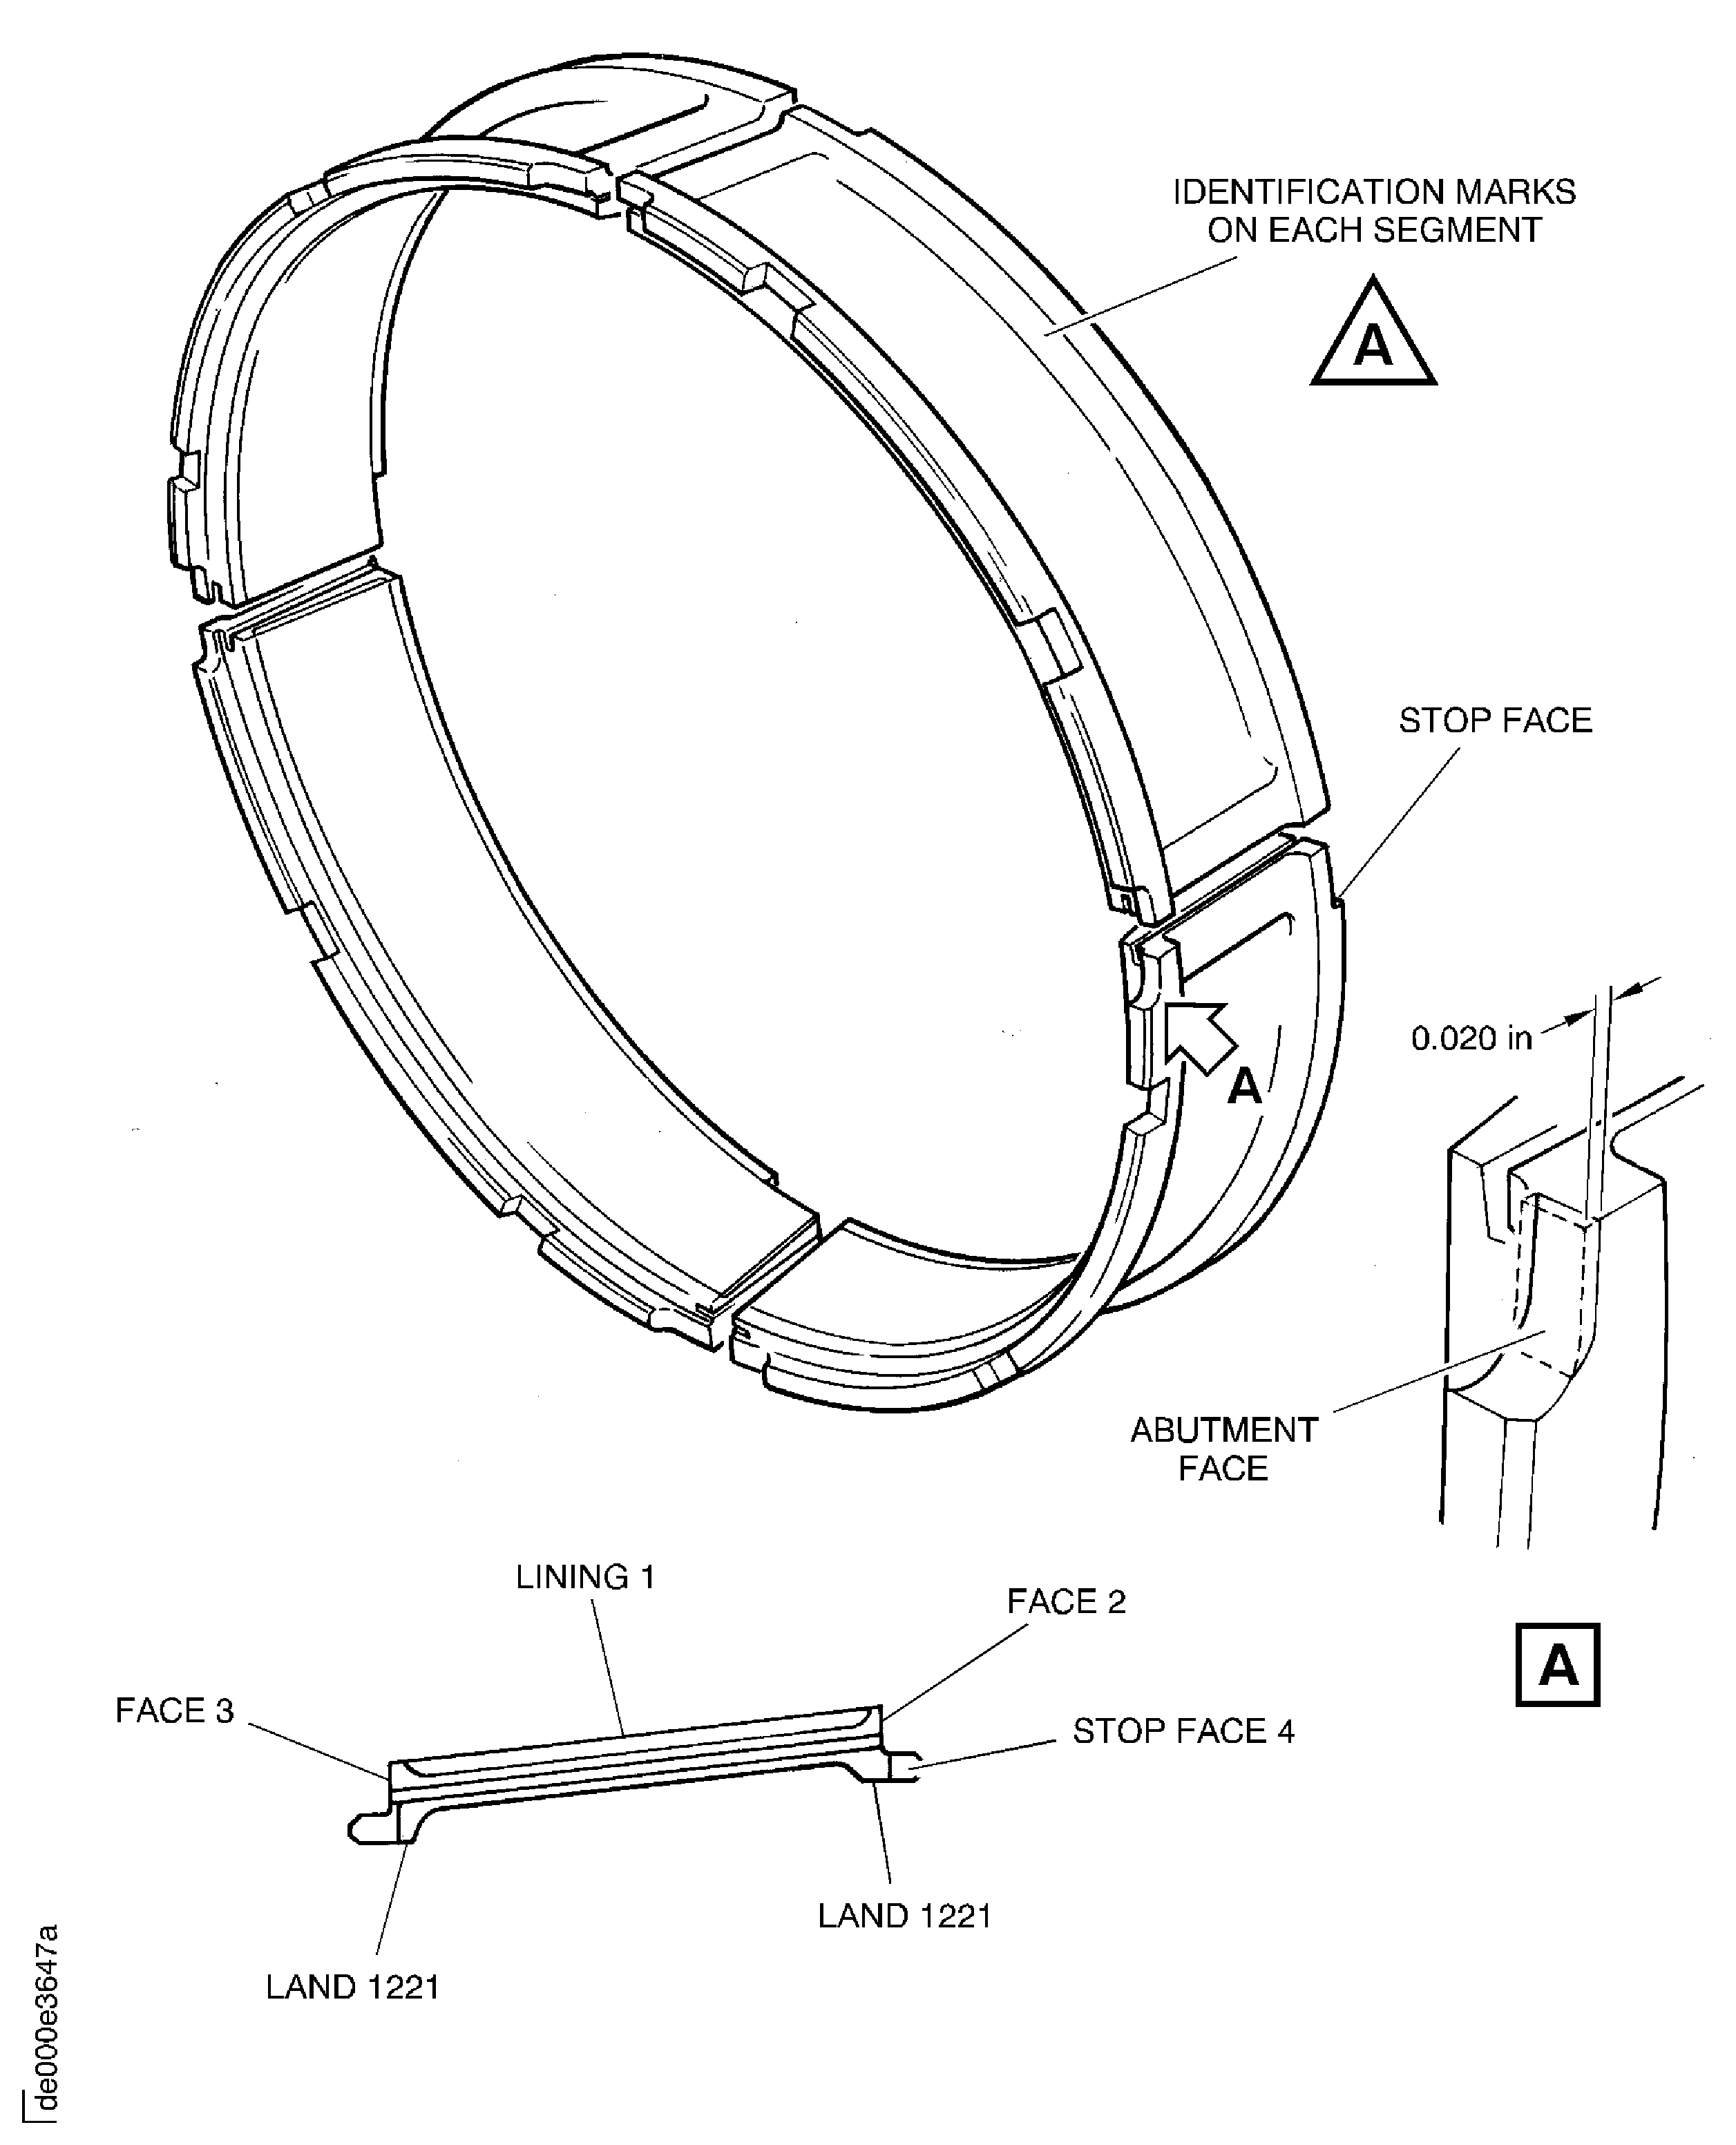
Mark the component with the symbol 'A' in a triangle next to the part number using vibro-engraving equipment, Figure. Refer to the SPM TASK 70-09-00-400-501, SUBTASK 70-09-00-400-001.
Between 0.010 to 0.020in. (0.25 to 0.50 mm) in depth
Worn.
Repair, VRS6208 TASK 72-41-31-300-007 (REPAIR-007)
More than (1)
Chafed.
SUBTASK 72-41-31-220-202 Examine the Stage 4 Rotor Path Ring Segments Stop Face at Location 4
Refer to Figure.
SUBTASK 72-41-31-220-103 Examine the Stage 4 Rotor Path Ring Segments Remaining Surfaces
Figure: Stage 4 rotor path ring - Inspection locations
Stage 4 rotor path ring - Inspection locations

