Export Control
EAR Export Classification: Not subject to the EAR per 15 C.F.R. Chapter 1, Part 734.3(b)(3), except for the following Service Bulletins which are currently published as EAR Export Classification 9E991: SBE70-0992, SBE72-0483, SBE72-0580, SBE72-0588, SBE72-0640, SBE73-0209, SBE80-0024 and SBE80-0025.Copyright
© IAE International Aero Engines AG (2001, 2014 - 2021) The information contained in this document is the property of © IAE International Aero Engines AG and may not be copied or used for any purpose other than that for which it is supplied without the express written authority of © IAE International Aero Engines AG. (This does not preclude use by engine and aircraft operators for normal instructional, maintenance or overhaul purposes.).Applicability
All
Common Information
TASK 72-32-51-200-002 Front Seal Runner Ring - Examine, Inspection-002
General
This TASK gives the procedure for the inspection of the seals.
Fig/item numbers in parentheses in the procedure agree with those used in the IPC.
The policy that is necessary for inspection is given in the SPM TASK 70-20-01-200-501.
All the parts must be cleaned before any part is examined. Refer to TASK 72-32-51-100-000 (CLEANING-000).
All parts must be visually examined for damage, corrosion and wear. Any defects that are not identified in the procedure must be referred to IAE.
The procedure for those parts which must have a crack test is given in Step. Do the test before the part is visually examined. Limits for cracks are given in the SUBTASK for each part.
A ** following repair referenced in this inspection indicates that the repair is not yet published in the current revision of the manual and the part must be rejected. Contact IAE for additional information concerning FAA approved repair date.
Do not discard any part until you are sure there are no repairs available. Refer to the instructions in Repair before a discarded part is used again or oversize parts are installed.
Parts which should be discarded can be held although no repair is available. The repair of a discarded part could be shown to be necessary at a later date.
All parts must be examined to make sure that all repairs have been completed satisfactorily.
The practices and processes referred to in the procedure by the TASK numbers are in the SPM.
References
Refer to the SPM for the data on these items.
Definitions of damages, SPM TASK 70-02-02-350-501
Inspection of parts, SPM TASK 70-20-01-200-501
Preliminary Requirements
Pre-Conditions
NONESupport Equipment
| Name | Manufacturer | Part Number / Identification | Quantity | Remark |
|---|---|---|---|---|
| Magnetic particle inspection equipment | LOCAL | Magnetic particle inspection equipment |
Consumables, Materials and Expendables
| Name | Manufacturer | Part Number / Identification | Quantity | Remark |
|---|---|---|---|---|
| CoMat 06-011 MAGNETIC PARTICLES, FLUORESCENT, DRY POWDER | LOCAL | CoMat 06-011 |
Spares
NONESafety Requirements
NONEProcedure
Clean the part. Refer to TASK 72-32-51-100-000.
Do the crack test on the part that is given below. Use the applicable magnetic particle inspection procedure.
PART IDENT
PROCEDURE
CURRENT/INSPECT
TASK/SUBTASK
Seal
Threading Bar Inspect using continuous wet or simultaneous inking with CoMat 06-011 MAGNETIC PARTICLES, FLUORESCENT, DRY POWDER
1000 amp Seal outside diameter visually inspect for longitudinal and radial defects. Check doubtful indications using low power magnification. If necessary, inspect under white light at 15X binocular
1-turn solienoid continuous wet or simultaneous inking
2000 A/T Do again the magnetisation and inspection along seal length. Visually inspect for circumferential defects. Check doubtful indications using low power magnification. If necessary, inspect under white light at 15X binocular
SUBTASK 72-32-51-240-055 Examine the Seals (01-200) for Cracks
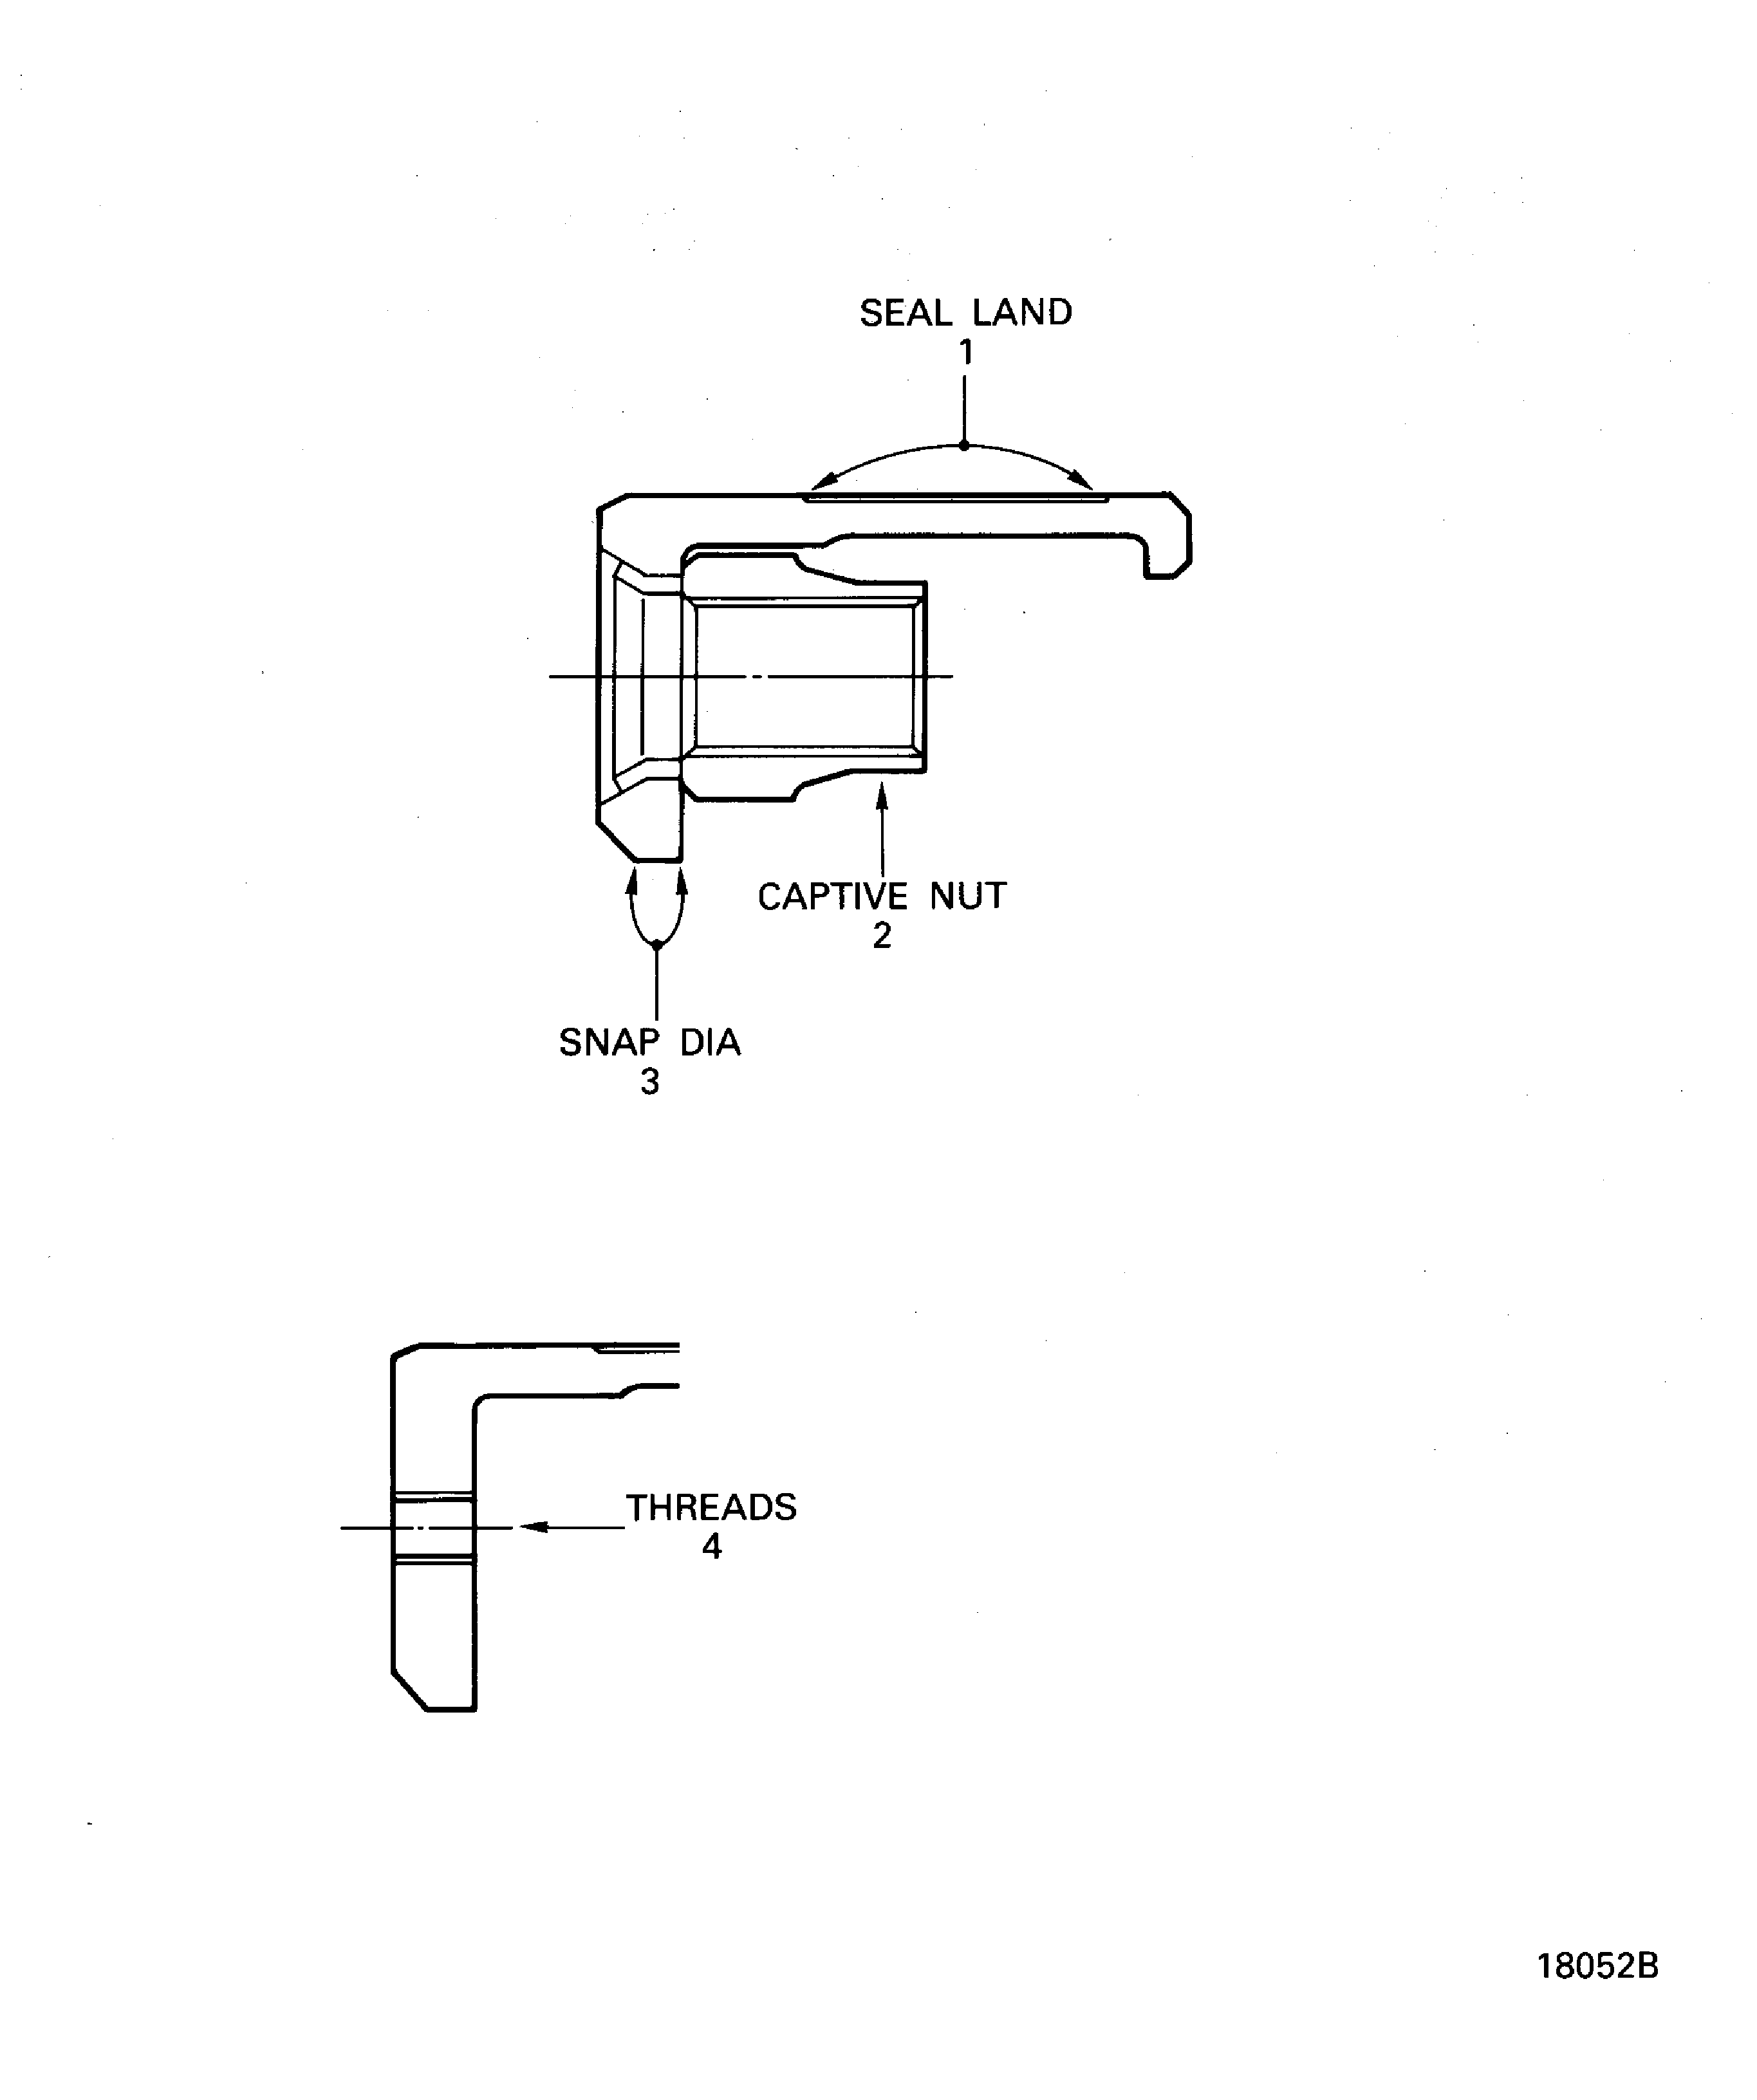
Refer to Figure.
Repair, VRS1285 TASK 72-32-51-300-005 (REPAIR-005)
Loose or Damaged
Examine the captive nuts at location 2.
SUBTASK 72-32-51-220-089 Examine the Seals (01-200) Captive Nuts
Refer to Figure.
Repair, VRS1286 TASK 72-32-51-300-006 (REPAIR-006)
More than in Step
Worn.
Examine the seal lands at location 1.
SUBTASK 72-32-51-220-090 Examine the Seals (01-200) Seal Lands
Refer to Figure.
Repair, VRS1945 TASK 72-32-51-300-021 (REPAIR-021)
More than in Step
Dimensionally inspect inside snap diameter
Examine the seal diameter at location 3.
SUBTASK 72-32-51-220-091 Examine the Seals (01-200) Seal Diameter
Refer to Figure.
SUBTASK 72-32-52-220-106 Examine the Seals (01-200) Thread
Repair, VRS1284 TASK 72-32-51-300-022 (REPAIR-022)
Not more than 0.005 in. (0.12 mm) in depth
Nicked.
Repair, VRS1284 TASK 72-32-51-300-022 (REPAIR-022)
Not more than 0.005 in (0.12 mm) in depth
Scored.
SUBTASK 72-32-51-220-092 Examine the Seals (01-200) Other Surfaces
Figure: Seal, A/O runner front
Seal, A/O runner front

