Export Control
EAR Export Classification: Not subject to the EAR per 15 C.F.R. Chapter 1, Part 734.3(b)(3), except for the following Service Bulletins which are currently published as EAR Export Classification 9E991: SBE70-0992, SBE72-0483, SBE72-0580, SBE72-0588, SBE72-0640, SBE73-0209, SBE80-0024 and SBE80-0025.Copyright
© IAE International Aero Engines AG (2001, 2014 - 2021) The information contained in this document is the property of © IAE International Aero Engines AG and may not be copied or used for any purpose other than that for which it is supplied without the express written authority of © IAE International Aero Engines AG. (This does not preclude use by engine and aircraft operators for normal instructional, maintenance or overhaul purposes.).Applicability
All
Common Information
TASK 72-32-81-200-001-A00 LPC Stage 1.5 - 2.5 Drum Disk - Examine The Disk, Inspection-001
General
This TASK gives the procedure for the inspection of the disk.
Fig/item numbers in parentheses in the procedure agree with those used in the IPC.
The policy that is necessary for inspection is given in the SPM TASK 70-20-01-200-501.
All the parts must be cleaned before any part is examined. Refer to TASK 72-32-81-100-000 (CLEANING-000)
All parts must be visually examined for damage, corrosion and wear. Any defects that are not identified in the procedure must be referred to IAE.
The procedure for those parts which must have a crack test is given in Step. Do the test before the part is visually examined.
Do not discard any part until you are sure there are no repairs available. Refer to the instructions in Repair before a discarded part is used again or oversize parts are installed.
Parts which should be discarded can be held although no repair is available. The repair of a discarded part could be shown to be necessary at a later date.
All parts must be examined to make sure that all repairs have been completed satisfactorily.
The practices and processes referred to in the procedure by the TASK/SUBTASK numbers are in the SPM.
References
Refer to the SPM for data on these items.
Definitions of Damage, SPM TASK 70-02-02-350-501
Record and Control of the Lives of Parts, SPM TASK 70-05-00-220-501
Inspection of Parts, SPM TASK 70-20-01-200-501
Some data on these items is contained in this TASK. For more data on these items refer to the SPM.
Method of Testing for Crack Indications
Chemical Processes
Surface Protection
Preliminary Requirements
Pre-Conditions
NONESupport Equipment
| Name | Manufacturer | Part Number / Identification | Quantity | Remark |
|---|---|---|---|---|
| Fluorescent Penetrant Inspection Equipment | LOCAL | Fluorescent penetrant inspection equipment |
Consumables, Materials and Expendables
NONESpares
NONESafety Requirements
NONEProcedure
Clean the part. Refer to TASK 72-32-81-100-000 (CLEANING-000).
SUBTASK 72-32-81-230-052 Examine the Disk (01-200) for Cracks
NOTE
For the method to clean the part, refer to the SPM TASK 70-11-03-300-503.Refer to Figure.
Repair, VRS1366 TASK 72-32-81-300-004 (REPAIR-004)
Less than 25.6802 in. (652.275 mm)
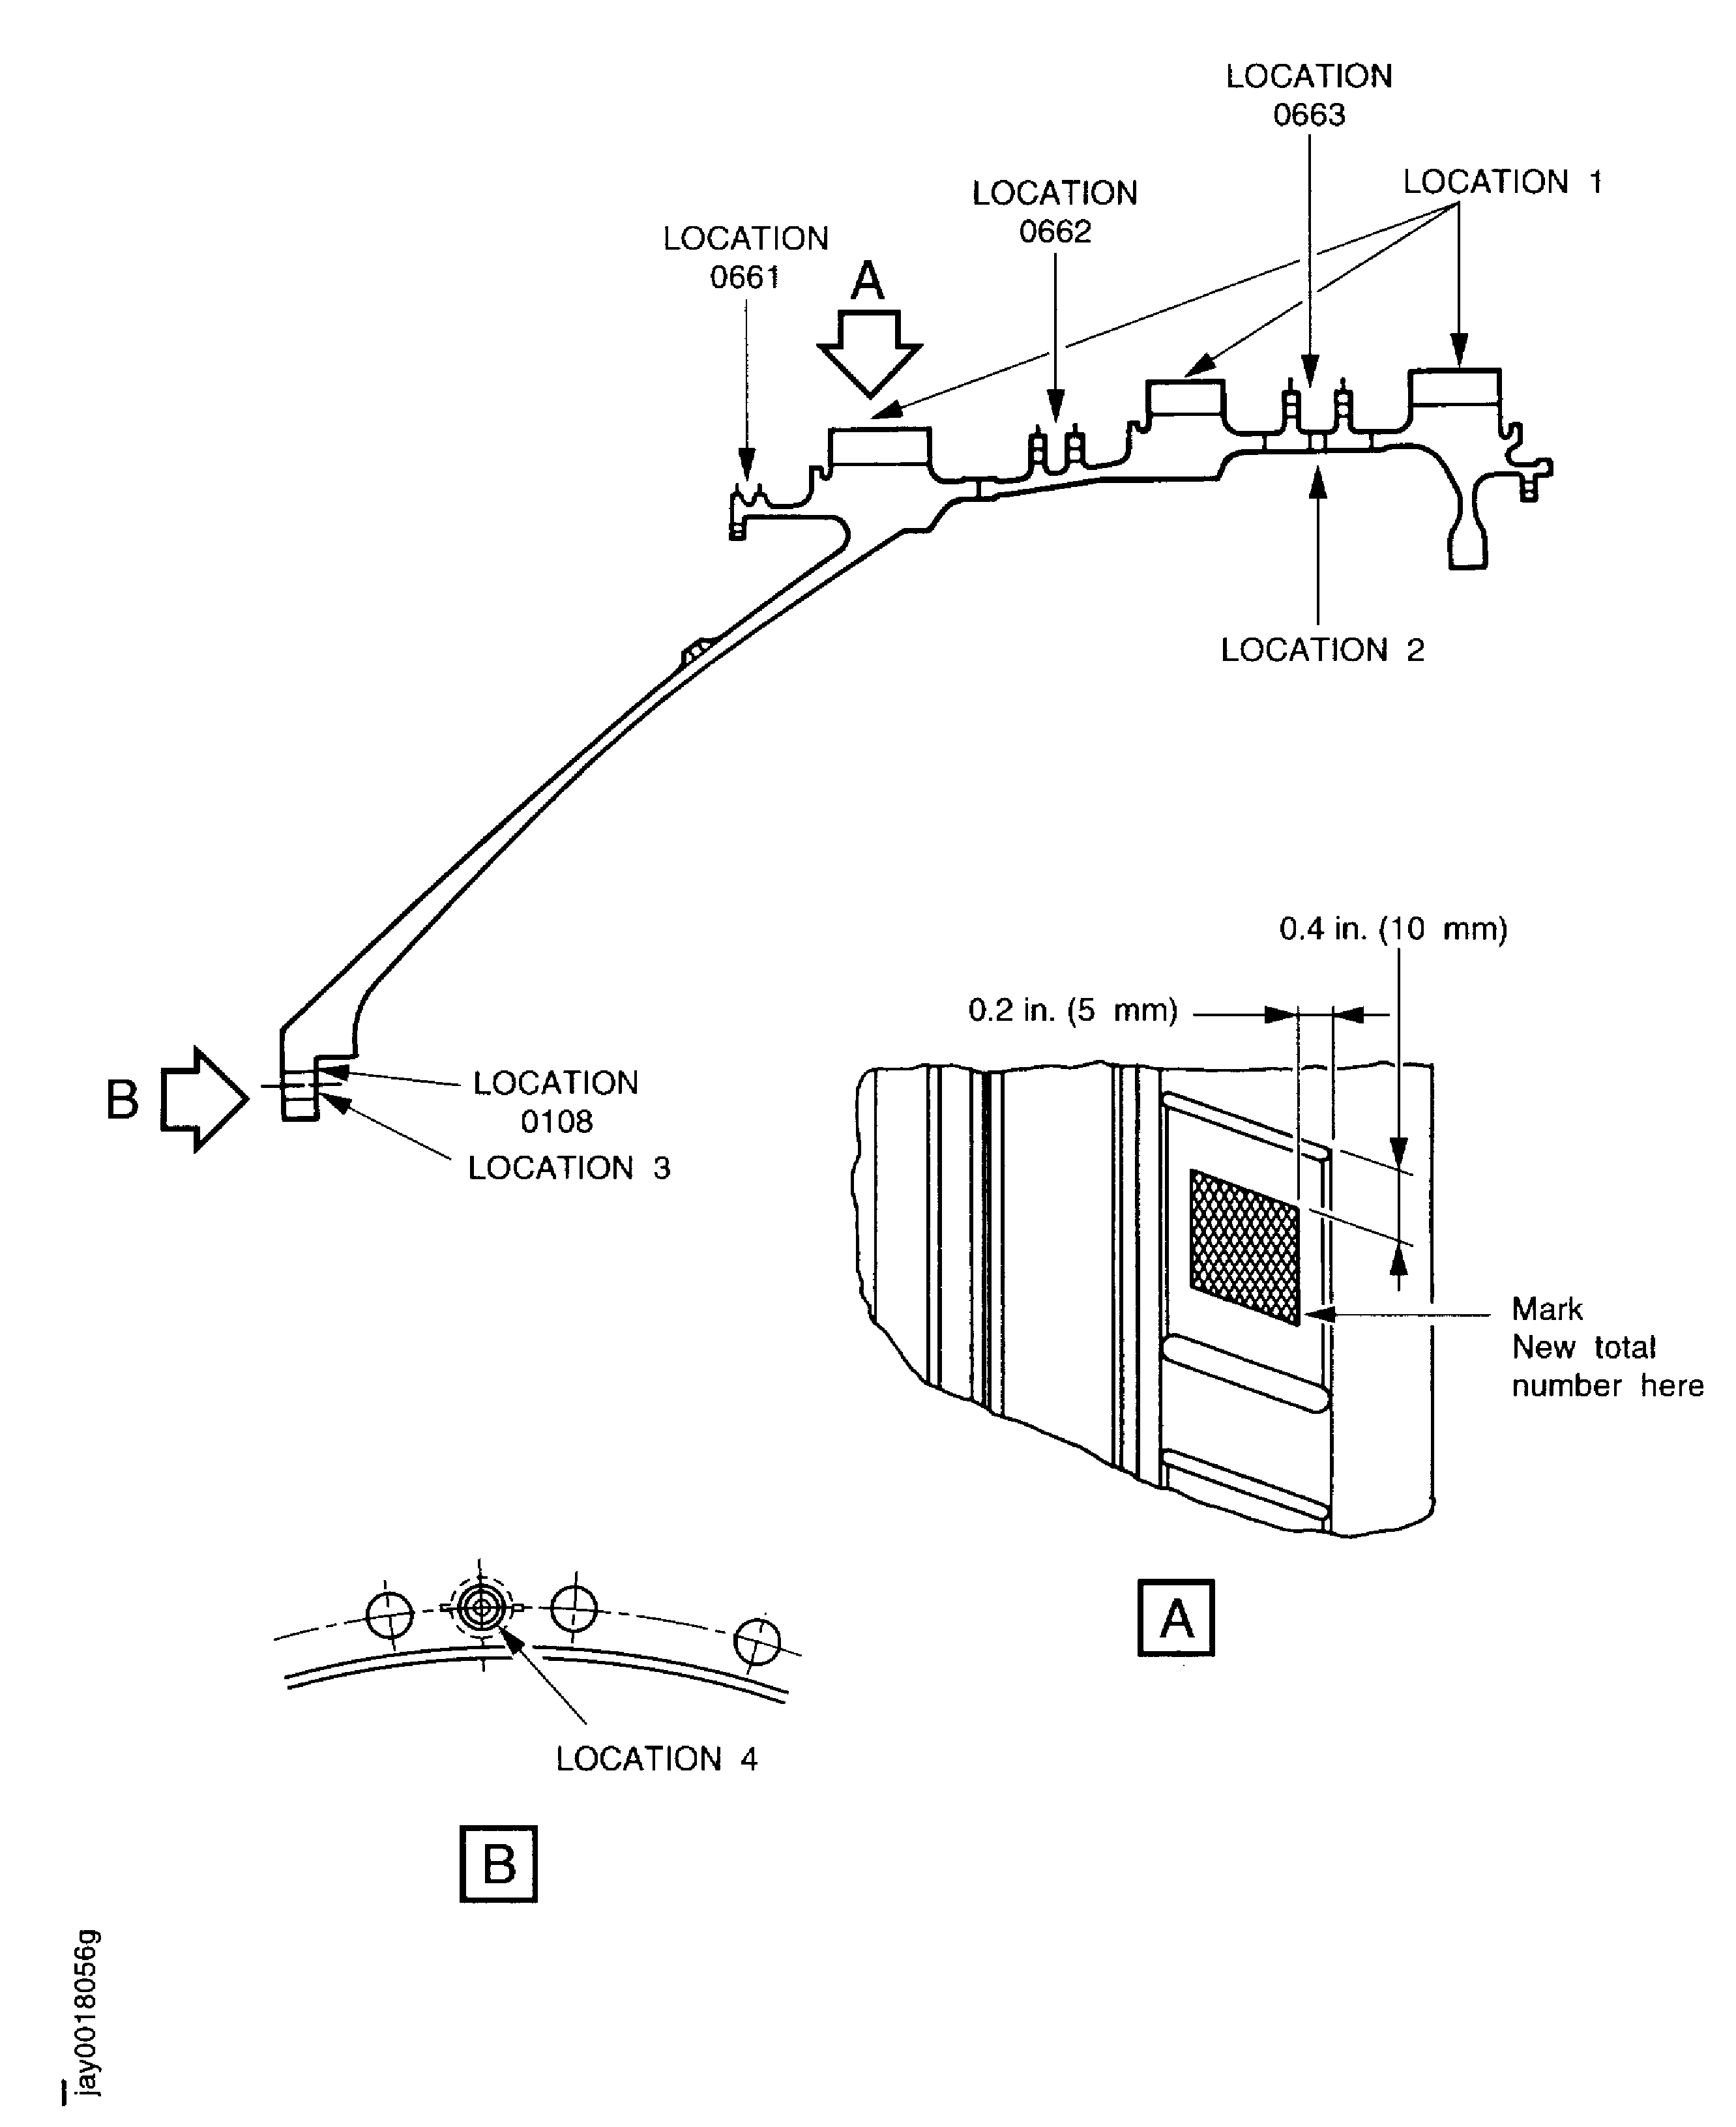
Location 0661.
Repair, VRS1366 TASK 72-32-81-300-004 (REPAIR-004)
Less than 26.9164 in. (683.675 mm)
Location 0662.
Repair, VRS1366 TASK 72-32-81-300-004 (REPAIR-004)
Less than 27.8770 in. (708.075 mm)
Location 0663.
Worn.
Repair, VRS1364 TASK 72-32-81-300-001 (REPAIR-001)
If the defects are to be removed by dressing, the damaged area must be less than 0.055 sqin (35.48 sqmm) per one fin.
Repair, VRS1366 TASK 72-32-81-300-004 (REPAIR-004)
More than Step
Bent, nicked or dented.
SUBTASK 72-32-81-220-053 Examine the Disk (01-200) Knife Edge Seals at Locations 0661, 0662 and 0663
Refer to Figure.
SUBTASK 72-32-81-220-055 Examine the Disk (01-200) Bolt Holes
Refer to Figure.
Repair, VRS1363 TASK 72-32-81-300-002 (REPAIR-002)
Scored
Repair, VRS1365 TASK 72-32-81-300-003 (REPAIR-003)
More than in Step
Worn.
Examine the spigot diameter at location 0108.
SUBTASK 72-32-81-220-056 Examine the Disk (01-200) Spigot Diameter
Refer to Figure.
Clean, refer to TASK 72-32-81-100-000 (CLEANING-000)
Plugged
Examine the oil drain hole at location 2.
SUBTASK 72-32-81-220-057 Examine the Disk (01-200) Oil Drain Hole
Refer to Figure.
Repair, VRS1363 TASK 72-32-81-300-002 (REPAIR-002)
Nicked
Examine all the other disk outer surfaces.
SUBTASK 72-32-81-220-058 Examine the Disk (01-200) all other Outer Surfaces
Refer to Figure.
Vibro-engrave the new total number at detail A, refer to the SPM TASK 70-09-00-400-501.
Mark the new total number of engine cycles on the disk.
SUBTASK 72-32-81-220-070 Examine the Disk (01-200) for the Maximum Life of the Part (Cycles)
Refer to Figure.
Repair, VRS1367 TASK 72-32-81-300-009 (REPAIR-009)
Damage of the threads
Repair, VRS1367 TASK 72-32-81-300-009 (REPAIR-009)
Loose or missing
Examine the jacking pad bush at location 4.
SUBTASK 72-32-81-220-084 Examine the Disk (01-200) Jacking Pad Bush
Figure: Locations of the LP Compressor Disk
Locations of the LP Compressor Disk

