Export Control
EAR Export Classification: Not subject to the EAR per 15 C.F.R. Chapter 1, Part 734.3(b)(3), except for the following Service Bulletins which are currently published as EAR Export Classification 9E991: SBE70-0992, SBE72-0483, SBE72-0580, SBE72-0588, SBE72-0640, SBE73-0209, SBE80-0024 and SBE80-0025.Copyright
© IAE International Aero Engines AG (2001, 2014 - 2021) The information contained in this document is the property of © IAE International Aero Engines AG and may not be copied or used for any purpose other than that for which it is supplied without the express written authority of © IAE International Aero Engines AG. (This does not preclude use by engine and aircraft operators for normal instructional, maintenance or overhaul purposes.).Applicability
All
Common Information
TASK 72-41-14-200-001-A00 HPC Rear Rotating Air Seal - Examine, Inspection-001
General
This TASK gives the procedure to examine the HP compressor rotating air seals you must make sure that this TASK is applicable to the part that is to be examined. Refer to TASK 72-41-14-200-000.
Fig/item numbers in parentheses in the procedure agree with those used in the IPC.
The policy that is necessary for inspection is given in the SPM TASK 70-20-01-200-501.
All parts must be cleaned before any part is examined.
All parts must be visually examined for damage, corrosion and wear. Any defects that are not identified must be referred to IAE.
A ** following repair referenced in this inspection indicates that the repair is not yet published in the current revision of the manual and the part must be rejected. Contact IAE for additional information concerning FAA approved repair date.
Do not discard any part until you are sure there are no repairs available. Refer to the instructions in Repair before a discarded part is used again or oversise parts are installed.
Parts which should be discarded can be held although no repair is available. The repair of a discarded part could be shown to be necessary at a later date.
All parts must be examined to make sure that all the repairs have been completed satisfactorily.
The practices and processes referred to in the procedure by the TASK numbers are in the SPM.
References
Refer to the SPM for data on these items:
Definitions of Damage, SPM TASK 70-02-02-350-501,
Record and Control of the Lives of Parts, SPM TASK 70-05-00-220-501,
Inspection of Parts, SPM TASK 70-20-01-200-501.
Some data on these items is contained in this TASK. For more data on these items refer to the SPM.
Method of Testing for Crack Indications,
Chemical Processes,
Surface Protection.
Preliminary Requirements
Pre-Conditions
NONESupport Equipment
NONEConsumables, Materials and Expendables
NONESpares
NONESafety Requirements
CAUTION
Procedure
Clean the parts. Refer to TASK 72-41-14-100-000.
SUBTASK 72-41-14-230-051 Examine the HP Compressor Rotating Air Seal (01-800) for Cracks
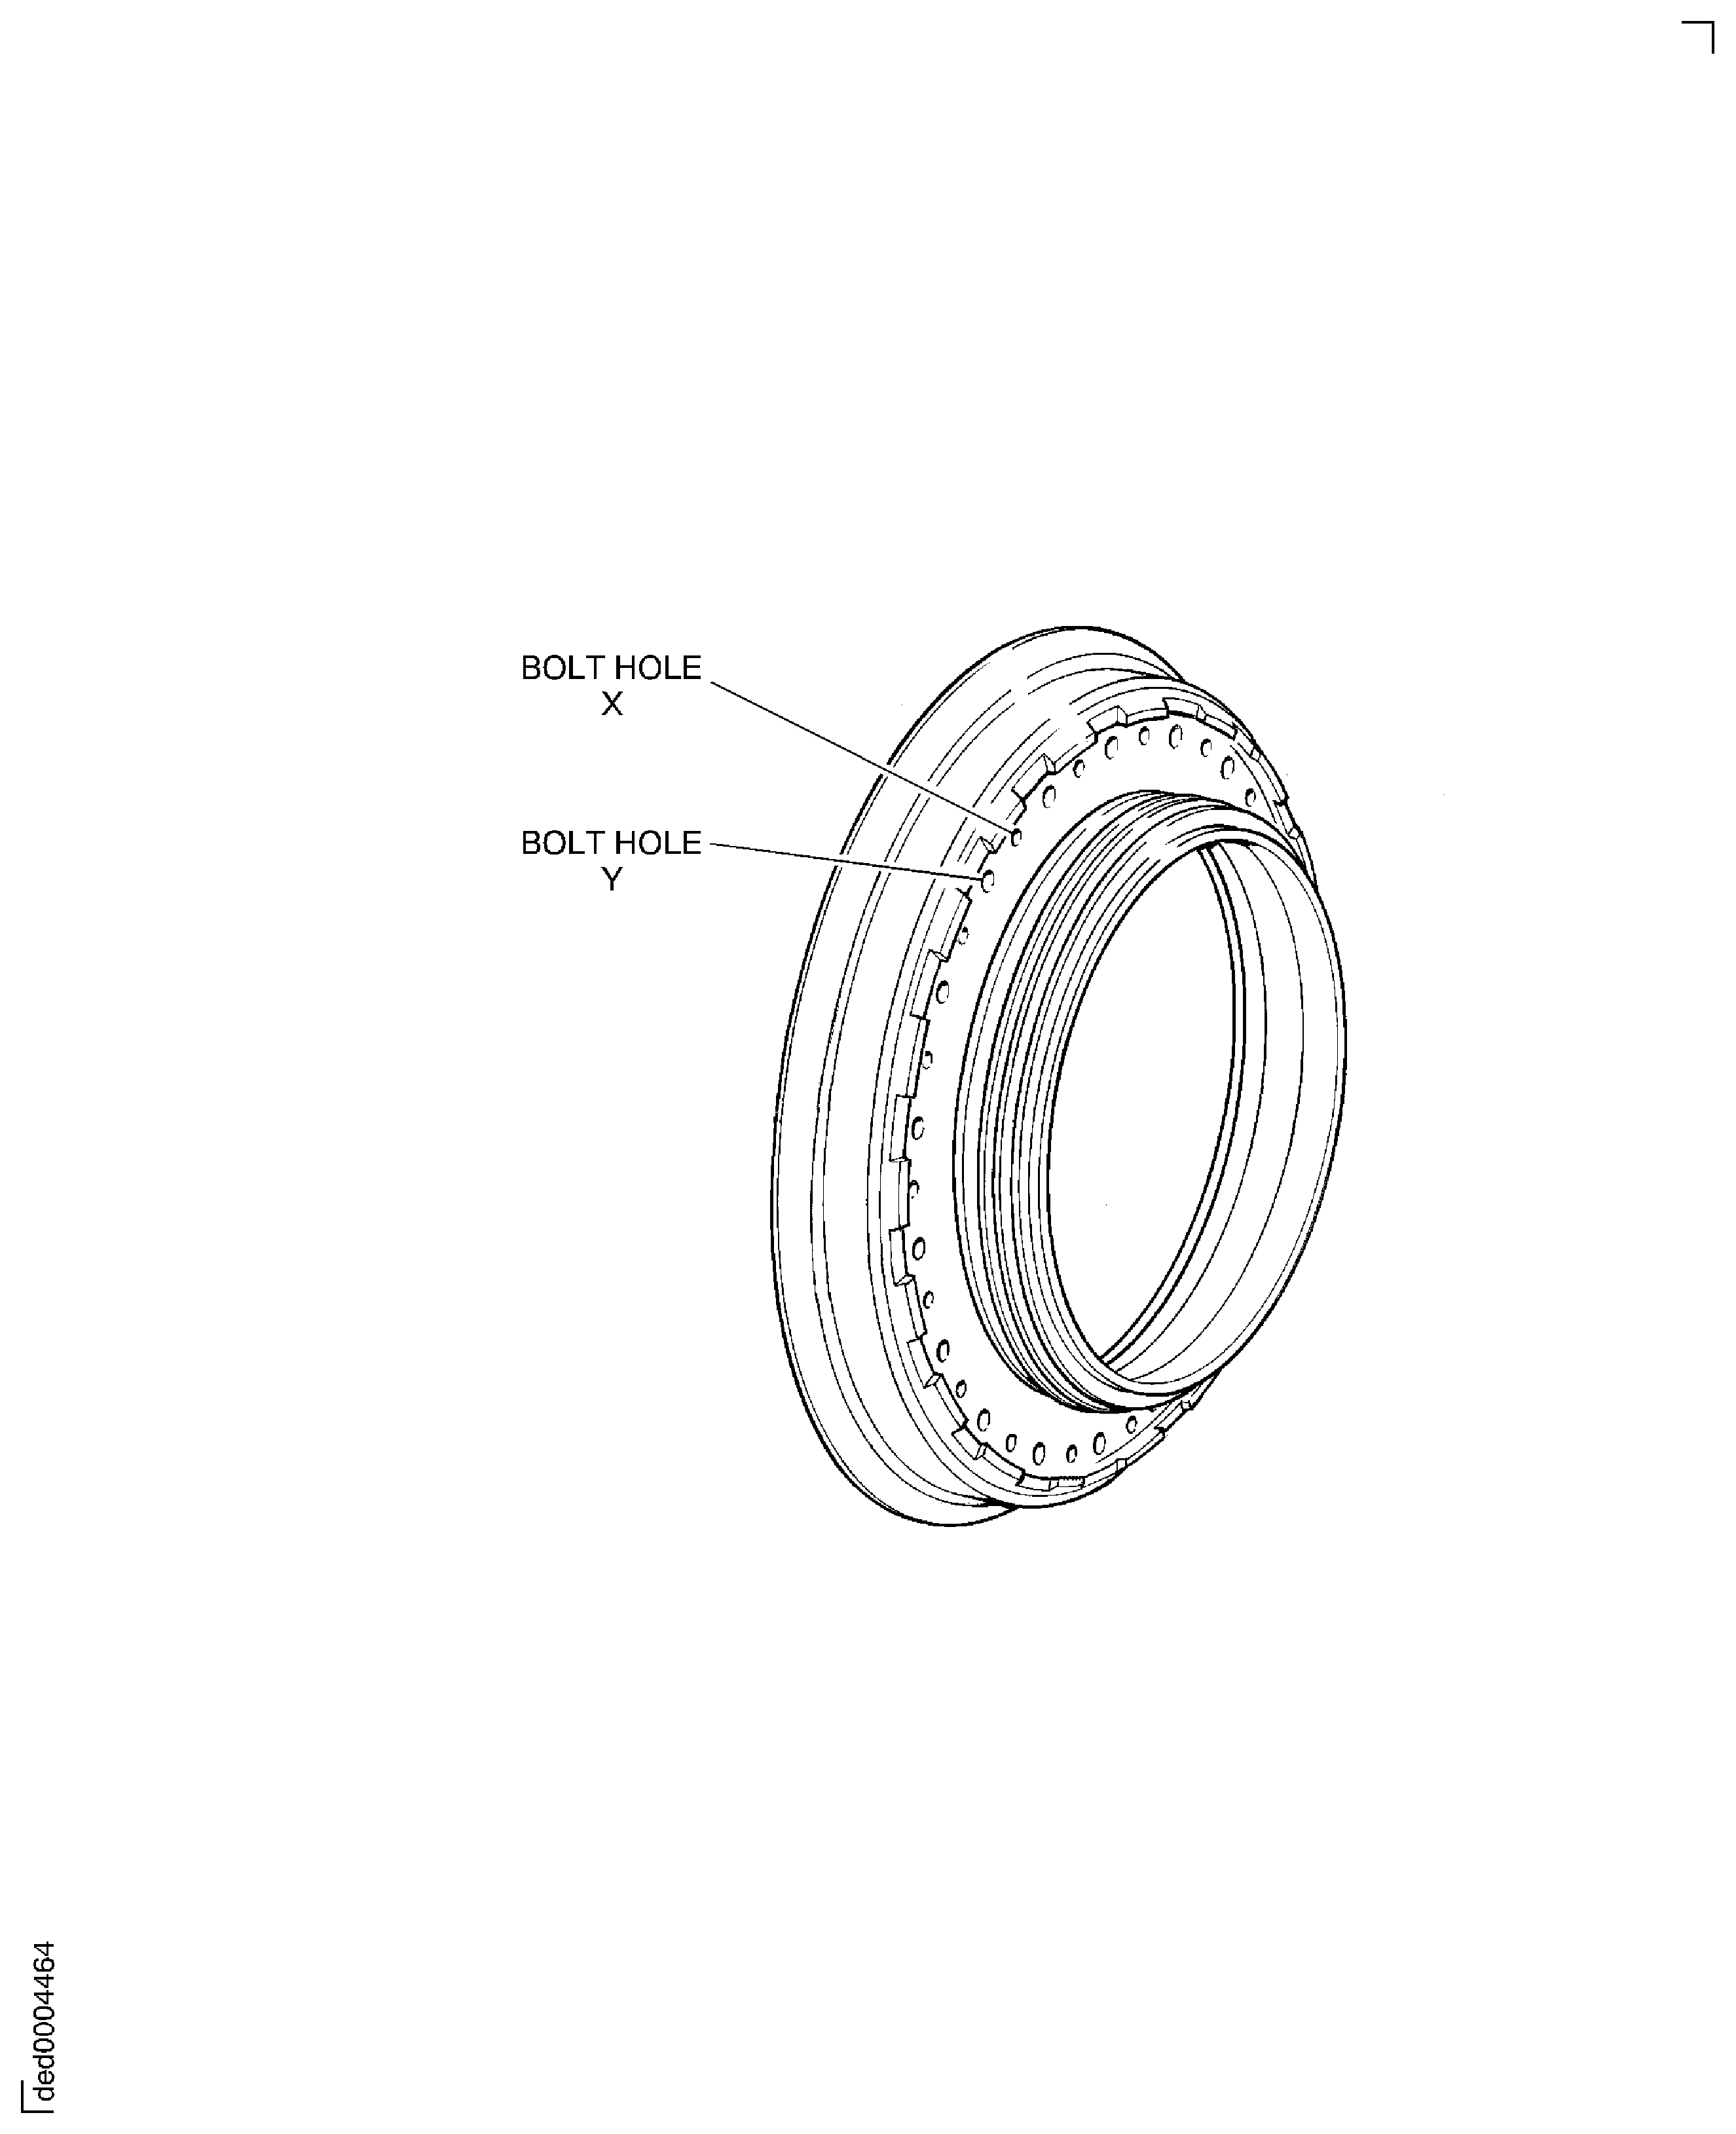
Do a Focused Inspection of the HP Compressor Rotating Air Seal for Cracks according to TASK 72-41-14-200-003, Subtask 72-41-14-230-064.
SUBTASK 72-41-14-230-067 Focus Inspect the HP Compressor Rotating Air Seal for Cracks
Repair, VRS6089 TASK 72-41-14-300-001 (REPAIR-001)
General nicks, dents and high metal within the limits of VRS6089
More than in Step
Nicks, dents and high metal
SUBTASK 72-41-14-220-051 Examine the HP Compressor Rotating Air Seal (01-800) for Damage
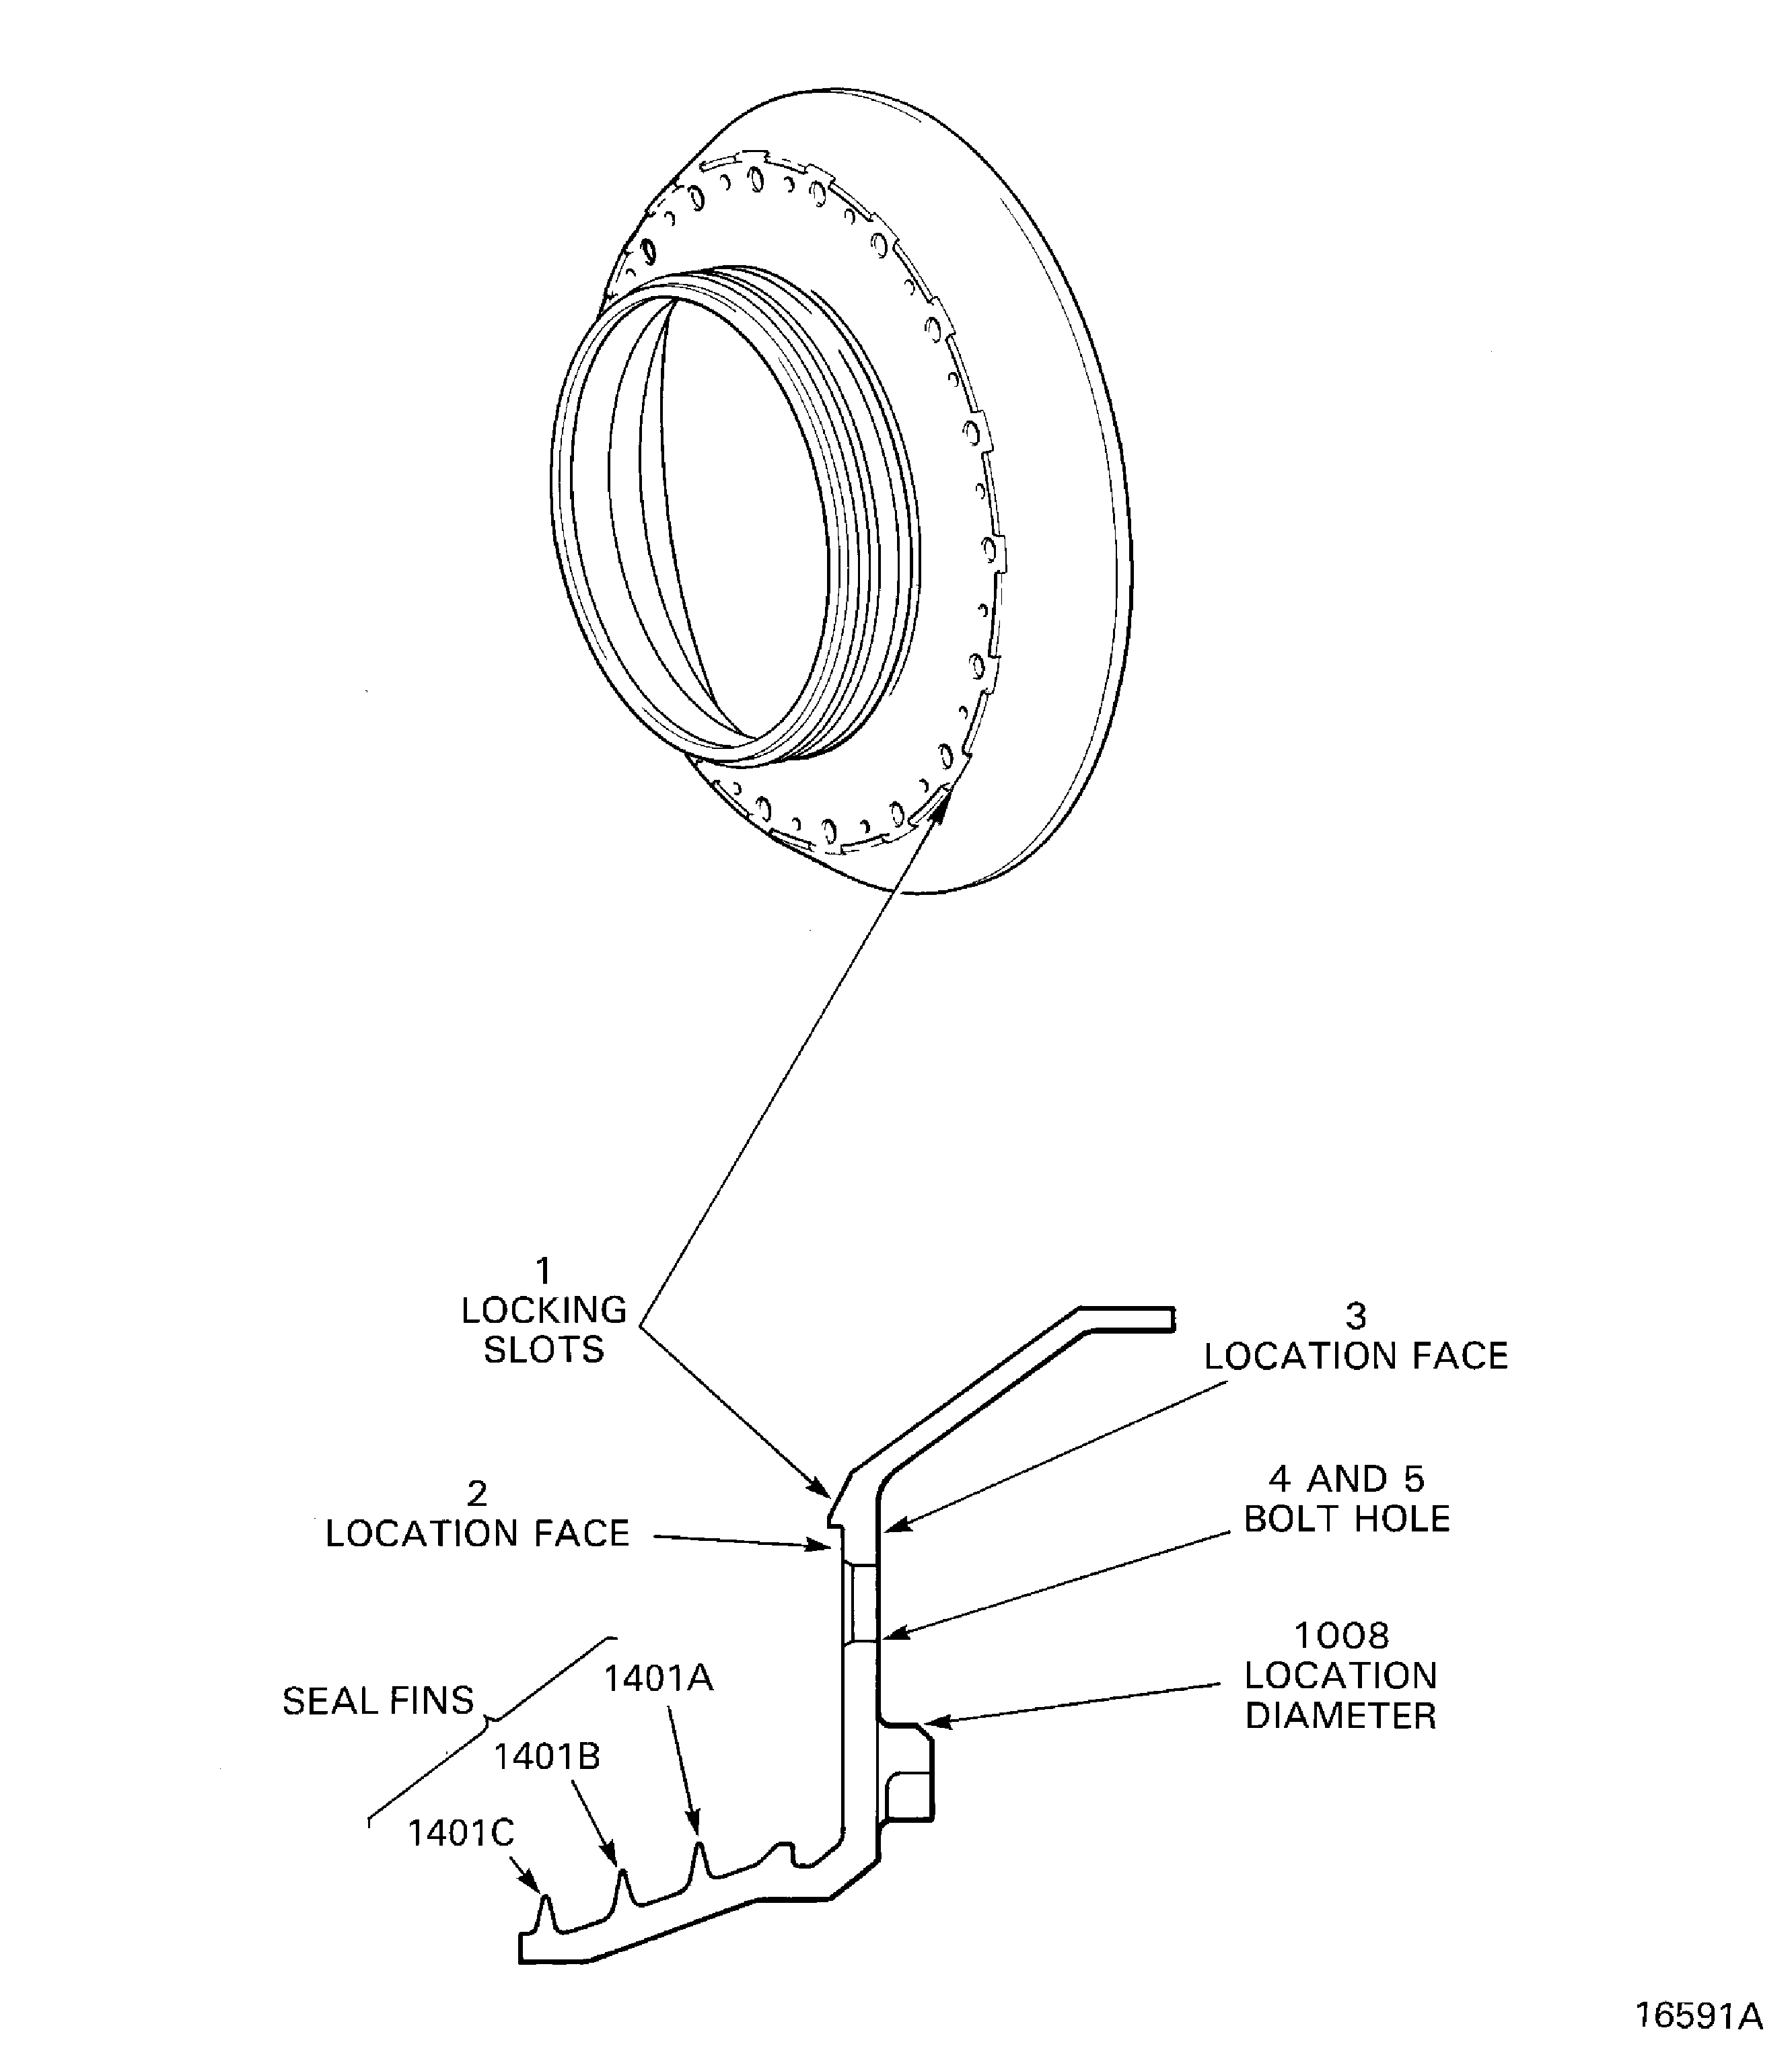
Refer to Figure.
SUBTASK 72-41-14-220-052 Examine the HP Compressor Rotating Air Seal Locking Slots at Location 1
Refer to Figure.
SUBTASK 72-41-14-220-053 Examine the HP Compressor Rotating Air Seal Locking Slots at Location 1
NOTE
HP compressor rotating air seals that have been in service may show areas of bedding.Refer to Figure.
Repair VRS6656, TASK 72-41-14-300-009 (REPAIR-009)
More than in Step
Repair VRS6656, TASK 72-41-14-300-009 (REPAIR-009)
Scored or scratched
SUBTASK 72-41-14-220-089 Examine the HP Compressor Rotating Air Seal Location Face at Location 3
Refer to Figure.
Repair, VRS6144 TASK 72-41-14-300-002(REPAIR-002)
Galled or scored
Repair, VRS6144 TASK 72-41-14-300-002 (REPAIR-002)
If the diameter is less than 10.138 in. (257.50 mm)
Examine the front location diameter
SUBTASK 72-41-14-220-055 Examine the HP Compressor Rotating Air Seal Front Location Diameter at Location 1008
Refer to Figure.
Repair, VRS6492 TASK 72-41-14-300-007 (72-41-14 REPAIR-007)
More than in Step but within the limits of VRS6145
More than in Step
Scored or burred.
Refer to the values written in TASK 72-41-10-040-001
Repair, VRS6492 TASK 72-41-14-300-007 (72-41-14 REPAIR-007)
Less than 9.204 in. (233.776 mm)
Location 1401A.
Refer to the values written in TASK 72-41-10-040-001
Repair, VRS6492 TASK 72-41-14-300-007 (72-41-14 REPAIR-007)
Less than 8.991 in. (228.376 mm)
Location 1401B.
Refer to the values written in TASK 72-41-10-040-001
Repair, VRS6492 TASK 72-41-14-300-007 (72-41-14 REPAIR-007)
Less than 8.779 in. (222.976 mm)
Location 1401C.
Worn.
SUBTASK 72-41-14-220-056 Examine the HP Compressor Rotating Air Seal Seal Fins at Location 1401
Figure: HP compressor rotating air seal - inspection locations
HP compressor rotating air seal - inspection locations

Figure: Focused Inspection - Rear rotating seal
Focused Inspection - Rear rotating seal

