Export Control
EAR Export Classification: Not subject to the EAR per 15 C.F.R. Chapter 1, Part 734.3(b)(3), except for the following Service Bulletins which are currently published as EAR Export Classification 9E991: SBE70-0992, SBE72-0483, SBE72-0580, SBE72-0588, SBE72-0640, SBE73-0209, SBE80-0024 and SBE80-0025.Copyright
© IAE International Aero Engines AG (2001, 2014 - 2021) The information contained in this document is the property of © IAE International Aero Engines AG and may not be copied or used for any purpose other than that for which it is supplied without the express written authority of © IAE International Aero Engines AG. (This does not preclude use by engine and aircraft operators for normal instructional, maintenance or overhaul purposes.).Applicability
All
Common Information
TASK 72-42-50-200-001-B00 HPC Rear Static Seal - Examine, Inspection-001
General
Fig/item numbers in parentheses in the procedure agree with those used in the IPC. Only the primary Fig/item numbers are used. For the service bulletin alpha variants refer to the IPC.
All the parts must be cleaned before they are examined. Refer to TASK 72-42-50-100-000 (CLEANING-000).
The policy that is necessary for inspection is given in the SPM TASK 70-20-01-200-501.
All the parts must be visually examined for damage, corrosion and wear. Any defects that are not identified in the procedure must be referred to International Aero Engines AG.
A ** following repair referenced in this inspection indicates that the repair is not yet published in the current revision of the manual and the part must be rejected. Contact IAE for additional information concerning FAA appproved repair date.
The procedure for those parts which must have a crack test is given in Step. Do the test before the part is visually examined. Limits for cracks are given in the SUBTASK for each part.
Do not discard any part until you are sure there are no repairs available. Refer to the instructions in Repair before a discarded part is used again or oversize parts are installed.
Parts which should be discarded can be held although no repair is available. The repair of a discarded part could be shown to be necessary at a later date.
All parts must be examined to make sure that all the repairs have been completed satisfactorily.
The practices and processes referred to in the procedure by the TASK/SUBTASK numbers are in the SPM.
References
Refer to SPM for data on these items.
Definition of Damage, SPM TASK 70-02-02-350-501
Inspection of Parts, SPM TASK 70-22-00-220-501
Some data on these items is contained in this TASK. For more data on these items refer to SPM.
Method of Testing for Crack Indications
Chemical Processes
Surface Protection
Preliminary Requirements
Pre-Conditions
NONESupport Equipment
NONEConsumables, Materials and Expendables
NONESpares
NONESafety Requirements
NONEProcedure
Clean the part. Refer to TASK 72-42-50-100-000 (CLEANING-000).
SUBTASK 72-42-50-230-056 Examine the Static Seal for Cracks
Repair, VRS6201 TASK 72-42-50-300-001 (REPAIR-001)
Replace the brush seal
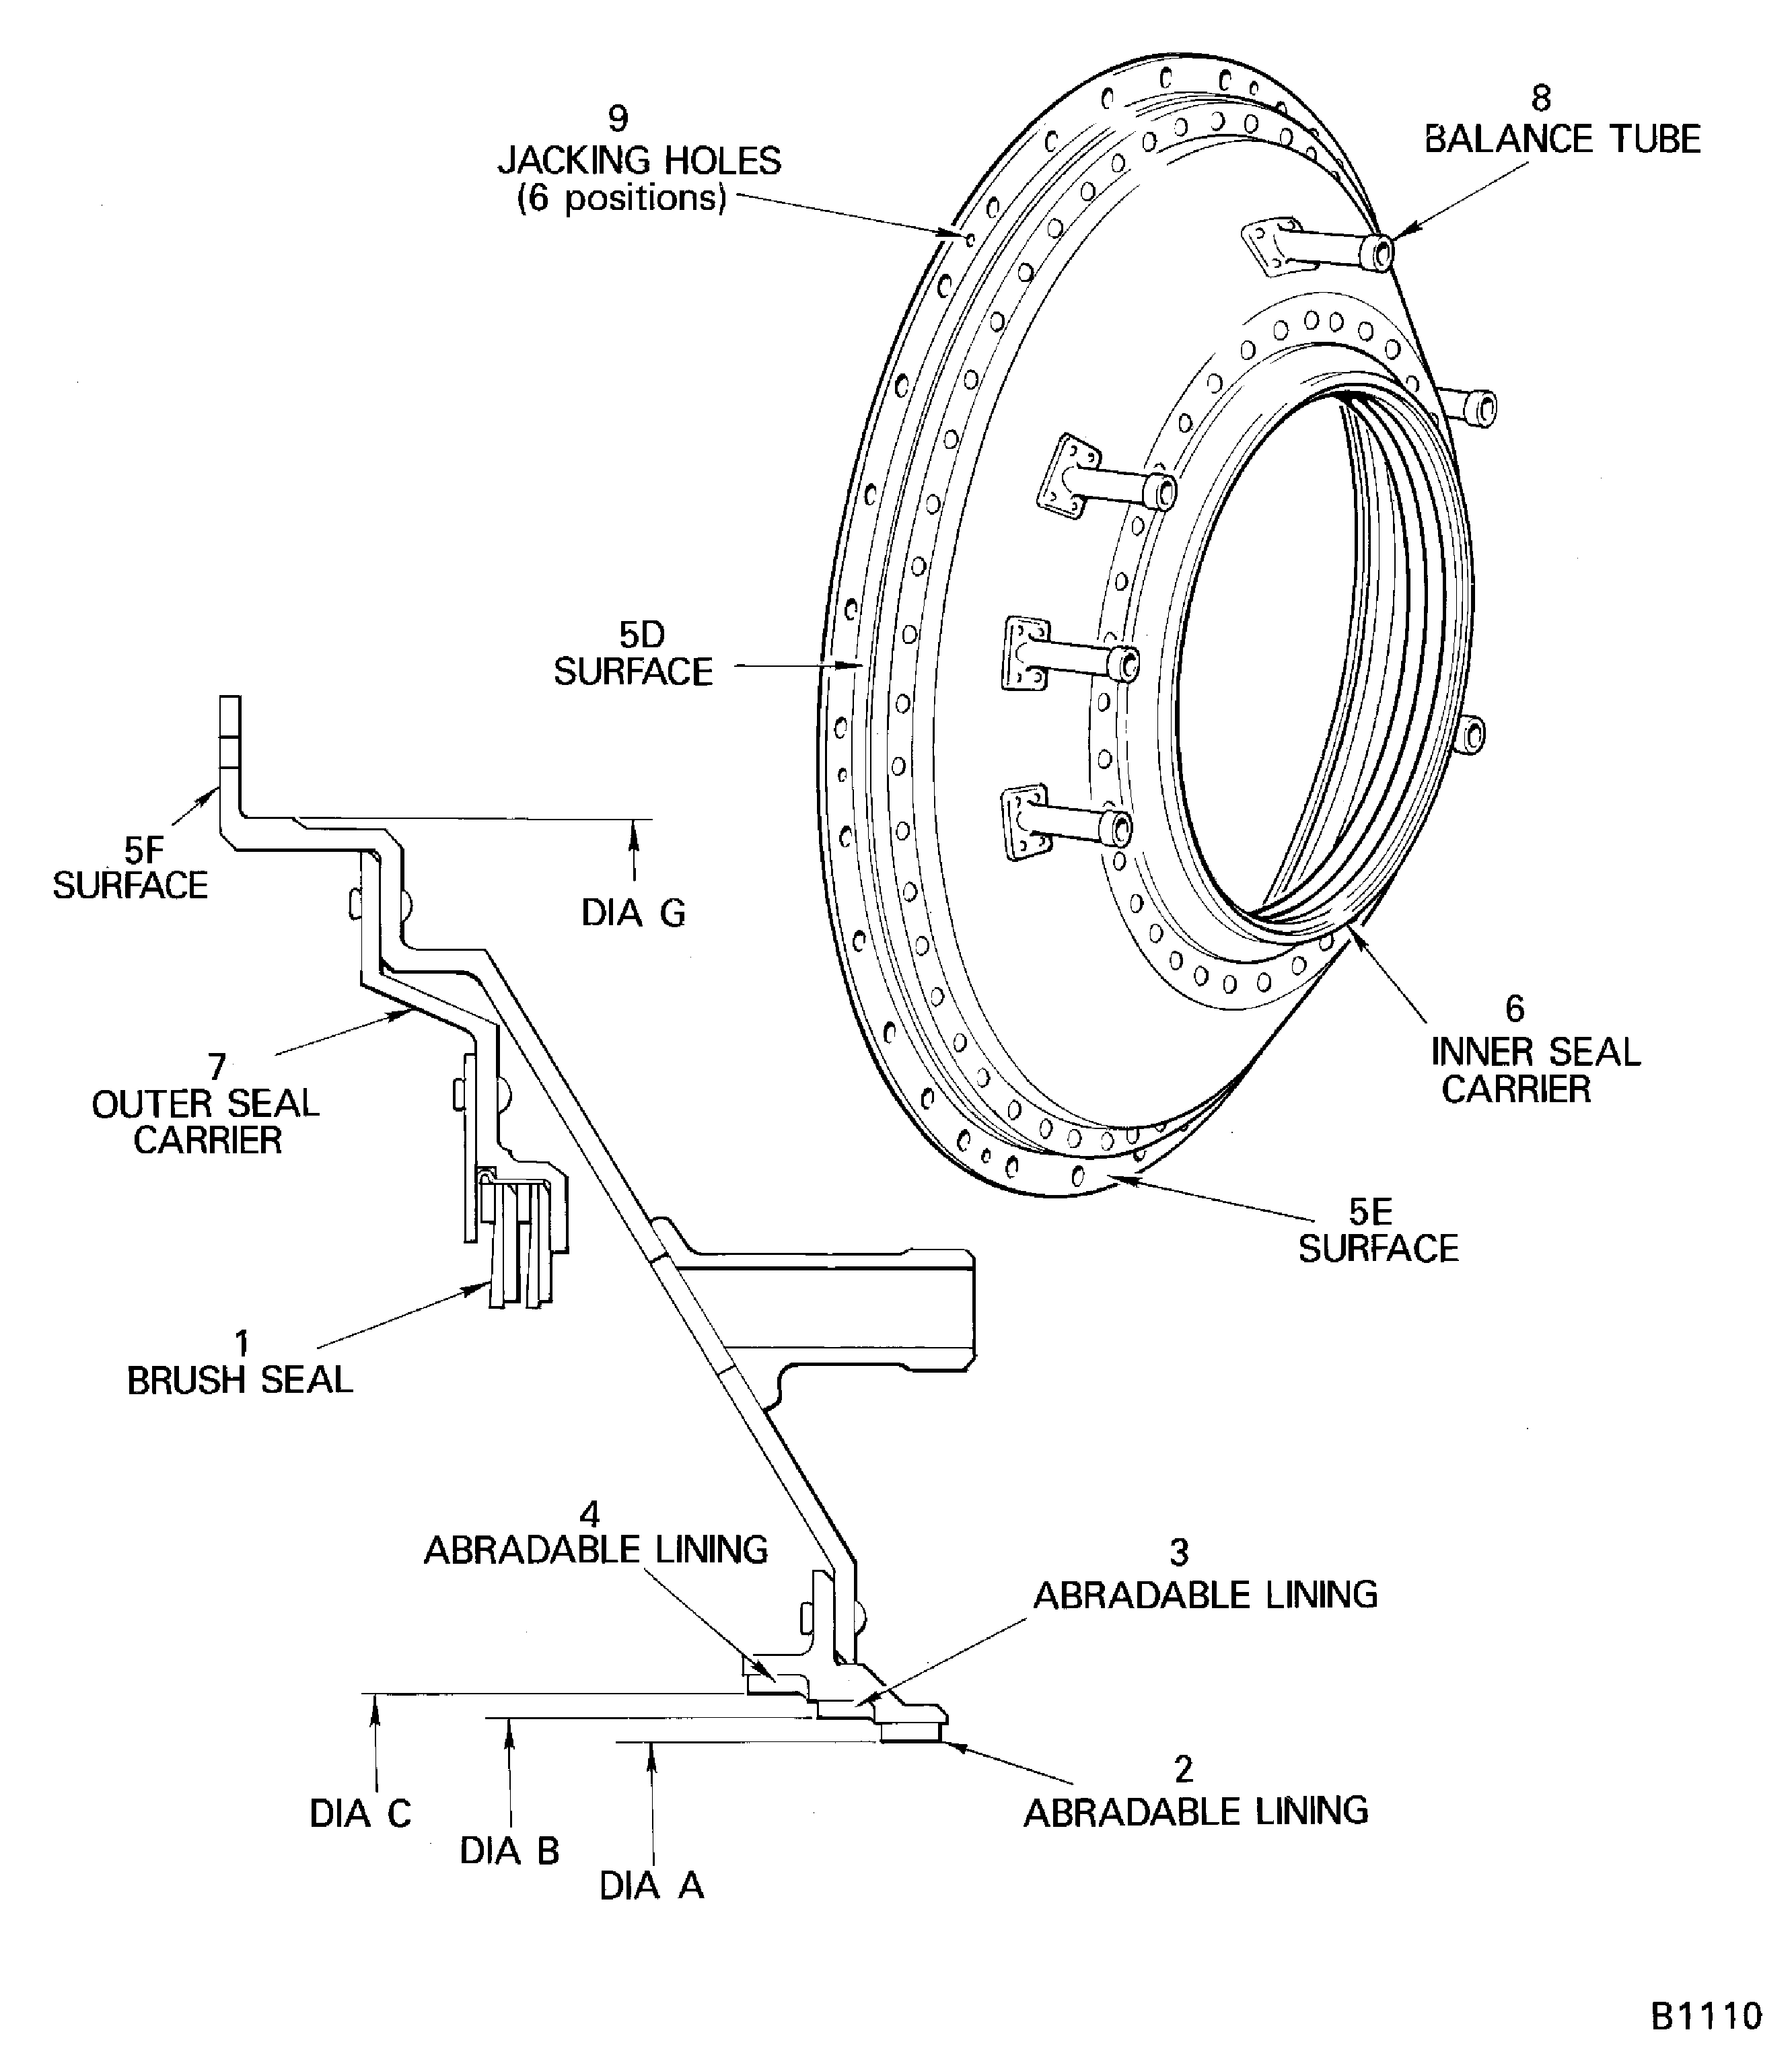
SUBTASK 72-42-50-350-054 Replace the Brush Seal at Location 1
Repair, VRS6203 TASK 72-42-50-300-002 (REPAIR-002)
Repair, VRS6203 TASK 72-42-50-300-002 (REPAIR-002)
Limits more than (1)
Measure diameter A (Location 2).
Repair, VRS6203 TASK 72-42-50-300-002 (REPAIR-002)
Limits more than (1)
Measure diameter B (location 3).
Repair, VRS6203 TASK 72-42-50-300-002 (REPAIR-002)
Limits more than (1)
Measure diameter C (location 4).
Rubbed
SUBTASK 72-42-50-220-060 Examine the Abradable Linings at Locations 2, 3 and 4
Repair, VRS6639 TASK 72-42-50-300-007
Limits more than (1)
Scored.
Repair, VRS6639 TASK 72-42-50-300-007
Missing or loose rivets
SUBTASK 72-42-50-220-061 Examine the Six Balance Tubes at Location 8
Repair, VRS6204 TASK 72-42-50-300-003 (REPAIR-003)
Distorted
SUBTASK 72-42-50-220-062 Examine the Outer Seal Carrier at Location 7
Refer to Figure.
Repair, VRS6116 TASK 72-42-50-300-004 (REPAIR-004)
Limits more than (1)
Galled (Location 5E and 5F).
Repair, VRS6231 TASK 72-42-50-300-005 (REPAIR-005)
Limits more than (1)
Measure diameter G (Location 5D).
SUBTASK 72-42-50-220-064 Examine the Static Seal Cone
Figure: Examine the HP compressor static seal
Examine the HP compressor static seal

